Related Posts Plugin for WordPress, Blogger...

                   Follow Me on Pinterest


photo cards


OpenSky

Freckled Nest - Design by Kelly Ann

Home & Garden Blogs
BLOG DIRECTORY
Online Marketing
Home Improvement Blogs - BlogCatalog Blog Directory
Wednesday
Aug032011

Rockin' Faucets Part 2 of 2!

Hello all! Joey peeking in again. Here's a real straight forward one for ya. Time to do the "Shower head shuffle"! Ok, maybe that's playing it up a bit. Let's move on.

Installing a shower head like the one we got from Delta is a super simple process. This is what we got when we opened the box.

This model comes with an extra washing utensil that detaches from the main shower head when you need to get to those hard to clean areas. (like the back of your knees) And what we like about this one is that it has a setting that allows the main overhead shower to remain on while you use the detachable one. Particularly useful if you are so bourgeois that you don't want your head to get cold while you wash the back of your knee. Which I totally pretend to be while I shower.


I took a vice grip and removed our old shower head. And this is the pipe that was left. As you can see from the picture where everything is out of the box it comes with a new shiny one if you have easy access to change the pipe. We have some lovely pink tile in the way, so I just left it. It also comes with a new, more fashionable, back plate that I tried to install, but the pipe we have was too close to the wall and I couldn't get it on. So I left that too.


A couple more turns of the vice grip and this is what you have. A new shower head. Or if you're good with photoshop, a pretty convincing UFO.


Here it is all together. It's a thing of beauty. And just to jangle my nerves, Lana and I decided we should time the installation from opening the box, to up on the wall. I clocked in at a semi-pro 7 min 34.6 secs. There were two minutes or so that I was wrestling with the back plate that I asked to have removed from the official clock, but Lana said "Rules are rules" and I relented.


And that's it. If you wanna be the hero of the household in 8 minutes or less I can't think of a better project. Except maybe brushing your teeth.


Just a little note to let you know we weren't paid to post this. A few weeks back Delta flew us out to check out there facilities and gifted us with this here showerhead to test out if we wished. So we did. And we loved it, so we wrote about it. We want you to know we would only write about a product we really love and trust.


Tuesday
Aug022011

Pinterest Challenge Time!

Whoot, whoot! I can't explain it, but something about this pinterest challenge put a smile on my face every time I tweeted, typed, or worked on it! I love how everyone jumped on board and was inspired to knock something off their own to do list. If you have no idea what I am talking about, rewind and catch up

So, what did we do and what on earth were we inspired by? 

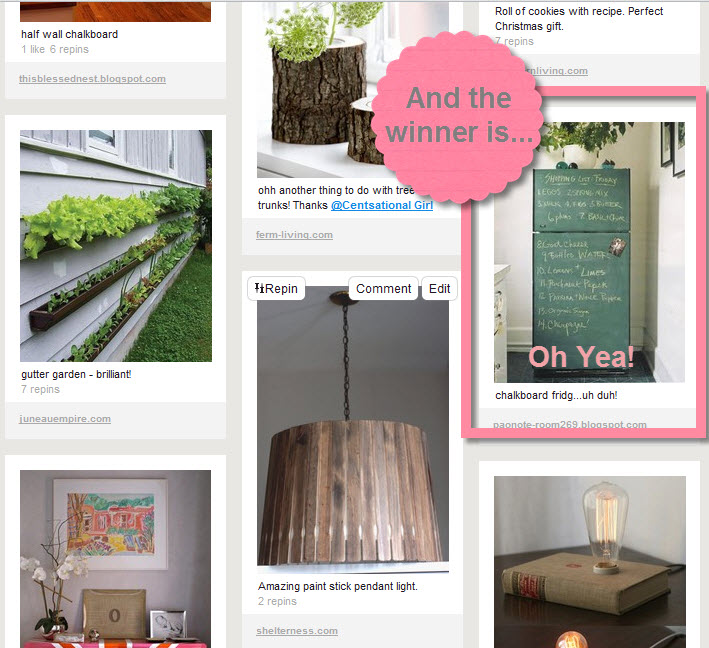
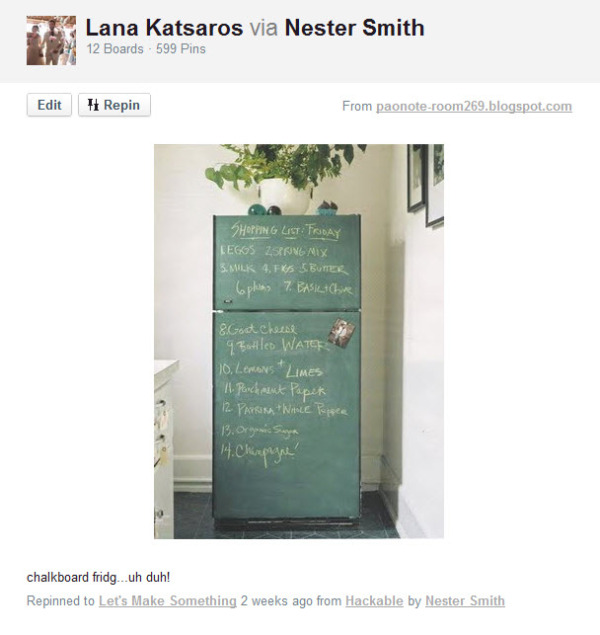
I knew we had to do this the second I pinned it! It's located in my Let's Make Something board.

Isn't that a great idea! The original pin was sourced here and they found it from Country Home if you want to take a gander. So, let's get down to bid-ness....

 Joey was a little "eh" about the whole idea. When we moved in the house came with one of those basic white fridges. Now we plan on doing a whole huge ($$$$) reno on the kitchen at some point, but for now was are doing a DIY update while we save the dough. We are cash money people. If we don't have the cash, we don't buy it. If you have renovated your own kitchen, or done any research you know it can cost $50K+. That's not French fry money!

So, I reminded him if all fails, we will have a new fridge someday soon when we do the big reno. To our surprise, we L-O-V-E the way it turned out. So if you have a basic white box, you are in luck! In a few simple steps, and $10 you can change things up in the kitch! Ready to break it down? Here we go...

We started with a white box:

Grab some chalkboard paint, we got some spray cans:

And...spray!

WAIT! Don't just spray. Kidding. Bad idea. The project was mildly more complicated than that, but not too much. The fridge is too slick to handle the paint. It will run and not be even. So, here is what we did. 

 We sanded her down with an electronic sander, then decided it may be a good idea to protect the surrounding area with some brown paper we taped to the walls.

Then we painted two coats. It only took one can of paint to do the whole project, but it's good to  have a second can around for touch ups. 

Perty neat, eh? It was scary to do, we aren't going to lie. But we love it! It's unexpected and totally fits in with what we are doing to the kitchen. Plus we get to be silly on our fridge!

So there was our challenge, and mission is accomplished! What did you do? Leave a comment to share your accomplishment! Also, don't forget to check out the other hosts of the Pinterest Challenge:

Sherry from YoungHouseLove.com Katie from BowerPowerBlog.com Emily from StyleByEmilyHenderson.com 

Don't forget to check back for more kitchen DIY projects! We are finalllllly almost done DIYing our cabinets, have some killer plans for built in storage, and are about to install our backsplash and counter tops. Eeeesh, so much to do! But for now, link up and share what you did for the Pinterest Challenge!!


Monday
Aug012011

Want to Win 5K for Your Next DIY Project? We Thought So!

Good morning lovlies! Are you working hard on your #Pinterestchallenge? Hope so! I CAN'T WAIT to see what everyone comes up with! Have you guessed what we are doing yet? Today we wanted to share something pretty darn exciting. It involves you, and extra $5,000 towards your next project, and some pretty funny moments. Intrigued? Want another challenge? Read on... 


So, ever work on a project (we are guessing you have!) and got lost in communication? Joey and I are always having moments where (mostly me!) communicate about something so poorly, it turns comical. It goes something like this:

Me: "Hey babe! Where is the thing we used to fix the other thing last month?!"

Joey: "Huh? What are you talking about?!

Me: "You knoooooooooow. The thing."

Joey: Walking into the room with a hammer "This thing"

Me: "Ugh! No! You know what I mean...."

You get the gist. This happens to us oh so often. It's usually followed by a massive fail and waste of time by doing a project with the wrong tools and having to start over. Tell me we aren't alone! I know this has to happen across the states every moment of every day. 3M's line, 3M Frameworks, has the tools to unfool you. Scotch Blue Tape, TEKK Protection, LeadCheck swabs, Abrasives and Tough Duct Tape  are products we use around here often. We actually have a really big paint fail we need to share. Let's just say we were out of Scoth Blue Tape...

It looks like these guys have the same problem. They totally remind me of us! So what's the deal? 3M is hosting a pretty amazing contest right now. Make a video about your communication problems when you are getting your DIY on and make a video that's two minutes or less to show the humor in your failure to communicate. The mission, should you chose to accept it, will grant two winners $5,000! Also if you want to write a transcript of your miscommunication, weekly winners get $250. Not a bad deal if you ask us. We are totally doing this!

You want in? We knew it! Here is what to do:

  • Enter here to find out more details on the video (2 minutes or less and funny!)
  • Select a product category when you submit. It will add that professional animation at the end! (found here)
  • NO 3M PRODUCTS allowed in the video.
  • You have until October 6th, 2011 - so get to it!

Like us, we hope you get your friends involved and Share on Twitter and  Share on Facebook ! We want to see what you come up with and are excited to share our video too when we are done! Remember to keep it clean and don't be mean! It's meant to be fun and funny!