


A Quickie Silver Leaf Project
Happy Monday Pretty People! We hope your weekend was filled with Spring-like sunshine and greatness. It's starting to get a little greener around here lately and it's very exciting to be drawing closer to constant good weather. This weekend was jam packed with a lot of home projects. We got our Timothy Oulton delivery, and are in L-O-V-E with the coffee and console tables!
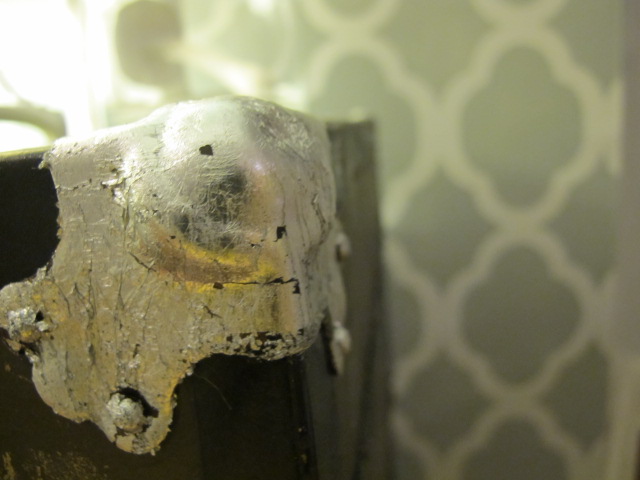
So, our Neutral-Moroccan-British-Cowboy room is so close to being complete, we can hardly wait! We had some old army trunks which were handed down from Joey's great aunt that we absolutely love. We wanted to give them a little "shine" because they are kinda of large and heavy looking, and we want a little bit of silver in all areas of the room. Here is a quick little guide on how to silver leaf odd shaped angels. Enjoy!
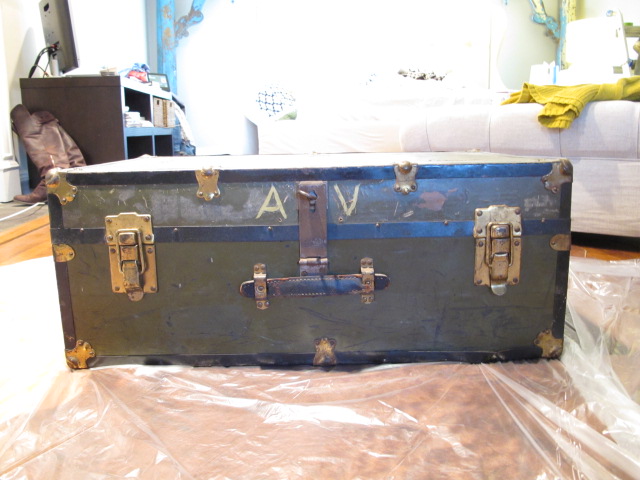
So we started with this pretty standard army trunk. We put down some tarp because leafing can get pretty messy, plus if you decide to use spray adheasive, it can get pretty sneaky and stick to things you do not want to get ruined, ie, new cowhide rug!
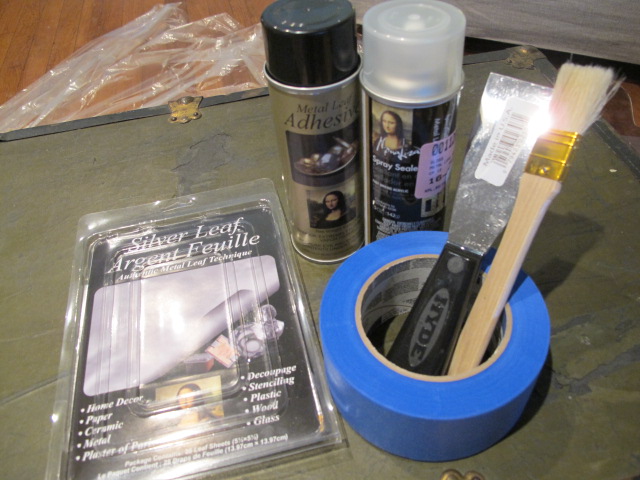
The supplies were pretty simple. I got:
- 25 sheets of silver leaf (I only needed like, six)
- painters tape
- soft brush
- paint scraper
- spray sealer
- metal leaf ahdeasive
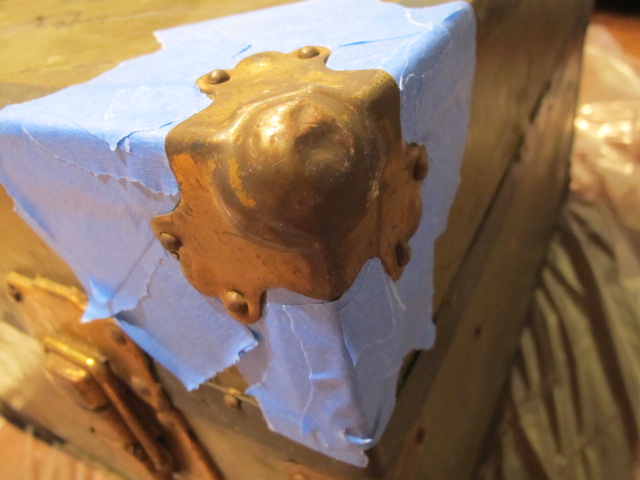
First things first! Prep your space. This is the whole key to leafing these corners, and the most time consuming part. We used painters tape to surround the metal corer we wanted to leaf. We places the tape about three inches out from the actual metal we were leafing, because after all - we aren't perfect with aiming a spray can.

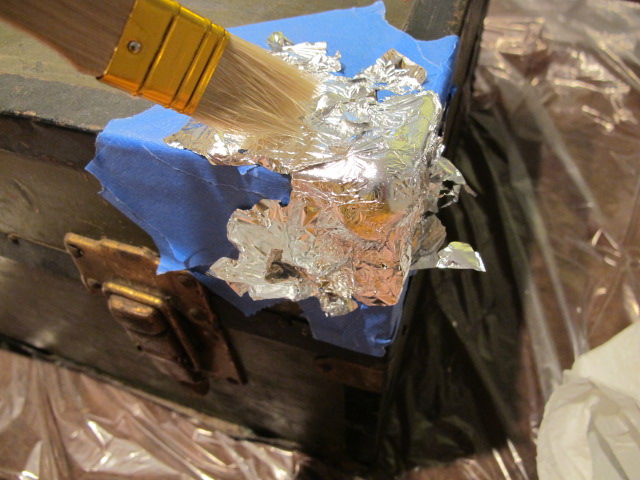
After your space is all prepped, spray the adhesive and wait a few minutes and let it tack up a bit. Then hold your breath, and with a steady hand plap the silver leaf on the tacky surface. We wanted an old and worn look so we used the brush to not only swipe away the access leaf, but to make streaks and worn dimples.
BEFORE you peal off the tape to look at the fruit of your labor, make sure to SEAL your work with spray sealer. We good?...Good!
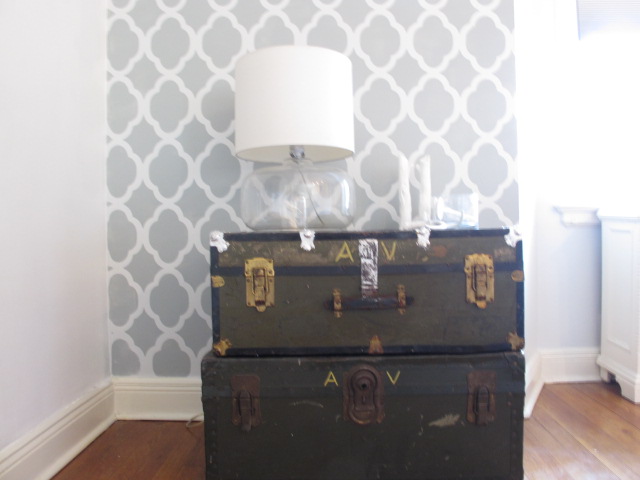
This is how she looks all finished up and placed against our newly stenciled wall! We love her! Now sure if we will do both, or maybe do one strip on the bottom trunk.
Want a peek at what we were up to this weekend?.....

Loving the silver Timothy Oulton pieces!
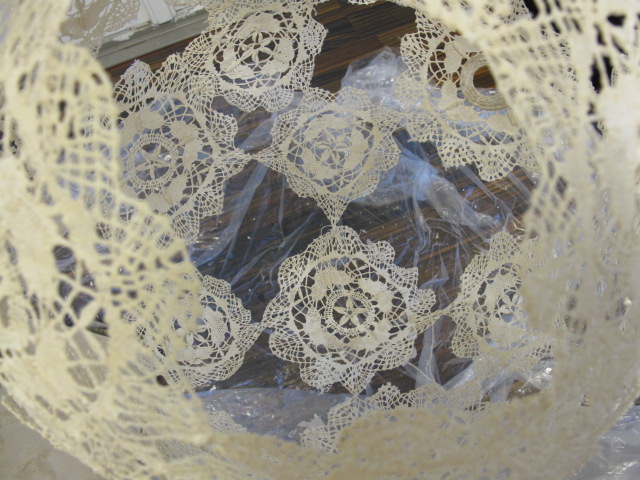
Turn doilies into a hanging lamp anyone? Check us out at handmadeology.com this week to learn how we did it!
....Any many more surpises coming up this week! Be well, and let us know what you have been doing in your home!
 Joey and Lana Make a House a Home
Reader Comments (2)
How pretty! Is there a reason you chose silver leaf over just spray painting the pieces? I have an old blue army trunk that I wasn't sure how to spiff up... and I was thinking of spray painting the gold.. so just curious!
@amy thanks! we wanted a "chunky" metal look that has some depth, so we decided on the leaf instead of spray paint. It was also easy to "distress". I think spray paint would totally work depending on the type of surface your trunk is. Good luck and share photos!