


Fireplace Facelift: A (semi) Quicky blog Squad Project
Good morning, friends! We have a few fireplaces in our home. Well, more like four. Ok, wait, three. See, the one is the basement is for "show". Kinda weird, right? A faux basement fireplace....wonder what they were thinking when that happened. So the three real fireplace are in the living room, master bedroom, and my office. We were very excited about all the fire places when we moved in. We actively use the one in the master suite, and the one in the living room. We have plans for the living room one, kinda massive plans, but the rest will pretty much stay "as is"...almost. We liked the brick texture in the master bedroom, however the "red brick-ness" didn't quite fit into out master plans. So we decided to give her a 'lil face lift. First we thought painting it white would be good enough. Fail. After a few days I hated it. Take a look.

So we figured out how to "rectify" the situation, and wound up with something we seriously love and absolutely fits in with what we are trying to do. Painting a brick fireplace is kind of scary. We aren't going to lie. It's a little permanent to be honest. But we are going to show you what to do, how to do it, and what it costs.
We started with the following:
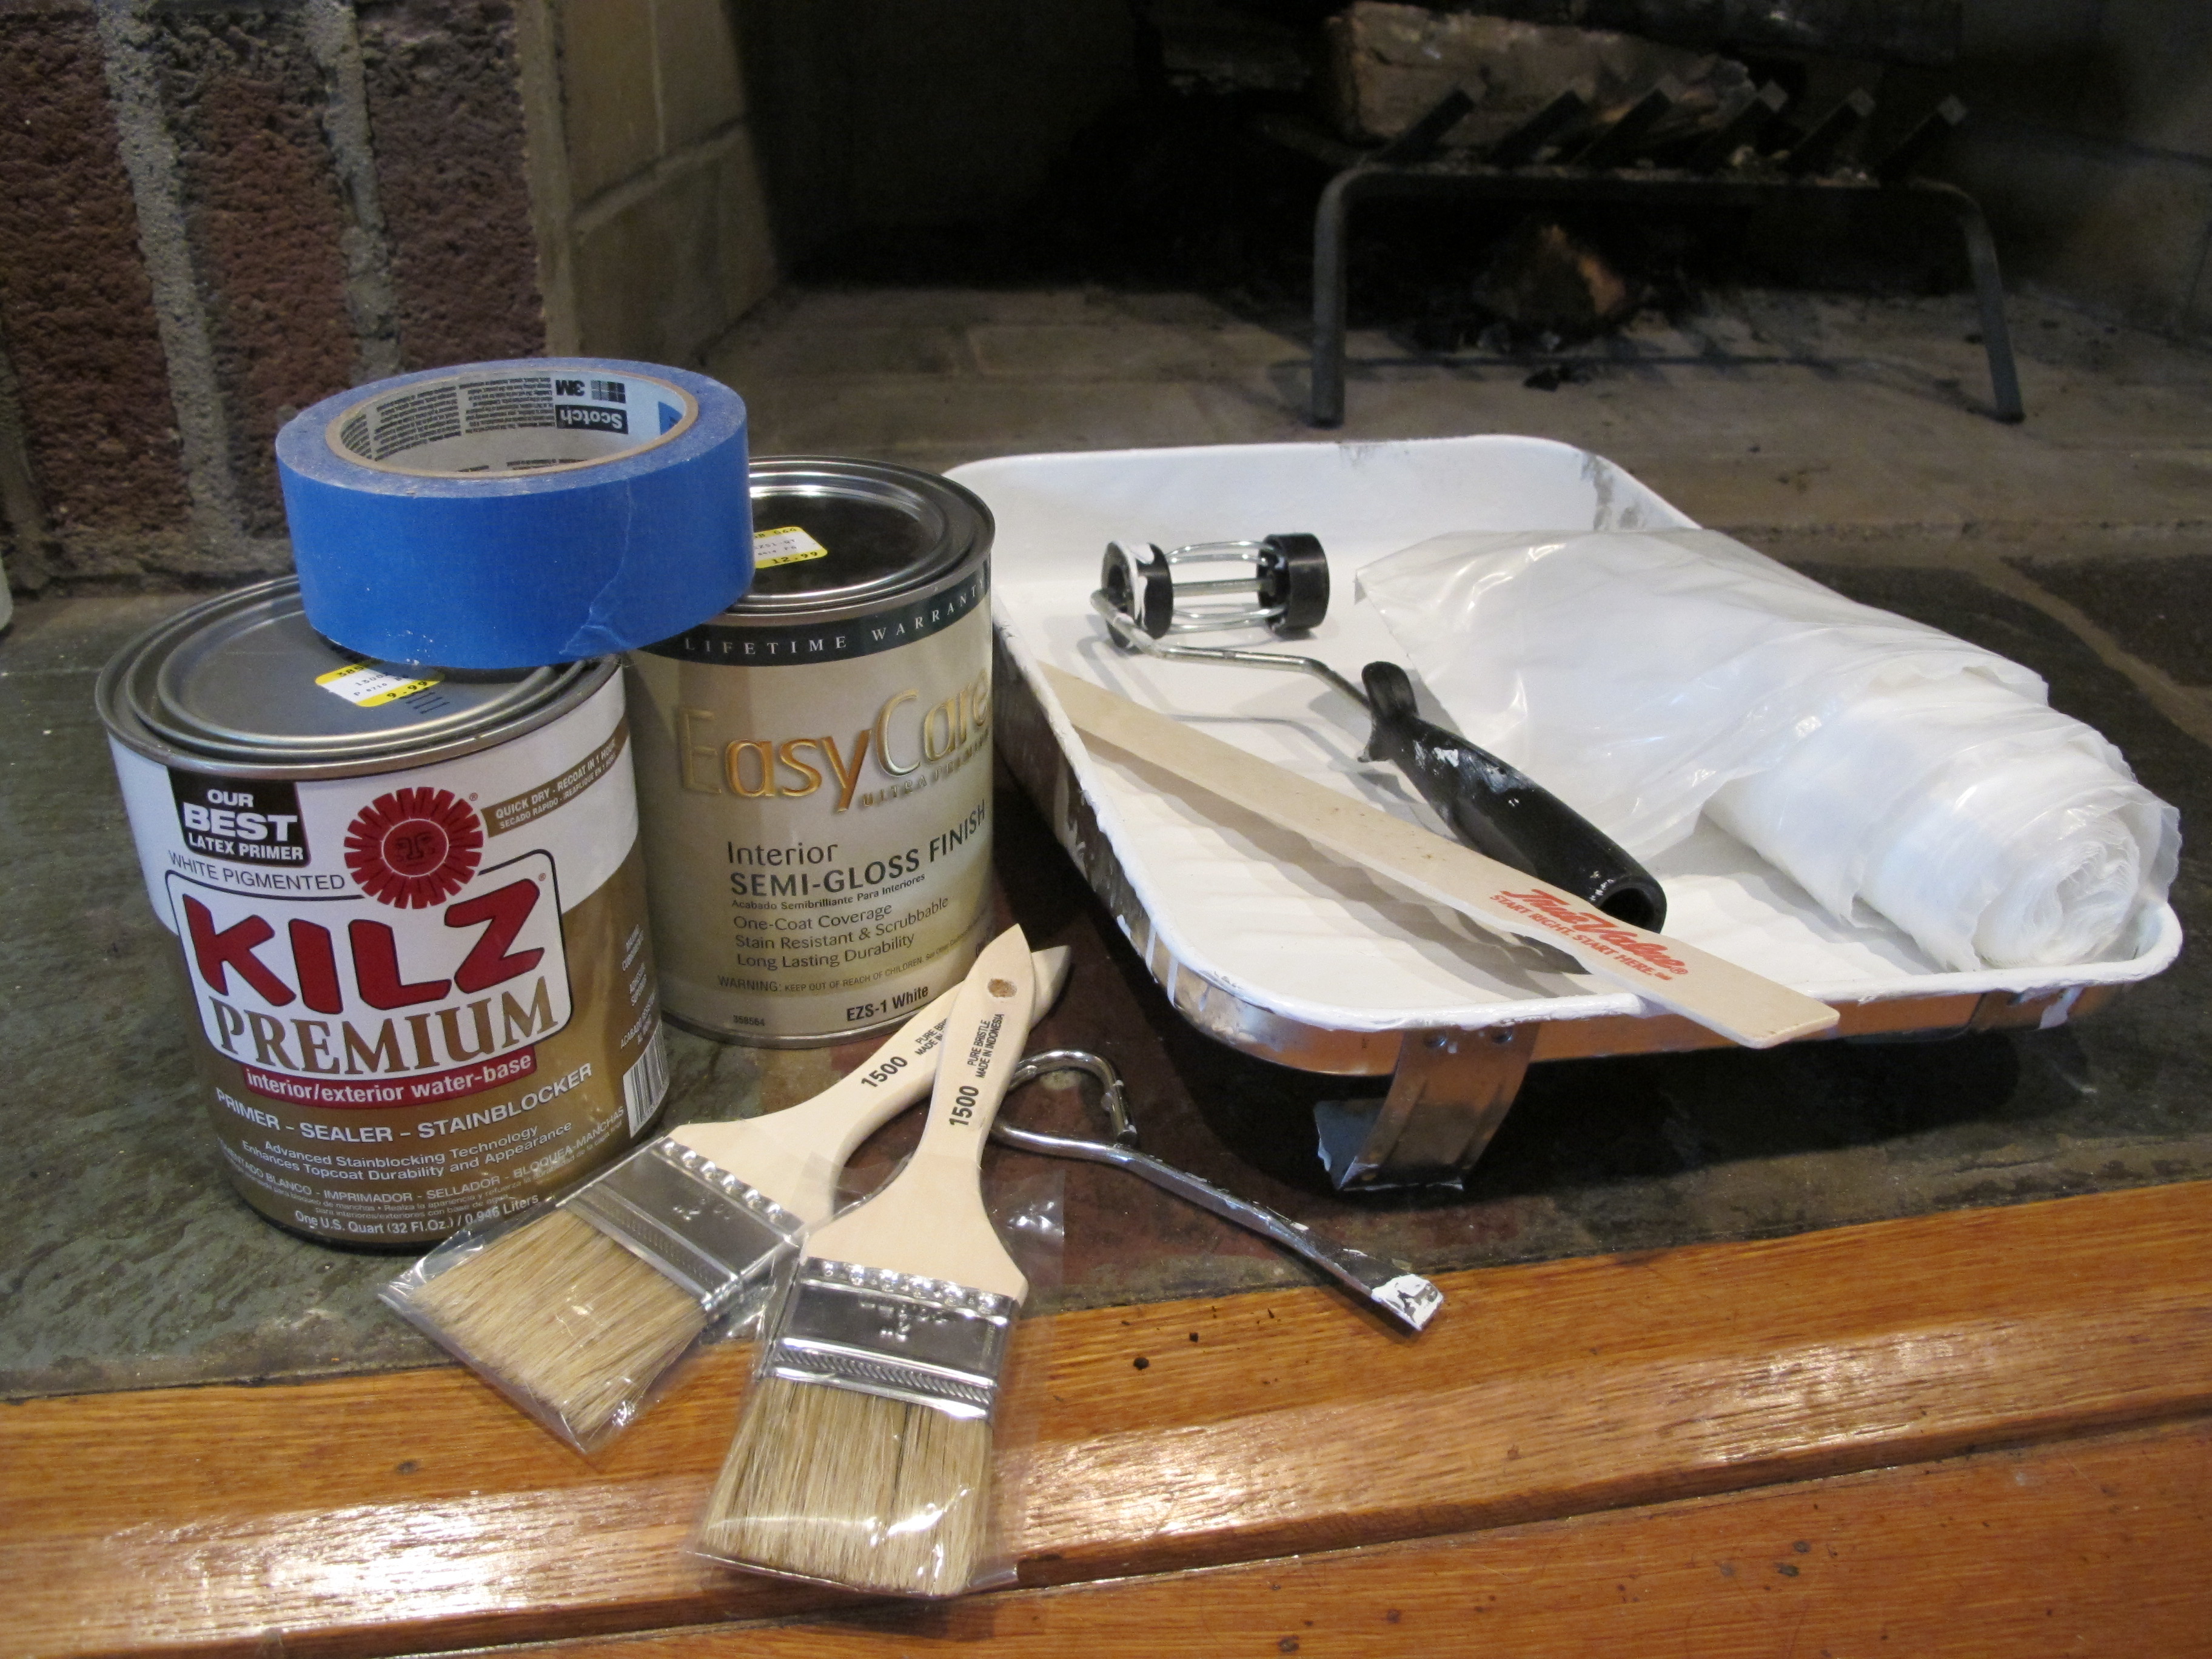
1-2 paintbrushes - $2
Kilz sealer - $6
Easy Care semi Gloss in white- $8
Plastic tarp - $3
Paint pan - $2
Mini Roller - $3
Total for round: $24
We got all of our items at True Value, as well as advice on which brands would work best for this project. The fine people at True Value warned us that if we were going to paint brick, it was going to stick. They also advised us that the brands above were safe to paint the outside of a fireplace.
As you can see above, step 1 is pretty simple. Brush off any debris, and clean the area before priming. Paint the fireplace and let it dry for at least 24 hours. We believe in taping stuff off and suggest you do too if you like clean lines and ensuring not to paint the mantel or wall.
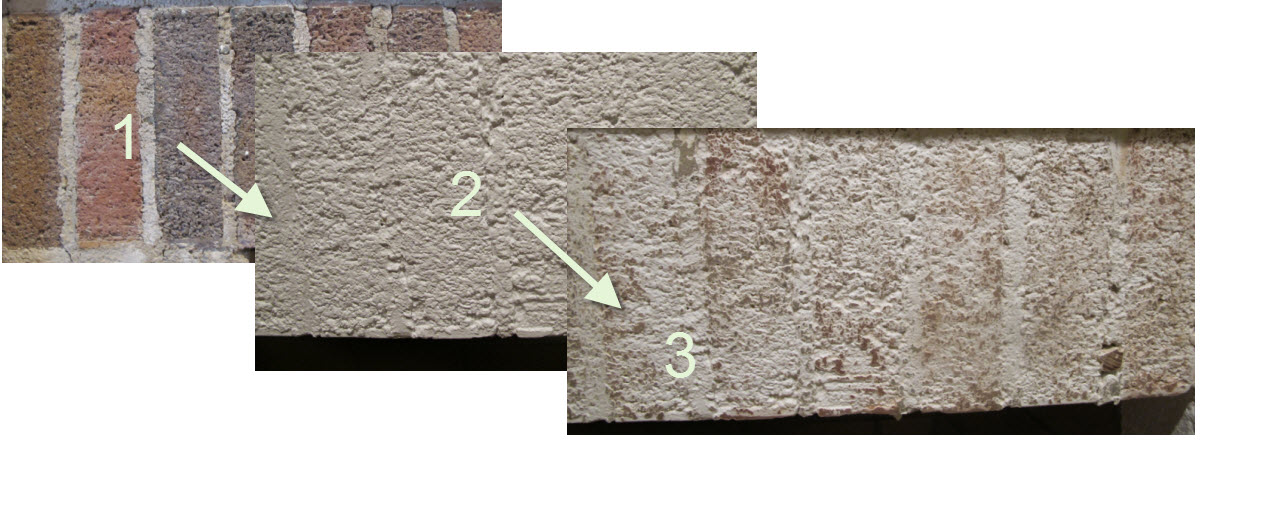
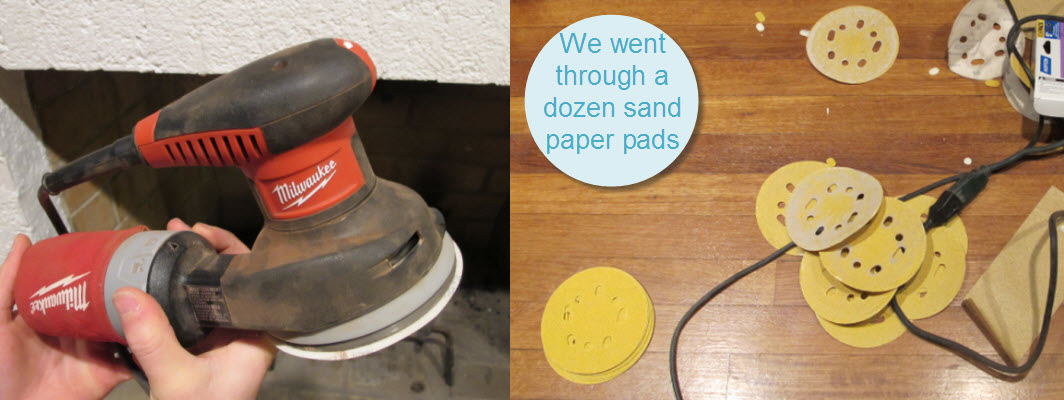
So you can see getting from step one to two is pretty easy. Getting from step two to three takes a little more work, but is so worth it. Joey figured out about half way through that spraying the painted brick with water helped the process of sanding. We tried a blow dryer before that, and it didn't help much. We used a Milwaukee hand sander, and a dozen rough 60 grain pads to "rough her up" once it was completely dry.
It took about a solid hour to buff through the perfectly painted white paint, and transform it into more of an aged and weathered look. But here is our shiny new fireplace we love!
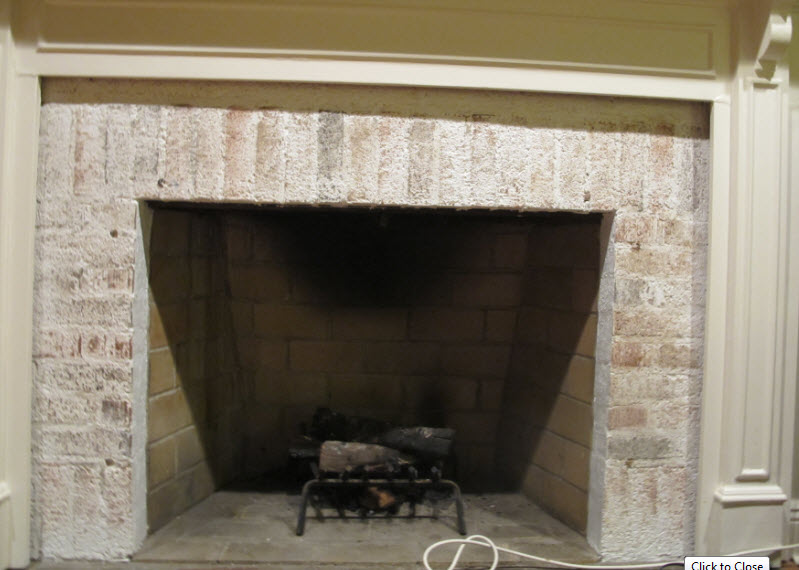
We have some styling to do around the fireplace, but now we are totally happy with the results of it's new look. We encourage you to not be scared and go for it. It was really simple. The hardest part is making the decision! Once you do, stop by your True Value and ask a friendly face to walk you through the process and you'll have a cheap and quick way to update your fireplace too.
Lets get legal: We were one of the 10 bloggers True Value has chosen to work on The Blog Squad , and we are way excited to take on the challenge of showing you exciting DIY projects. They have compensated us for our time and writing, and provided materials for the projects we have worked on. However, our opinions are entirely our own and we have not been paid to publish positive comments. Did we mention we are excited to show you our DIY Blog Squad Projects?
 Joey and Lana Make a House a Home
Reader Comments (6)
Great tip! We have brick that looks somewhat similar to this on the rear of our house. In our case, it seems to have come with this kind of coating, before it was installed. We want to cut a hole in the wall to install some french doors leading out to the backyard, but I've been nervous about how to get the new brick we use to edge the new doorway to match the existing brick. I might have to try this trick!
We have this exact fireplace but without the great trim that you have. Any chance you can show a photo of the whole thing including the mantle? Looks great.
@kitchen-dreams here is a shot from before: http://www.flickr.com/photos/joeyandlana/4983734233/ - thanks for the love!
@L good luck! share photos when you are done!!
It looks A-MA-ZA-ZING!!!!
:-)
Layla
@layla thanks lady!