Related Posts Plugin for WordPress, Blogger...

                   Follow Me on Pinterest


photo cards


OpenSky

Freckled Nest - Design by Kelly Ann

Home & Garden Blogs
BLOG DIRECTORY
Online Marketing
Home Improvement Blogs - BlogCatalog Blog Directory

Entries in quicky (9)

Wednesday
Jul062011

How Much Wood Would a Woodchuck Chuck....

...about 15 bucks worth! 'Morning all! We are super excited to share what $15 worth of wood did for us this weekend. Like I mentioned before, we took advantage of the long weekend, and really hit the ground running. Check this out. 

Joey, our friend Duane, and myself headed out to Queens to go to a little place we have mentioned before, Build it Green. It's a magical place where demo'ed building scraps go to find a new home, and we dig it. 

..and dig through it! After going through piles and piles of wood, we hand selected what we thought would work best in our kitchen. 

 Just 15 smackers and about two hours of work later, we were grinning ear to ear. We prepped and measured the wood on the floor, and planned it out just how it would look on the wall before we used a nail gun to put it in place. Here is a shot of what our kitchen in progress looked like before:

 Armed with a ladder and a nail gun, Joey transformed above the cabinets from the above to the below. 

We had a weird snag in the installation, it was an outlet we needed to figure out what to do with. 

Joey wounded up routing out the back of those wood panels so they would fit over the outlet with out it bulging out. At the end of the day, we wound up with this:

We likey! If you are wondering why we have no kitchen cabinets, it's because Joey is in the process if refinishing them! After our 10K estimate from Home Depot to refinish them, we thought it would be smart to at least give it a go and see how we do with some paint and spackle. We have had some kitchen drama in the past and are looking to overcome it. I think this is a really good start. 

Wednesday
Dec082010

A Tabletop That Won't Stop: A QUICKY BLOG SQUAD PROJECT

Hello lovlies! We have been working really hard to wrap up our wonderful run of being True Value Blog Squadders while trying to get the house in Christmas mode. We were able to hang a 4 ft lighted wreath on the turret, add some garland to the living room fire place, and do a vignette on the dining room table, and hang some wooden snowflakes. We aren't finished, hey, we don't event have a tree yet - but we are trucking along. We got to wrap up a project on our long to-do list and definitely wanted to add it to out True Value posts, so here we go!

Back in July, Joey's amazing Aunt Debbie drove all the way from Minnesota with a uhaul filled with goodies. We were so stoked to see them and get blessed with some furniture at the same time. One gift was an AMAZING table we fell in love with immediately. 

We knew exactly where it was going to live upon first site. We put it straight in the mudroom and called it a day. We found ourselves looking at it going hrrrmmmmm, "something is missing". We decided the tabletop needed to be white. We didn't just want to paint it white and leave it at that, because we know it would get scuffed up very quickly, so we decided to immortalize it. 

Now, we are going to be brutally honest before we go through the steps on how to epoxy a tabletop. We messed up. Just like on other home improvement projects, we mess up now and again. I feel bad saying we messed up, I messed it up. Big time. I thought we wouldn't be able ti fix my royal failure. 

I went through the whole process (which we will go over in a sec), and left it outside to dry. That night it rained. It was windy...and when I woke up to check out my labor I was saddened by what I found. Raindrops were sporadically placed in the hardened residue, along with leaves and bugs. It was gross. 

So, when Joey came home from work, he had an idea to fix the problem. (Now, I am telling you this upfront so you pick a smart place to epoxy your table from the start. You won't be able to move it once you pour on the solution and it's still wet.) He simply took a screwdriver and wedged it between the glassy, dry epoxy and the painted table. The epoxy came up in large chunks and it was pretty easy to resolve my major fail, minus the $20 the epoxy costs at True Value. 

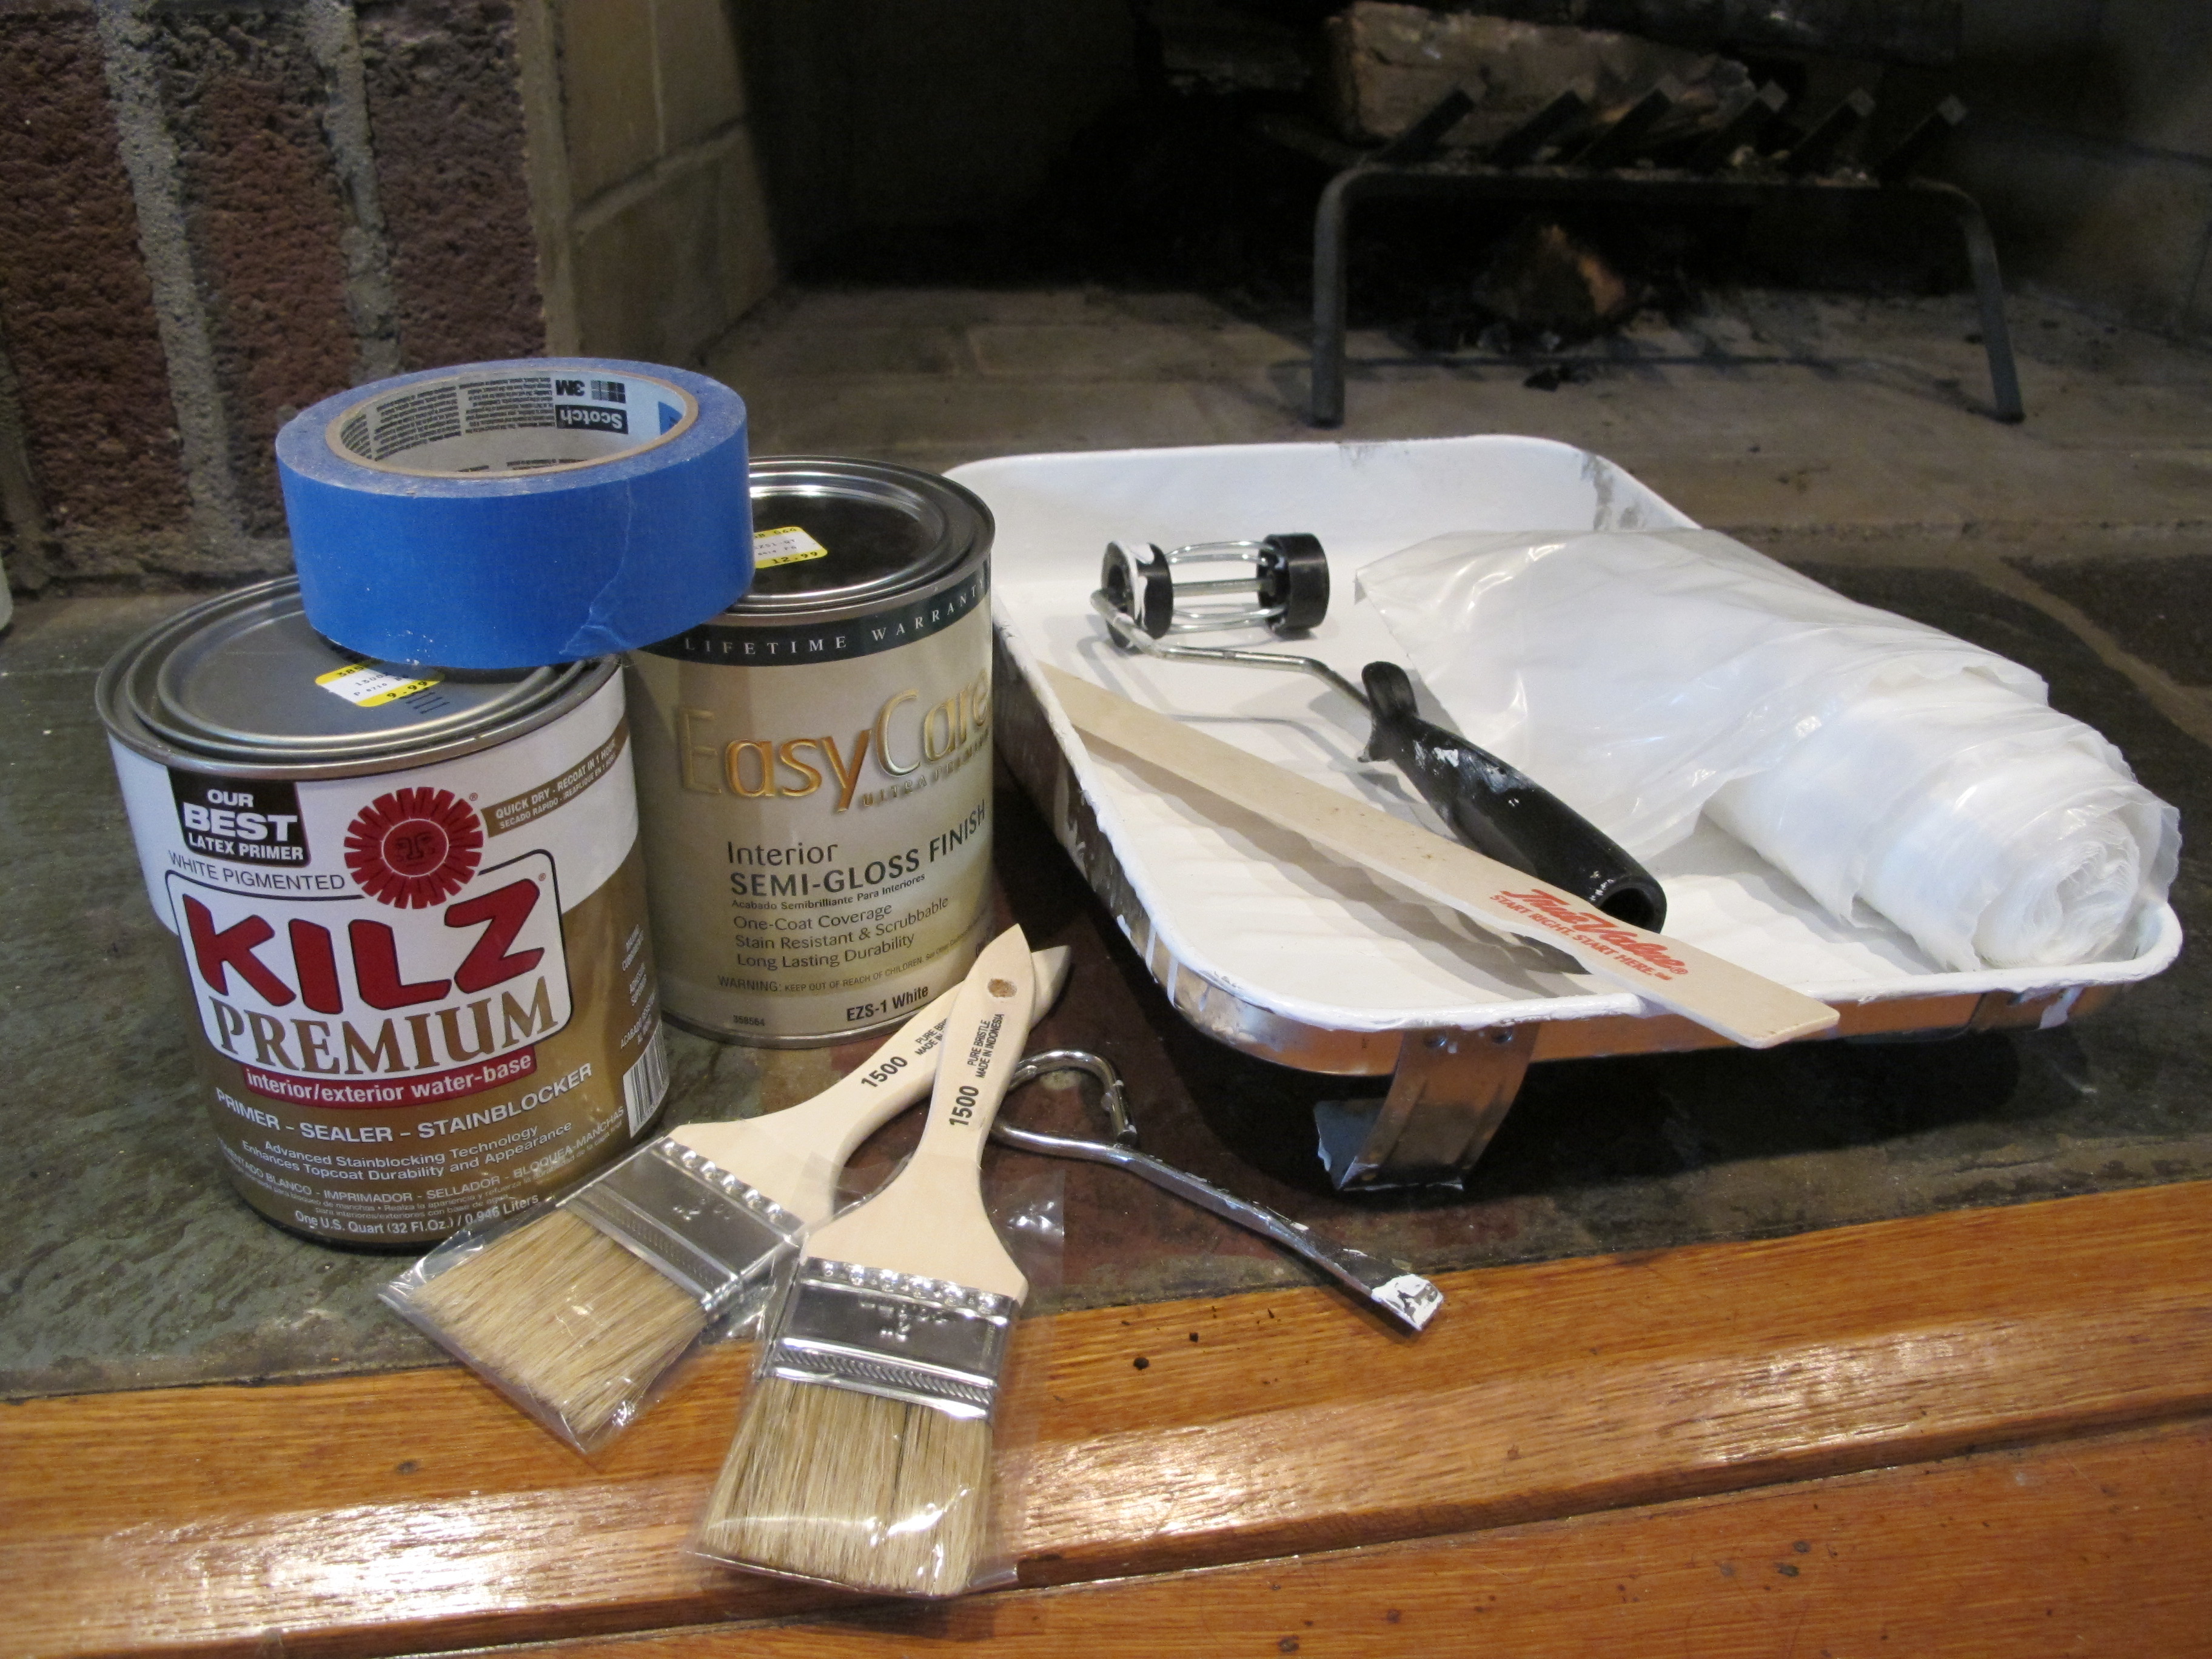
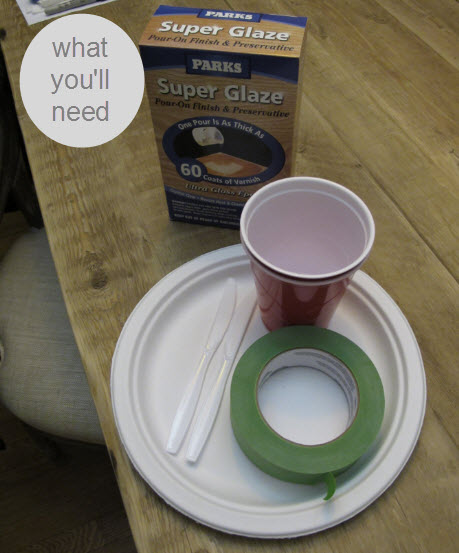
So on to the right way to amp up your tabletop! Here is what you'll need, what to do, and how to do it:

A box of Parks Super Glaze 32 fl. oz. Box $20

Painters tape (we used frogtape) $10

A blowdryer

3 plastic cups

2 plastic knives

Floor covering (to protect your lovely home)

$30-$50 total (depending on what you have on hand)

Find a flat surface to lay your table top (We recommended removing the tabletop if you can). Place down your floor covering, and make sure when you place your tabletop on top of it it is as flat as possible. 

Tape off the rim of your table and make sure to keep the tape about 1/8 inch above the actual table. This will make kind of a rim for when you pour the epoxy. 

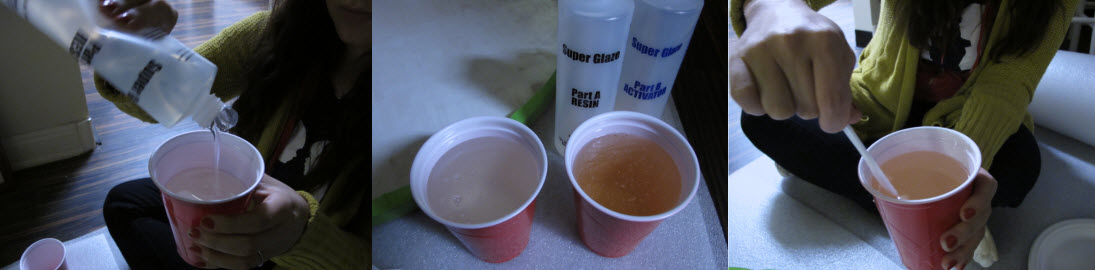
Grab your plastic cups and knives (don't use metal!) and your box of epoxy. Fill up half your cup with the resin, and half of your other cup with the activator. Now pour both the resin and the activator in a third cup. Mix smoothly with a plastic knife until well blended. Don't over mix or you will be cursed with bubbles!

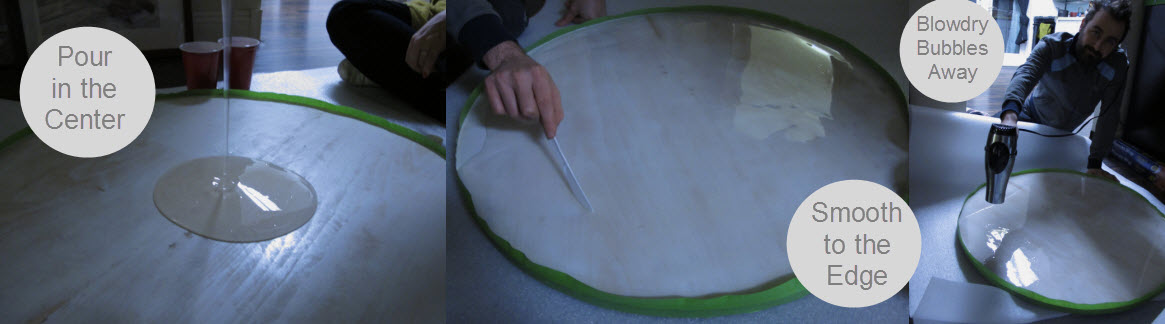
Pour this mixture in the center of your table. If you see it obviously flowing to a certain side of the table top, not is the time to fix the uneven-ness. 

Take another plastic knife and smooth out the epoxy with smooth movements from the center of the table outward. 

Now here is a little trick. once you have a nice even epoxy top, take a blow dryer and blow out all the bubbles! You can also move around the mixture a bit with the pressure from the air if you need to.


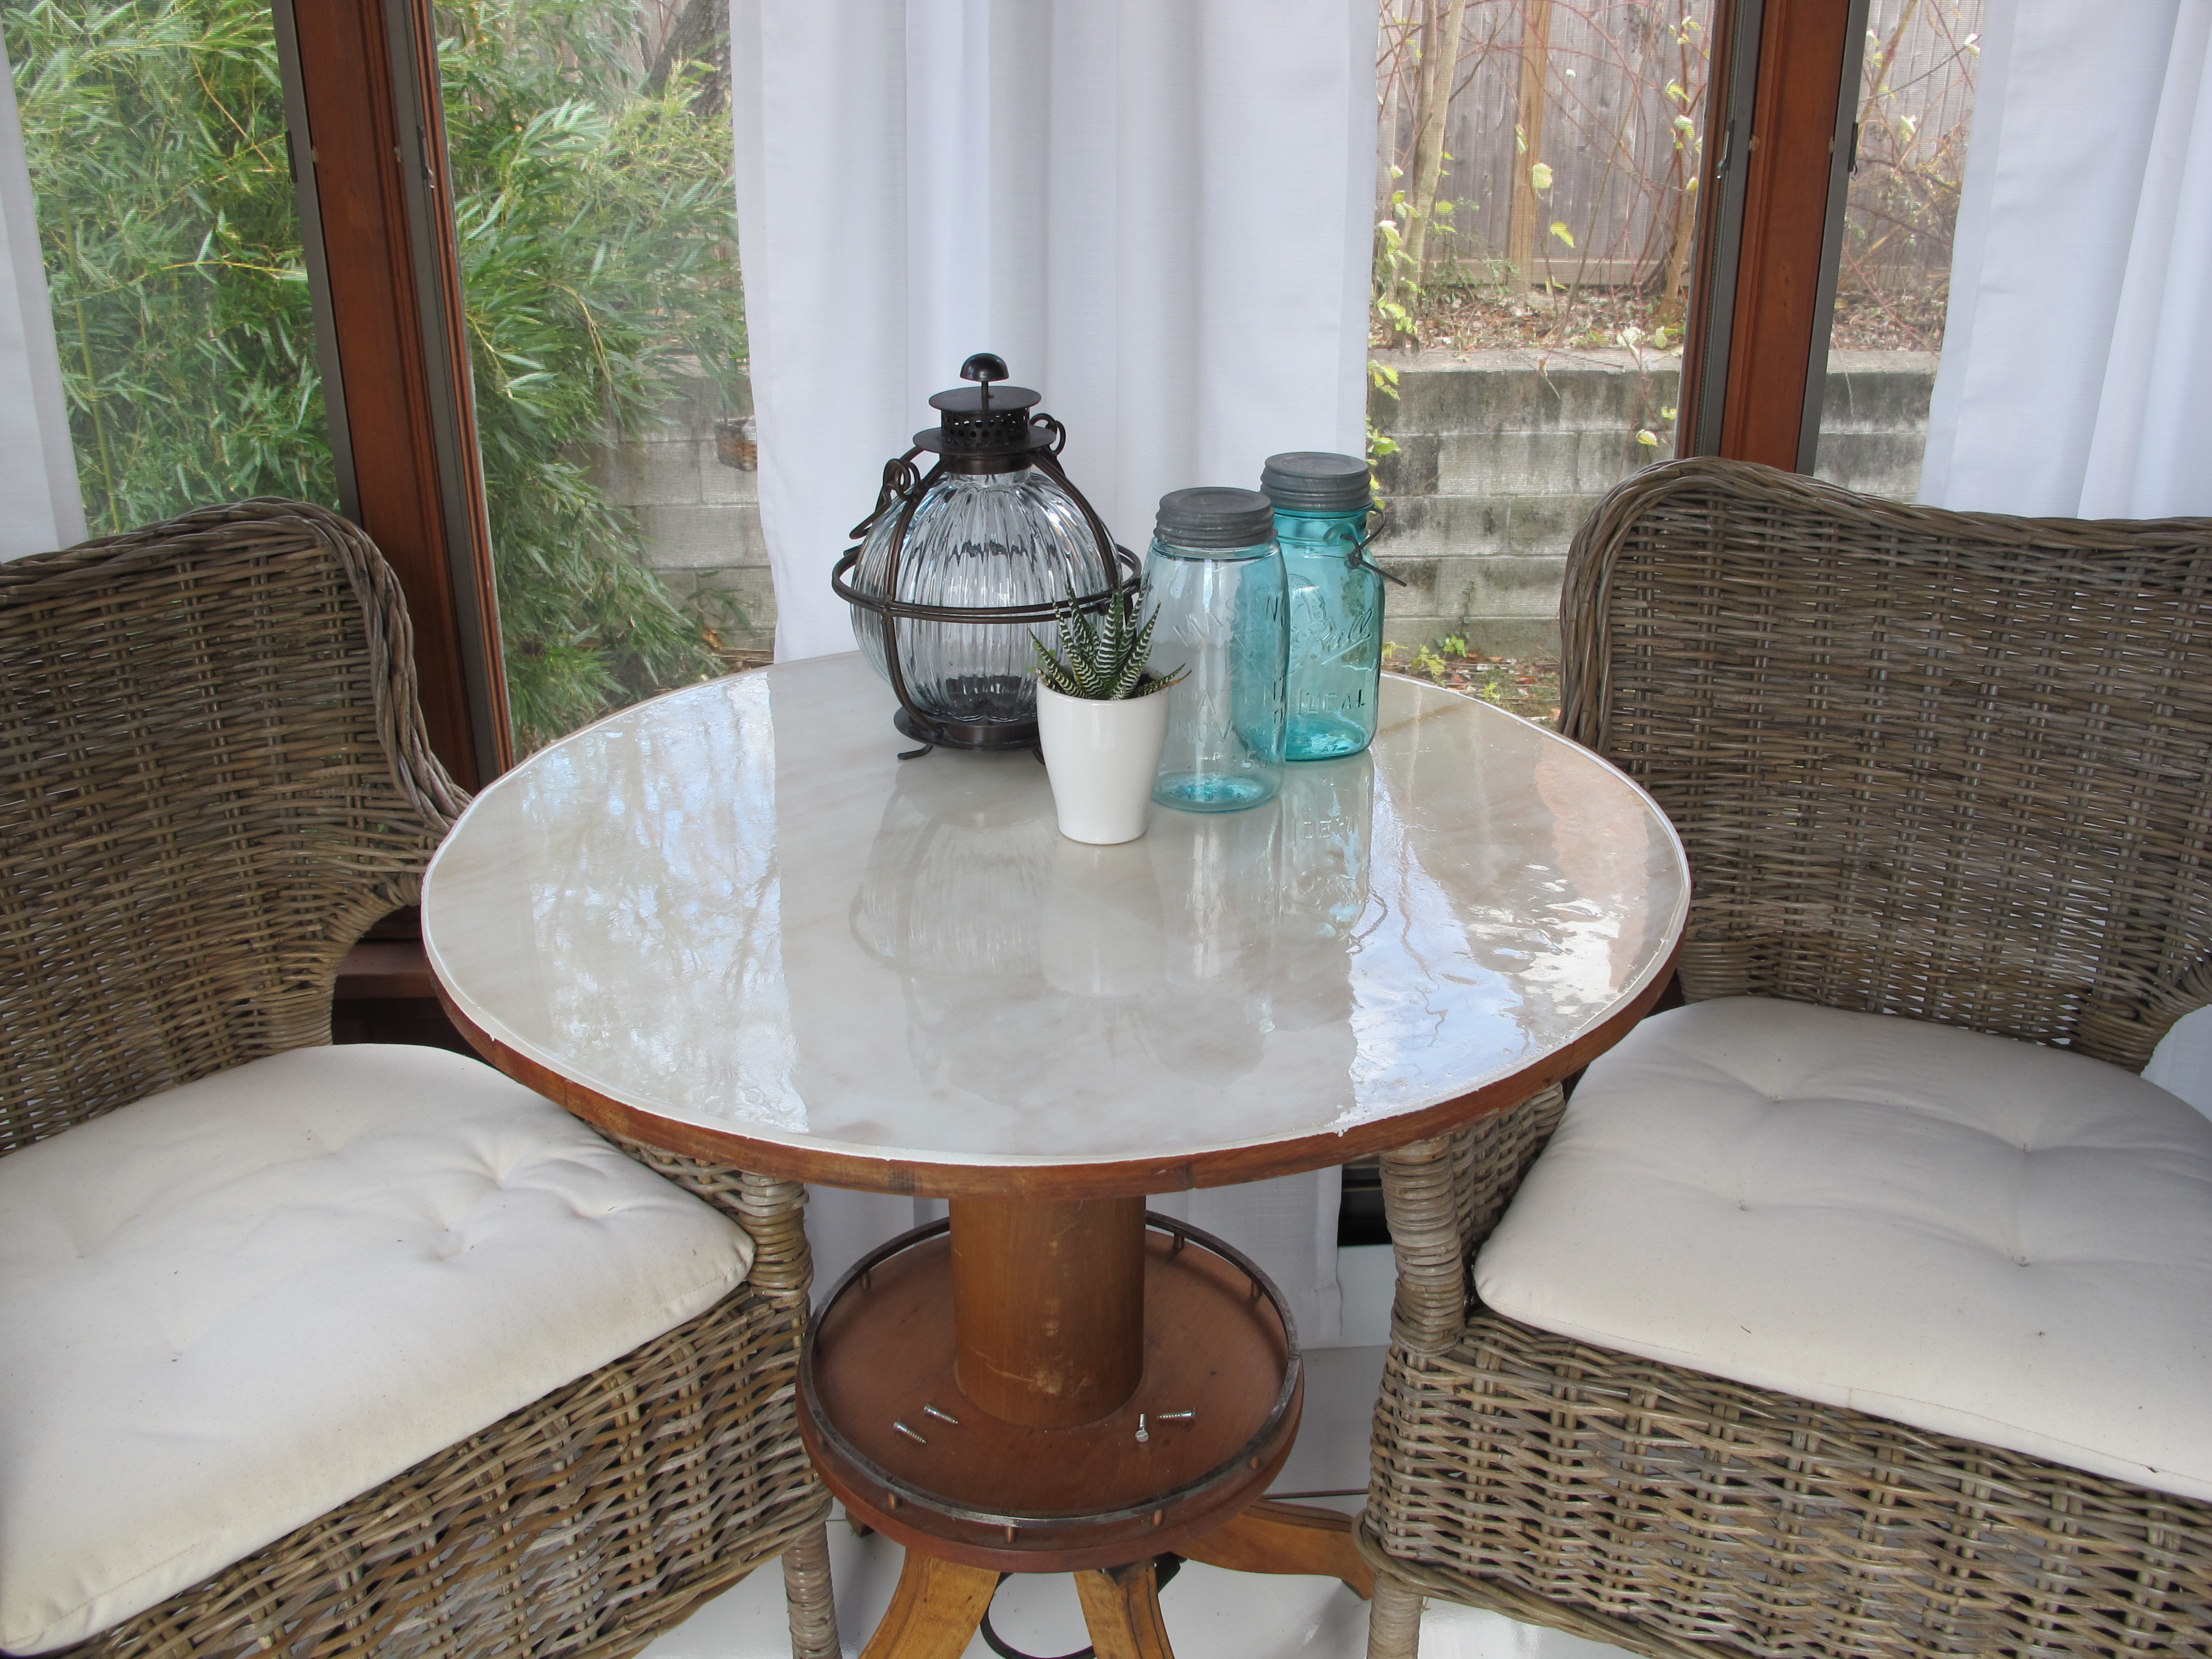
...and the hard part. Leave the room! Try to not look at the tabletop, or walk by it! You will be tempted to touch "just to see if it's dry". It's best to let it sit about 24 hours. 

It will be easy to peel the painters tape off once it's completely dry. You can also buff out any unevenness. And there you have it. Your totally awesome tabletop that can withstand food, wine, and anything else you throw at it!

Lets get legal: We were one of the 10 bloggers True Value has chosen to work on The Blog Squad , and we are way excited to take on the challenge of showing you exciting DIY projects.  They have compensated us for our time and writing, and provided materials for the projects we have worked on. However, our opinions are entirely our own and we have not been paid to publish positive comments. Did we mention we are excited to show you our DIY Blog Squad Projects?

Wednesday
Nov172010

Fireplace Facelift: A (semi) Quicky blog Squad Project

Good morning, friends! We have a few fireplaces in our home. Well, more like four. Ok, wait, three. See, the one is the basement is for "show". Kinda weird, right? A faux basement fireplace....wonder what they were thinking when that happened. So the three real fireplace are in the living room, master bedroom, and my office. We were very excited about all the fire places when we moved in. We actively use the one in the master suite, and the one in the living room. We have plans for the living room one, kinda massive plans, but the rest will pretty much stay "as is"...almost. We liked the brick texture in the master bedroom, however the "red brick-ness" didn't quite fit into out master plans. So we decided to give her a 'lil face lift. First we thought painting it white would be good enough. Fail. After a few days I hated it.  Take a look.

So we figured out how to "rectify" the situation, and wound up with something we seriously love and absolutely fits in with what we are trying to do. Painting a brick fireplace is kind of scary. We aren't going to lie. It's a little permanent to be honest. But we are going to show you what to do, how to do it, and what it costs.

We started with the following:

1-2 paintbrushes - $2

Kilz sealer - $6

Easy Care semi Gloss in white- $8

Plastic tarp - $3

Paint pan - $2

Mini Roller - $3

Total for round: $24

We got all of our items at True Value, as well as advice on which brands would work best for this project. The fine people at True Value warned us that if we were going to paint brick, it was going to stick. They also advised us that the brands above were safe to paint the outside of a fireplace.

As you can see above, step 1 is pretty simple. Brush off any debris, and clean the area before priming. Paint the fireplace and let it dry for at least 24 hours. We believe in taping stuff off and suggest you do too if you like clean lines and ensuring not to paint the mantel or wall. 


So you can see getting from step one to two is pretty easy. Getting from step two to three takes a little more work, but is so worth it. Joey figured out about half way through that spraying the painted brick with water helped the process of sanding. We tried a blow dryer before that, and it didn't help much. We used a Milwaukee hand sander, and a dozen rough 60 grain pads to "rough her up" once it was completely dry. 

It took about a solid hour to buff through the perfectly painted white paint, and transform it into more of an aged and weathered look. But here is our shiny new fireplace we love!

We have some styling to do around the fireplace, but now we are totally happy with the results of it's new look. We encourage you to not be scared and go for it. It was really simple. The hardest part is making the decision! Once you do, stop by your True Value and ask a friendly face to walk you through the process and you'll have a cheap and quick way to update your fireplace too.

Lets get legal: We were one of the 10 bloggers True Value has chosen to work on The Blog Squad , and we are way excited to take on the challenge of showing you exciting DIY projects.  They have compensated us for our time and writing, and provided materials for the projects we have worked on. However, our opinions are entirely our own and we have not been paid to publish positive comments. Did we mention we are excited to show you our DIY Blog Squad Projects?