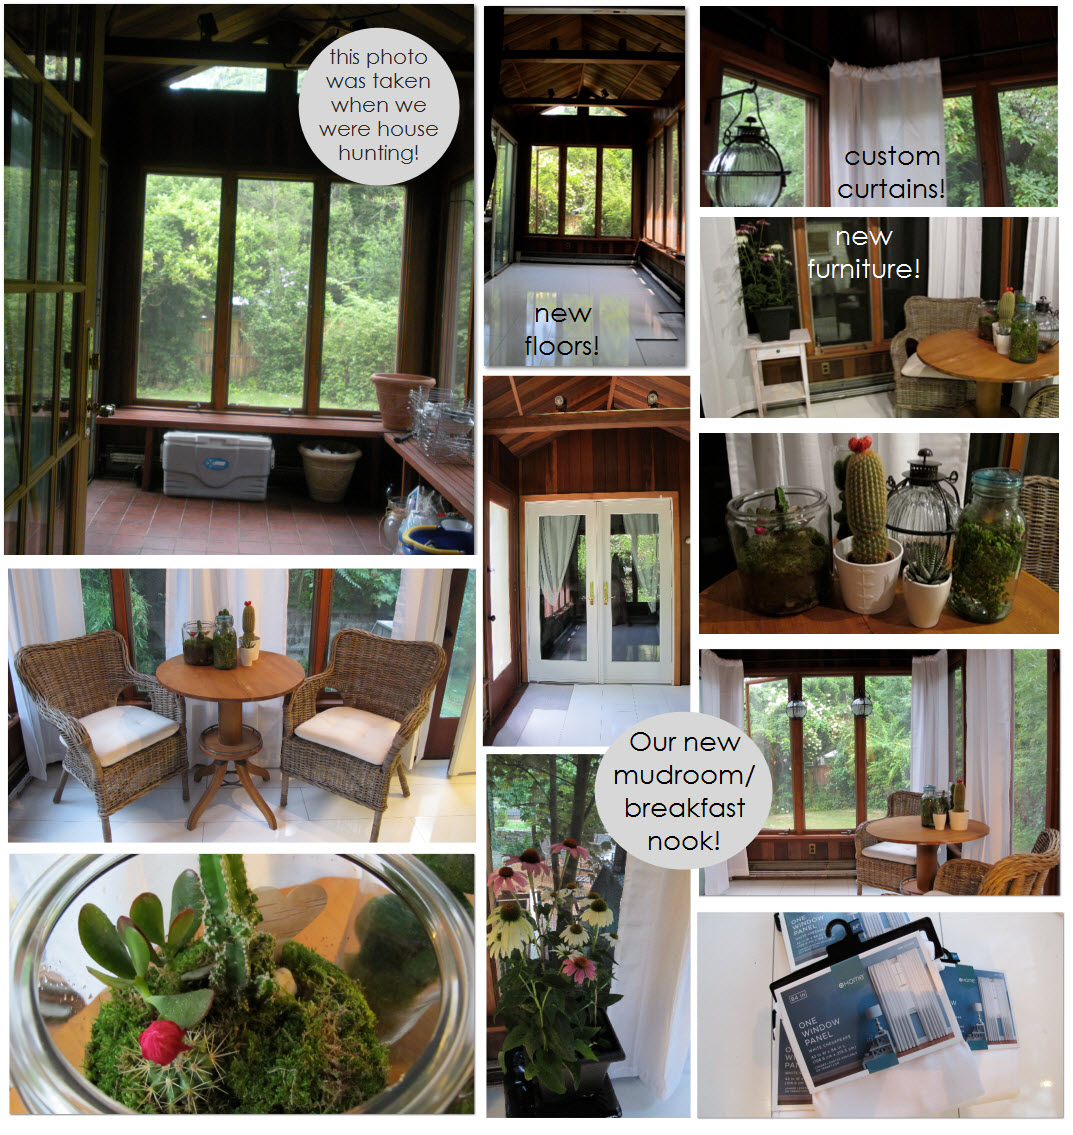
If you read our blog, I suspect you have some level of adoration for Anthropologie. It's no secret I am a huge fan. I must pop into an Anthro once a week to check out the home goods, or simply get inspired by the displays. I recently found out I am not the only one with this mildly obsessive ritual. One piece I have drooled over for some time has been an armoire and matching side board. Like most things that can be found at an Anthropologie, this is simple, clean, and has just a spec of flare. I asked myself what I like about it so much, and concluded it was the simple and delicate pattern of the birds with this bulby-floral like swirl.

Being we have yet to settle on a true design palate for our bedroom (or rest of the house for that matter), I have held back on this purchase - however I have found a use for the inspiration in this piece you see to the left.
Together with Joey and our dear friend Duane, we decided to build a screen door for the mudroom using the armoire as our starting-off-point, while adding a bit of our own voice and talents. Thanks to joining the True Value Blog Squad, we were able to make this project with the gift card they provided us. We are so over-the moon excited about this project too! We found a local True Value lumber yard, which was loaded with tons of amazing options, as well as all the tools we needed to accomplish this. We get inspired from so many different places, and most of the time we are able to replicate or make up our own project with just a few simple items.
If you are stuck for ideas of your own, check out their Start Right. Start Here. page, which is loaded with ideas - some of which we will be tackling!
Here is what we did, how we did it, and what it cost:
All items purchased and available at your local True Value stores:
Supplies:
Pine Plywood: $44 for 8 ft X 4 ft Sheet
8 ft Scalloped Trim $6 a piece X 4 pieces, $24
Paint: we picked three colors (two spray paint, one small sample jar) $32
Pencil and Erasures: we had, figure $5
Marker we had, figure $2
Sandpaper: $5
Clamps: we had, figure $30 for a pair
Door Handle: $5
Door Hinges: $ 10
Weather proof sealant: $16 for two cans
Tools:
Router $125
Router Bit 1/4 inch $15
Wood Glue: we had, figure $3-$8
Ruler or T-Square: $15
Measuring Tape: we had, figure $10
Staple Gun (optional): we had, figure $25
Dremel (optional): we had, figure $100
**and just in case you make a mistake, Elmers Wood Putty $4.
If you don't have any of the tools above - this can be a pretty expensive project (around $500!). I suspect most people would have about half of the tools needed to complete this. It cost us around $300, but we invested in the router and bit which cost $140 alone, we will get away with the next door at about $150.

The photos above are a play by play of what we did. It is as simple as it looks, really! Here is the order of how we figure this project works best:
- Measure! We measured the door this screen door would go in front of. Then we measured the boarder around the door. Joey suggested a 10" kick plate (bottom of the door), 3" on the top and 3" on the sides. Once you mark off, use the rulers to draw straight lines to create the frame you will draw your design in. See first image.
- Get creative! We had our favorite artist Duane draw a pattern inside the frame. This can be whatever works for your decor. If you aren't an artist, or don't have one on hand, simple shapes like circles would look elegant. See second image.
- "X" marks the spot, or spots in this case. "X" out all the negative space you are going to cut out.
- Get crackin'! Carefully use the router to cut out all the negative space. You don't have to be super exact, but get as close as you can. You will have a chance to "clean up" the snags and missteps. See image six and seven.
- Be a smooth operator. Now you can use your sand paper and/or sander to smooth out everything. If you have a Dremel and want to get very exact - now is the time to do it.
Oops! Did you make a mistake and cut some of the positive space? No worries! Do your best to nail it back in place and use the Elmers wood putty to fill in the gaps. Once it's dried you can sand it down to match the surface of the wood. We are going to paint and seal this baby - no one will know you made a mistake.
Stay tuned for part two! We will go over painting, weather-proofing, and installing! Have you ever made something custom from inspiration you found someplace else? Let us know! We are looking to feature your DIY projects too! If you missed any of our True Value Blog Squad posts, make sure to check them out here!
Lets get legal: We were one of the 10 bloggers True Value has chosen to work on The Blog Squad , and we are way excited to take on the challenge of showing you exciting DIY projects. They have compensated us for our time and writing, and provided materials for the projects we have worked on. However, our opinions are entirely our own and we have not been paid to publish positive comments. Did we mention we are excited to show you our DIY Blog Squad Projects?


 Joey and Lana Make a House a Home