Related Posts Plugin for WordPress, Blogger...

                   Follow Me on Pinterest


photo cards


OpenSky

Freckled Nest - Design by Kelly Ann

Home & Garden Blogs
BLOG DIRECTORY
Online Marketing
Home Improvement Blogs - BlogCatalog Blog Directory

Entries in DIY (14)

Tuesday
Jun072011

The Kitchen is Brining Us Down - Again.

Mornin' Lovlies! Having fun in the sun? It's been beautiful, we can't help but have a smile on our face and find excuses to spend more time outsite the past few days. So much time Porkchop got a little friend he brought home with him. We didn't approve, so we kicked him out stat. A tick does not belong in our home. Poor pup, he has a tiny scab where the tick was trying to dig into him. El groso for sure. Want to know about something else gross? Our kitchen!

You are totally jealous of our first ever invented dishwasher. We can tell. We have heard so many times that the kitchen sells the house. What were we thinking when we bought this place? The kitchen is the worst part of the home, the most expensive to fix, and used the most (except the living room). One of the first things we did, way back when, was paint the cabinets. Major fail. We used matte paint. Don't do that. You'll have a heck of a time cleaning them if you do. We also covered up the horrid plastic stick on floors with a quick Ikea fix, which has served well as a long-term-temp.

Then, Home Depot was having a promotion to have someone come over and check out your kitch to see what it would cost to resurface your preexisting cabinets. Sounded like something we needed, so we said "sure".  So a nice gentleman stopped by a few days later and we went over our options, and for the cheapest resurface (remember, these are not new!) it would cost....get this....TEN THOUSAND DOLLARS. Um.....no thank you. It cost that much to have someone paint the ouside of our whole house.

So back to the drawing board. Think. Think. Think.

See those grooves? Those are super 50's. I think that's that last time someone updated this kitchen. Sinse we aren't going 50s, the grooves have got to go. So, Joey had an idea.

He told me to take those bad boy's off the hinges, he wanted to fill them in with wood putty, then repaint them....He was thinking. The kind of thinking I like a lot. A bit of love and labor can save you a ton.

So after some brainstorming of what we could DIY, here is what we cam up with.
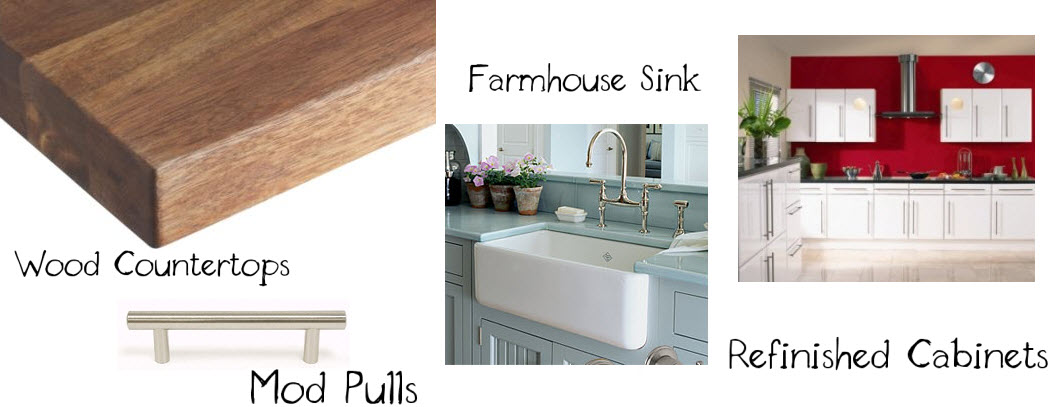
  • Wood countertops from Ikea
  • Pulls from Home Depot
  • DIY Cabinets, resurfaced
  • New Farmhouse sink

....and we will call it a day for now. Unless of course you lovely people think those yellow counter tops are just too amazing to let go of.... :)

We will keep you posted and show you how the cabinets turned out, and share the (hopefully!) successful story of how to DIY this yourself and keep your 10K! We will also walk through the backsplash replacement, and counter installation. Also if we invent a magic want to make this archaic stove go away, we will share that too!

Monday
May302011

Flash Master Jam

Happy Monday Lovlies! How is your holiday weekend treating you? We have some family in from out of town and are very excited to see everyone. The weather has finally decided to be beautiful, no complaining over here at Casa Katsaros. As we mentioned in a previous post, we have been working on the master bedroom, and are ready to share with you! Brace yourself, this is going to be a long post.

If you aren't up to date with how we got to the current state of our bedroom, check this and this out to get you in the know. Now that everyone is up to date, we had to make a bit of a mess to get things in order.

After moving things out of the room, and coving up the heavy stuff, the room looked like a wreck. Almost so bad, I couldn't image it actually finished. A messy room is a messy mind, and this room was pure chaos.

We had only painted one wall with the stencil we bought over at Cutting Edge Stencil, the rest of the room was in the original putty color that came with the house. It was driving me bananas.

=

We decided to take the lighter color from the stencil, Cumulus Cloud by Martha Stewart, and have it color matched with Behr Premium Plus Ultra so we wouldn't have to prime + paint + paint again. It's a really large room, and as much as we love the result of paint, the process is kinda grueling. We also invested in some new tools because of this.

Let me introduce you to your new best friend. This is the Ryobi Duet Power House Paint System. She's not perfect, but she's darn good. Here is the deal in a nutshell. For $99 bucks, this investment is totally worth it. We picked it up at our Home Depot along with two gallons of the paint to finish off our room. Being this paint system is so efficient, we wasted nearly no paint, and only needed one gallon of paint. The process of painting the room took about 1/4 of the time we thought. It has a duel option, but Joey pounded it out with out my help. I did corners and used 3M tape, while he did the bulk. So why isn't she perfect? Truth is, she is a pain in the booty to clean. The cleaning instructions are vague, and he made a mess in the laundry room. Even with this flaw, we totally recommend the investment, it will save you time, paint, and in the end a lot of money. We have a lot more painting ahead of us, and the quote we got from professionals (we were curious) was outrageous.  

Notice the dramatic color difference on the two walls? Looks a bit more blue than we anticipated. Odd thing is, the room seems to change colors depending on where you are looking. The number one rule of design lives in lighting, and this is the first time we really experienced how dramatic the difference can be depending on said light. 

So the bones of the room are finally finished. The furniture is purchased and placed, the patterns and textiles have been selected and some are even living in the room. The "sparkle" and fun stuff is missing. One major item we haven't bought yet is this amazing mirror via Restoration Hardware:

She's pretty and would fit perfectly over this:

Best news is, she's $1,200 and that's not including shipping. If you paid attention to previous bedroom posts, we have only spent just a speck over $3,000 for the whole bedroom. Seems a bit silly to spend that much on a mirror, but then again, she is very pretty....

In the meantime, the room is pretty unsparkely. The fun part is picking all the accessories and homey/cozy things. Check her out so far. We would love to know what you think!

We have some of those sparkle items in hand. If you remember, we have some amazing pillars from India circa 1880. I love them I drool over them. Right now they are hanging out in the upstairs hall until we decide on a few things.

We also have the amazing white moose head from Z Galleries, which sadly did not fit in the mudroom chilling in a basket, soon to be hung over the fireplace.

We also got some curtains from West Elm we placed behind the bed....for now. We love them, but aren't quite sure how we feel about them dressing every window in the room.

After we put the pillars back up, we will have a better idea of what works. Also, notice we are still fan-less? Another massive Restoration Hardware love fest going on there.

So there you have it! Our "finished" bedroom! As we add the elements that make it a home, we will happily share. Some financial contemplations and moral dilemmas going on as far as the things we love, and is the cash worth it. Have you ever faced this? Let us know, we are curious about how to solve a problem like a $500 fan you can't DIY your way through.

Happy Memorial Day!


Monday
Mar212011

A Quickie Silver Leaf Project

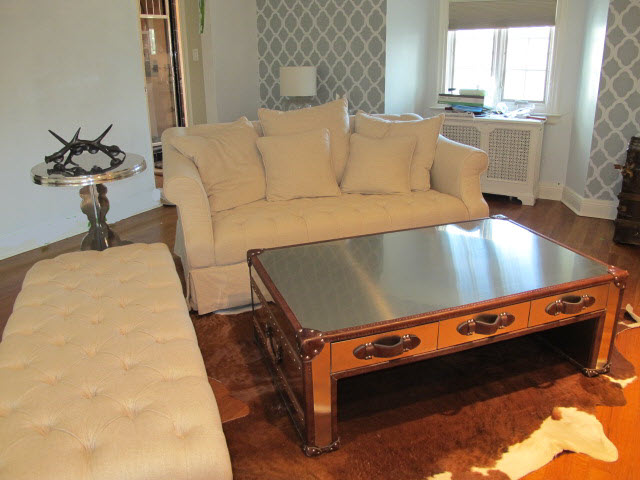
Happy Monday Pretty People! We hope your weekend was filled with Spring-like sunshine and greatness. It's starting to get a little greener around here lately and it's very exciting to be drawing closer to constant good weather. This weekend was jam packed with a lot of home projects. We got our Timothy Oulton delivery, and are in L-O-V-E with the coffee and console tables!

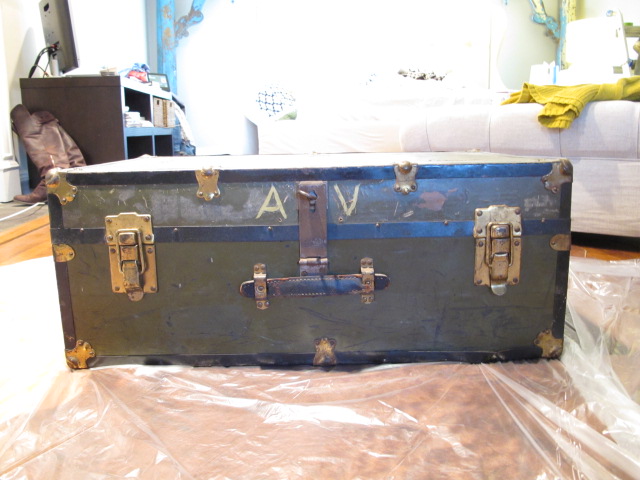
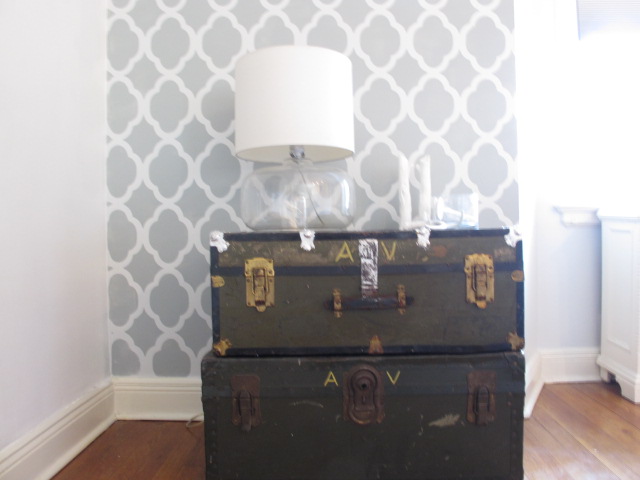
So, our Neutral-Moroccan-British-Cowboy room is so close to being complete, we can hardly wait! We had some old army trunks which were handed down from Joey's great aunt that we absolutely love. We wanted to give them a little "shine" because they are kinda of large and heavy looking, and we want a little bit of silver in all areas of the room. Here is a quick little guide on how to silver leaf odd shaped angels. Enjoy!

So we started with this pretty standard army trunk. We put down some tarp because leafing can get pretty messy, plus if you decide to use spray adheasive, it can get pretty sneaky and stick to things you do not want to get ruined, ie, new cowhide rug!

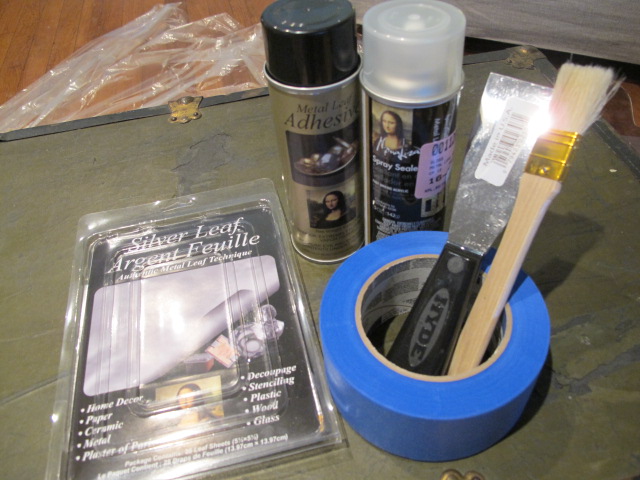
The supplies were pretty simple. I got:

  • 25 sheets of silver leaf (I only needed like, six)
  • painters tape
  • soft brush
  • paint scraper
  • spray sealer
  • metal leaf ahdeasive

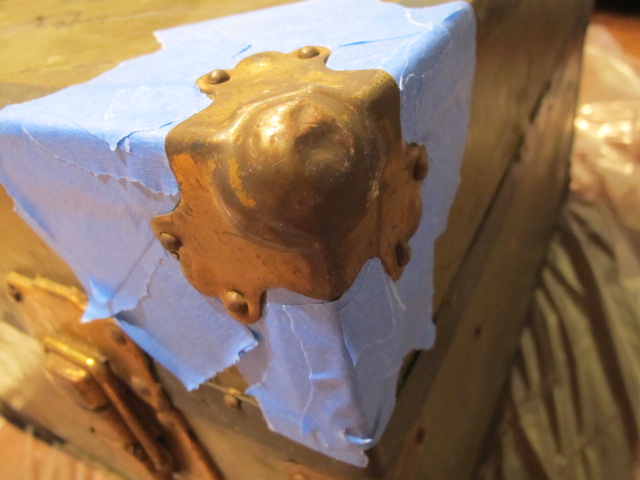
First things first! Prep your space. This is the whole key to leafing these corners, and the most time consuming part. We used painters tape to surround the metal corer we wanted to leaf. We places the tape about three inches out from the actual metal we were leafing, because after all - we aren't perfect with aiming a spray can.

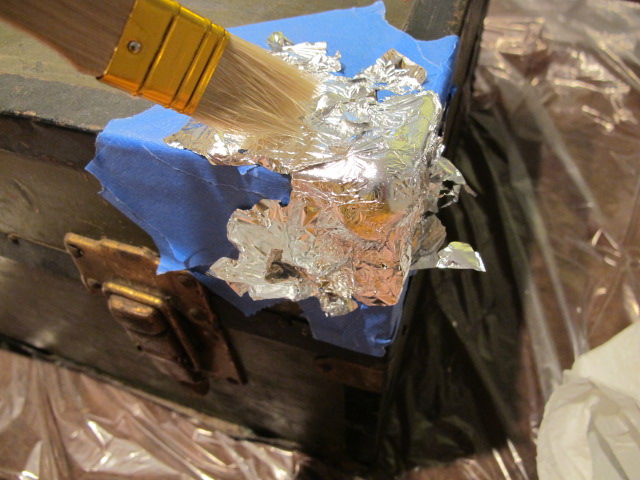
After your space is all prepped, spray the adhesive and wait a few minutes and let it tack up a bit. Then hold your breath, and with a steady hand plap the silver leaf on the tacky surface. We wanted an old and worn look so we used the brush to not only swipe away the access leaf, but to make streaks and worn dimples.

BEFORE you peal off the tape to look at the fruit of your labor, make sure to SEAL your work with spray sealer.  We good?...Good!

This is how she looks all finished up and placed against our newly stenciled wall! We love her! Now sure if we will do both, or maybe do one strip on the bottom trunk.

Want a peek at what we were up to this weekend?.....

Loving the silver Timothy Oulton pieces!

Turn doilies into a hanging lamp anyone? Check us out at handmadeology.com this week to learn how we did it!

....Any many more surpises coming up this week! Be well, and let us know what you have been doing in your home!