Related Posts Plugin for WordPress, Blogger...

                   Follow Me on Pinterest


photo cards


OpenSky

Freckled Nest - Design by Kelly Ann

Home & Garden Blogs
BLOG DIRECTORY
Online Marketing
Home Improvement Blogs - BlogCatalog Blog Directory

Entries in True Value Blog Squad (16)

Wednesday
Dec292010

TRUE VALUE BLOG SQUAD CHALLANGE - A BED FIT FOR A KING! PART Trois!

Helllllooo pretty people! We have resolved to complete this massive bed project before 2010 is over, and we are here to present Part Three (or a happy little trois!). If you missed Part One or Part Duce, check them out for a refresh. If you feel like staying put, here is a quicky break down of where we are up to. We bought our supplies, build our frame, stained the feet, and upholstered the sides and foot of the bed. Today we will share...drum roll please....the almighty headboard! Got it? Great, let's go!

The headboard required a small army because of it's massive size and weight. This time we were lucky enough to have some family and friends in town, so we put them to work, stat!
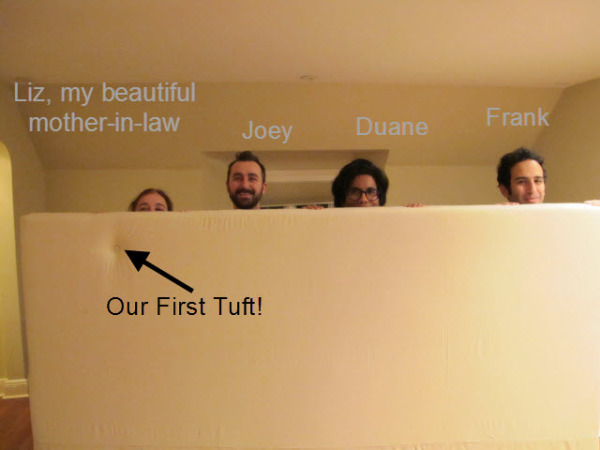
So here is how we upholstered the bed, before we get to the tufting (which is hard work, let us tell ya!). 

You will need:

Foam

Batting

Spray Glue (one-two cans)

Gorilla Glue (just a little)

The headboard you built from wood

Fabric

Buttons (we made our own from the upholstery fabric using a kit from here)

Upholstery Thread & Needle

Staple Gun

Rubber Hammer

Sharpie

Scissors

Drill

You can find everything at True Value except the batting, fabric, and upholster thread!
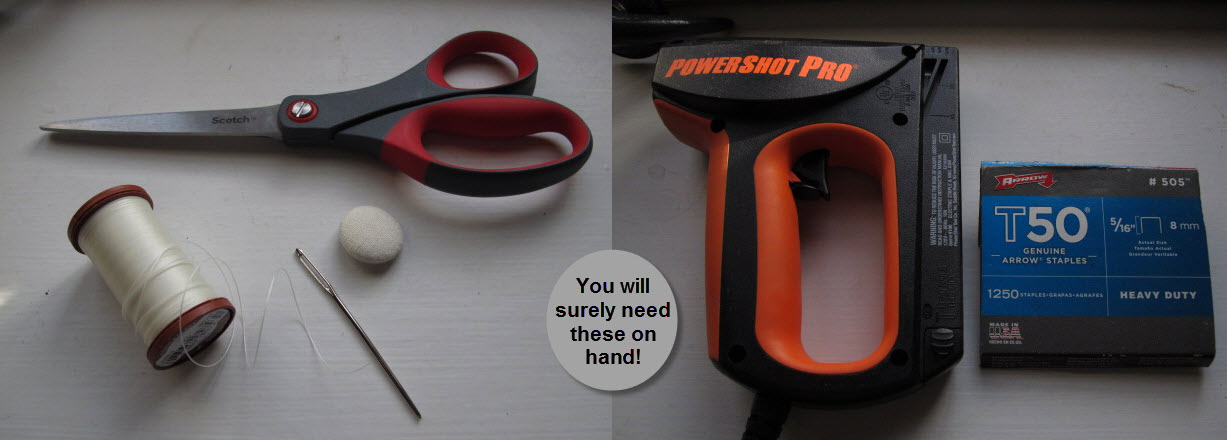
 

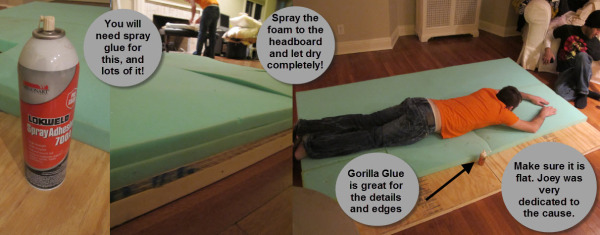
First you are going to attach your foam to the front of the headboard you built. Make sure if you are tufting you pre-drilled holes before you glue the foam to the headboard. We found spray glue is way easier to use and works great! The Gorilla glue is pretty great too, but you have to account for more drying time. We used the Gorilla glue to make sure corners of the foam were super flat on the surface of the wood. 
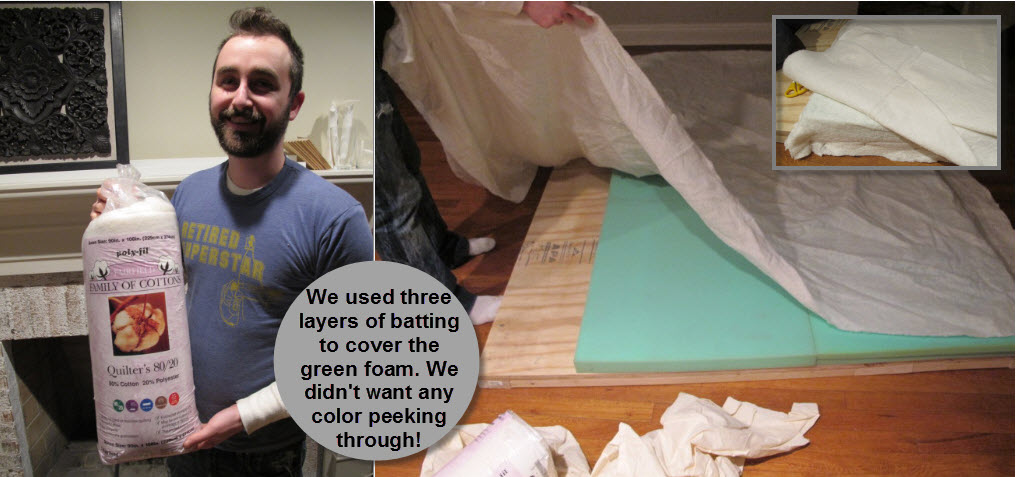
Once you have a super secure (no sagging!) base to work with you can start batting. We loved the cotton based batting. It's 80% cotton and 20% polyester. We bought two "Queen Size" rolls to cover the foam three (yes, three) times. We were paranoid the greem foam would peek through our light fabric, so we played it safe.  
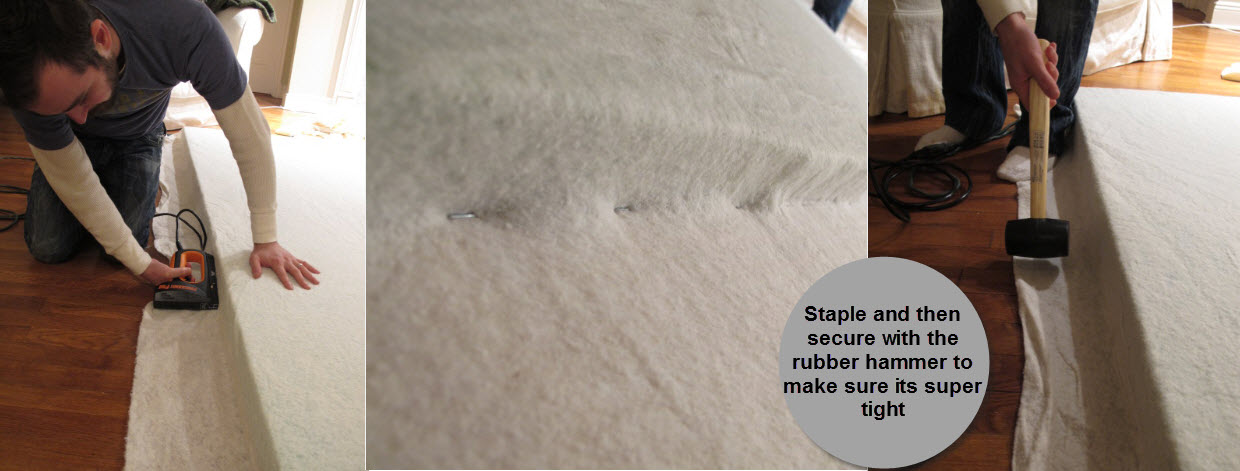
We think the trick to having the professional look when upholstering is clean straight lines from the start. We smooth out the matting several times before stapling it. We hammered loose staples to keep the smoothness going.
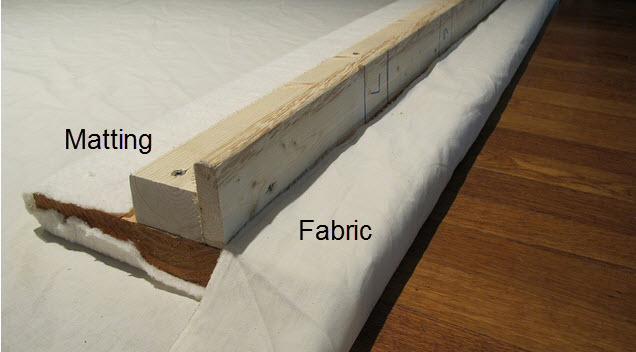
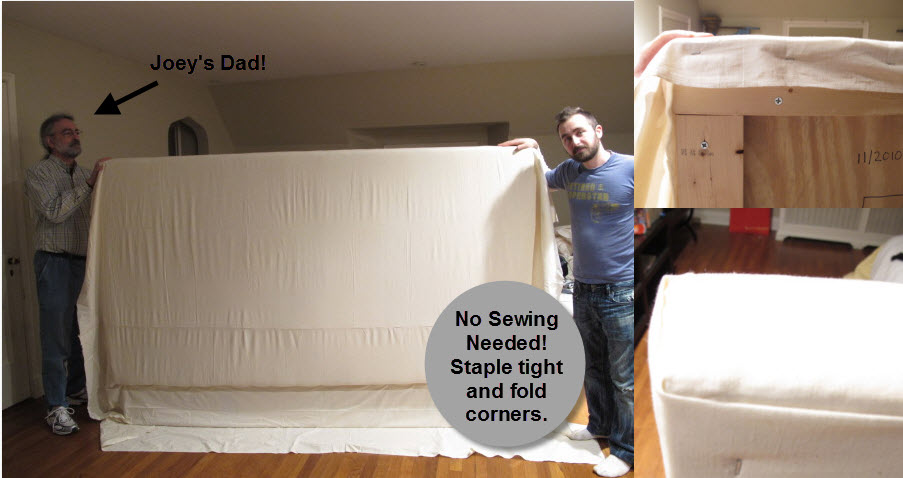
We didn't sew any of the fabric except to piece it together. Instead we stapled it tightly to the wood, and folded the corners like you see below. Easy peasy.
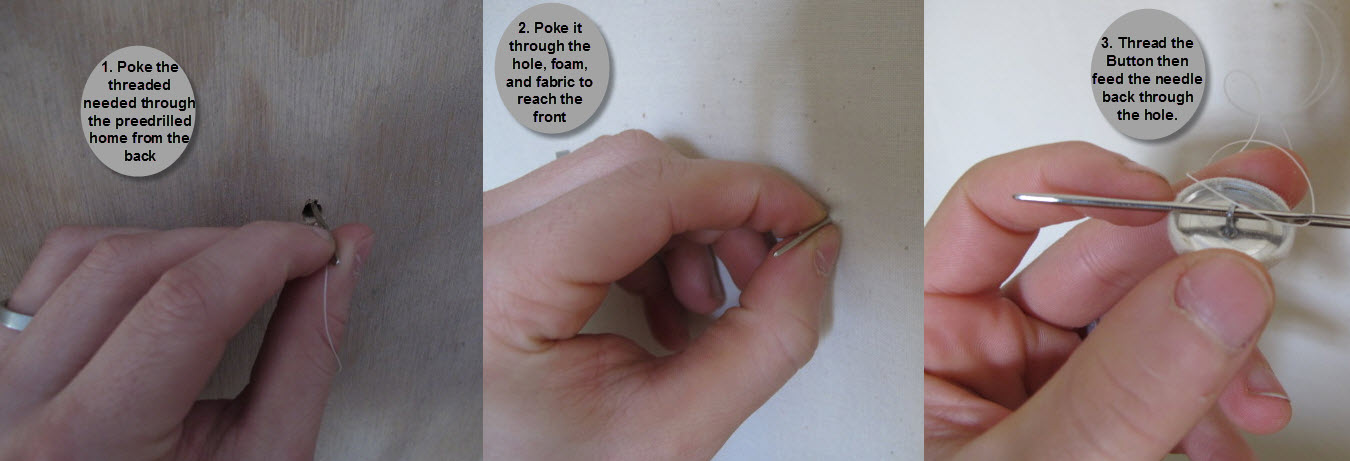
 

Tufting is what we were initially scared to do, but it wasn't so bad! Granted it's a good idea to have an extra pair (or two) of friendly hands to help and steady the bed as you work with the needle and thread to make sure the buttons are perfectly placed. We had to push the buttons against the foam really hard and secure the thread with staples from the staple gun. Want to see our genius mess?
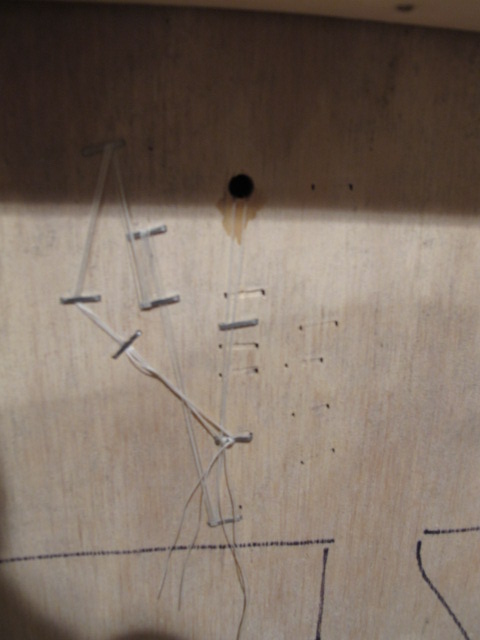
As you can see we made a bit of a crazy mess with super glue and staples to keep the upholstery thread secure in the back of the bed. Thank god this will be covered up (more on that next post!)

Speaking of our next and final bed post, check out how close we are to sharing the final product!
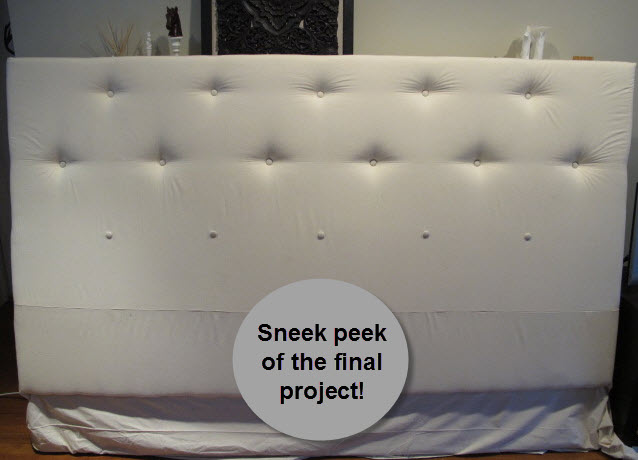
Have you made a bed? Know a great project about bed building? Please share! We are kinda obsessed with how affordable it is compared to buying. 


Lets get legal: We were one of the 10 bloggers True Value has chosen to work on The Blog Squad , and we are way excited to take on the challenge of showing you exciting DIY projects.  They have compensated us for our time and writing, and provided materials for the projects we have worked on. However, our opinions are entirely our own and we have not been paid to publish positive comments. Did we mention we are excited to show you our DIY Blog Squad Projects

Wednesday
Dec082010

A Tabletop That Won't Stop: A QUICKY BLOG SQUAD PROJECT

Hello lovlies! We have been working really hard to wrap up our wonderful run of being True Value Blog Squadders while trying to get the house in Christmas mode. We were able to hang a 4 ft lighted wreath on the turret, add some garland to the living room fire place, and do a vignette on the dining room table, and hang some wooden snowflakes. We aren't finished, hey, we don't event have a tree yet - but we are trucking along. We got to wrap up a project on our long to-do list and definitely wanted to add it to out True Value posts, so here we go!

Back in July, Joey's amazing Aunt Debbie drove all the way from Minnesota with a uhaul filled with goodies. We were so stoked to see them and get blessed with some furniture at the same time. One gift was an AMAZING table we fell in love with immediately. 

We knew exactly where it was going to live upon first site. We put it straight in the mudroom and called it a day. We found ourselves looking at it going hrrrmmmmm, "something is missing". We decided the tabletop needed to be white. We didn't just want to paint it white and leave it at that, because we know it would get scuffed up very quickly, so we decided to immortalize it. 

Now, we are going to be brutally honest before we go through the steps on how to epoxy a tabletop. We messed up. Just like on other home improvement projects, we mess up now and again. I feel bad saying we messed up, I messed it up. Big time. I thought we wouldn't be able ti fix my royal failure. 

I went through the whole process (which we will go over in a sec), and left it outside to dry. That night it rained. It was windy...and when I woke up to check out my labor I was saddened by what I found. Raindrops were sporadically placed in the hardened residue, along with leaves and bugs. It was gross. 

So, when Joey came home from work, he had an idea to fix the problem. (Now, I am telling you this upfront so you pick a smart place to epoxy your table from the start. You won't be able to move it once you pour on the solution and it's still wet.) He simply took a screwdriver and wedged it between the glassy, dry epoxy and the painted table. The epoxy came up in large chunks and it was pretty easy to resolve my major fail, minus the $20 the epoxy costs at True Value. 

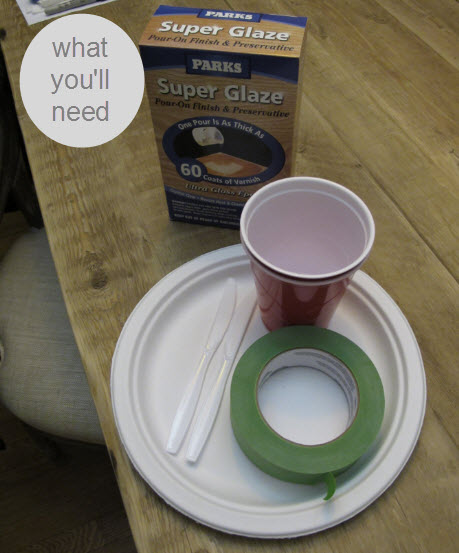
So on to the right way to amp up your tabletop! Here is what you'll need, what to do, and how to do it:

A box of Parks Super Glaze 32 fl. oz. Box $20

Painters tape (we used frogtape) $10

A blowdryer

3 plastic cups

2 plastic knives

Floor covering (to protect your lovely home)

$30-$50 total (depending on what you have on hand)

Find a flat surface to lay your table top (We recommended removing the tabletop if you can). Place down your floor covering, and make sure when you place your tabletop on top of it it is as flat as possible. 

Tape off the rim of your table and make sure to keep the tape about 1/8 inch above the actual table. This will make kind of a rim for when you pour the epoxy. 

Grab your plastic cups and knives (don't use metal!) and your box of epoxy. Fill up half your cup with the resin, and half of your other cup with the activator. Now pour both the resin and the activator in a third cup. Mix smoothly with a plastic knife until well blended. Don't over mix or you will be cursed with bubbles!

Pour this mixture in the center of your table. If you see it obviously flowing to a certain side of the table top, not is the time to fix the uneven-ness. 

Take another plastic knife and smooth out the epoxy with smooth movements from the center of the table outward. 

Now here is a little trick. once you have a nice even epoxy top, take a blow dryer and blow out all the bubbles! You can also move around the mixture a bit with the pressure from the air if you need to.


...and the hard part. Leave the room! Try to not look at the tabletop, or walk by it! You will be tempted to touch "just to see if it's dry". It's best to let it sit about 24 hours. 

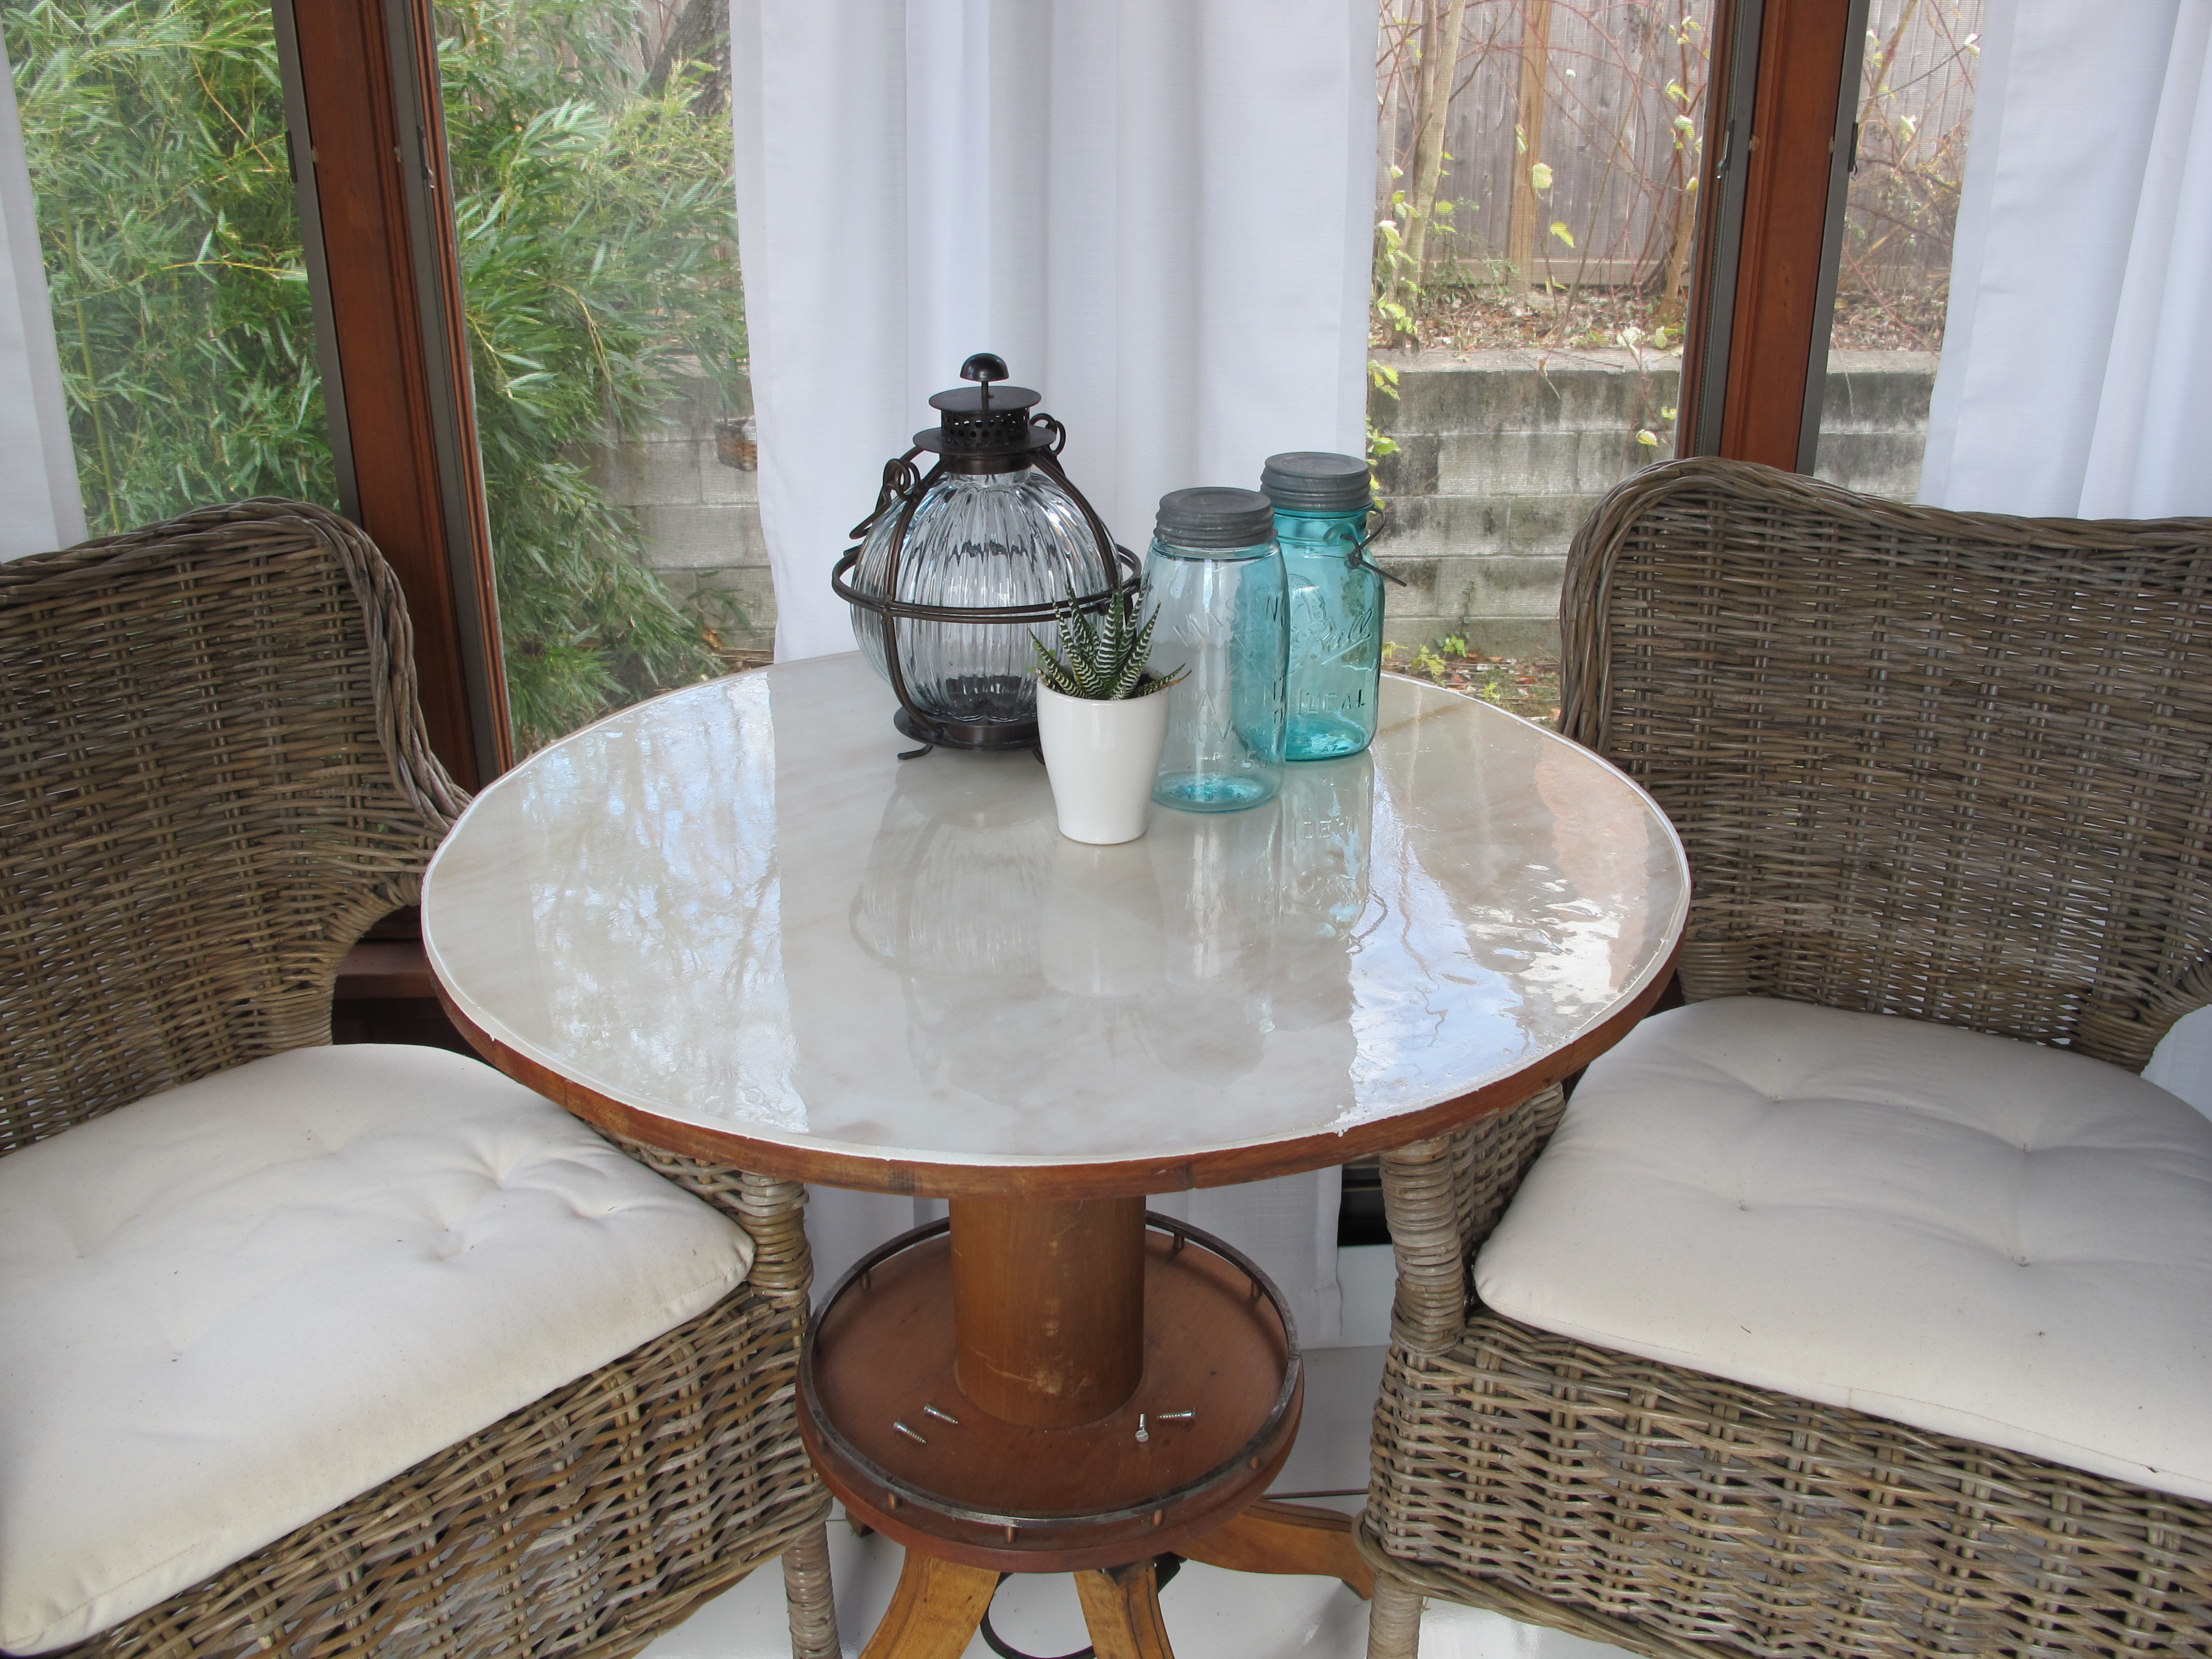
It will be easy to peel the painters tape off once it's completely dry. You can also buff out any unevenness. And there you have it. Your totally awesome tabletop that can withstand food, wine, and anything else you throw at it!

Lets get legal: We were one of the 10 bloggers True Value has chosen to work on The Blog Squad , and we are way excited to take on the challenge of showing you exciting DIY projects.  They have compensated us for our time and writing, and provided materials for the projects we have worked on. However, our opinions are entirely our own and we have not been paid to publish positive comments. Did we mention we are excited to show you our DIY Blog Squad Projects?

Monday
Nov292010

TRUE VALUE BLOG SQUAD CHALLANGE - A BED FIT FOR A KING! PART Duce

We hope everyone had an amazing and yummy Thanksgiving! We had a blast! As some of you know, I am a vegetarian, and Joey is a bona-fide meat eater. So I thought it was sweet when he helped me make a vegan "turkey" out of wheat gluten! It turned out really great, and everyone was happy with "both birds". More importantly, we have been moving along with our True Value Blog Squad projects as well as getting the house Christmas ready!

We have been getting a lot of requests for the next steps with the "making of the bed" so we thought we would push this post in front of others we had planned out to get you all rolling on making a bed of your own!

So if you haven't been keeping up with the bed making progress, take a peek at the last post to get you up to date. 

And now, we officially begin part two!

Your True Value Shopping List will include:

for the legs:

Six "feet" $6-$8 each

An electric screwdriver, we like Ryobi

The left over 2X12 wood you already used for the sides

Wood Screws $4

Stain, we like Minwax gel stain, A LOT $15

for upholstering the sides of the bed: 

Staple gun $28

Plenty of sharpies and pencils

Scissors

spray glue (optional, but you will need it for the headboard)

Don't forget:

Fabric and matting

After you collect the few things you need to make this awesome DIY bed, make sure to review your plan. Make sure the fabric looks good with the stain you picked out, and you KNOW the shape of the headboard you are going to use, etc. Having a plan upfront is key to a successful bed. 

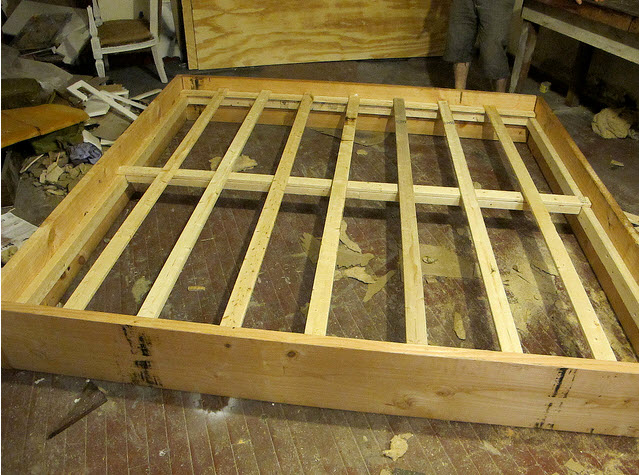
We left off here last time:

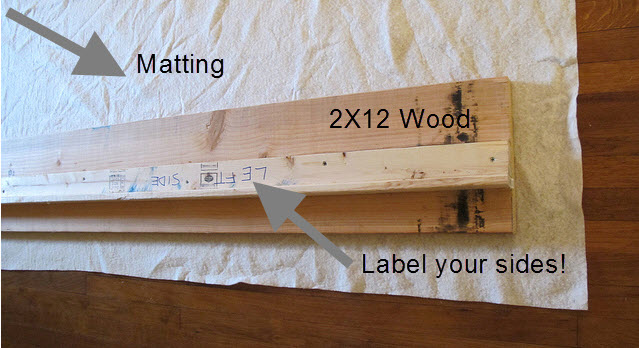
After you get to this point, dismantle the bed. Yes, we know you are probably asking "Why on earth would I undo all that hard work?!" Well, there are a few reasons. Reason one is because building it in your bedroom will be much easier than getting it though a door way. Or in our case, up two flights of stairs. Number two, it's much easier to upholster the sides one by one. Label your sides! Decide now what side you want to be what. 

You will not have to finish this wood in anyway, unless of course you do not plan on upholstering your bed. If that's the case, finish, paint or stain now. If that's not the case, just finish the feet.

We used a dark Minwax gel stain. We really love the gen stain and totally suggest trying it out if you never have. We would gel stain everything in our house if we could. It's just so painless and rewarding. 

After the six legs are stained and let dry for 24 hours, we used the left of scrap wood from the 2X12 pieces we used to make the frame to give the legs height and have the feet double as braces for extra support. We cut 2 large triangles and 1 small triangle, everything was connected with 2 1/2 in. wood screws. Set these aside for now.

Now that the frame is dismantled, you can upholster the sides with the fabric of your choice. We selected 1940 German grain sack. We bought sixteen yards in case we mess up, and to make pillow shams. Cut your batting about 6 inched extra on each side of your 2X12 wood.

The reason you want to use matting before you staple your fabric to the wood is to add a uniformed smoothness as well as an extra layer of cozy. Simple staple with a staple gun tightly around the wood. Then do the same with the fabric.

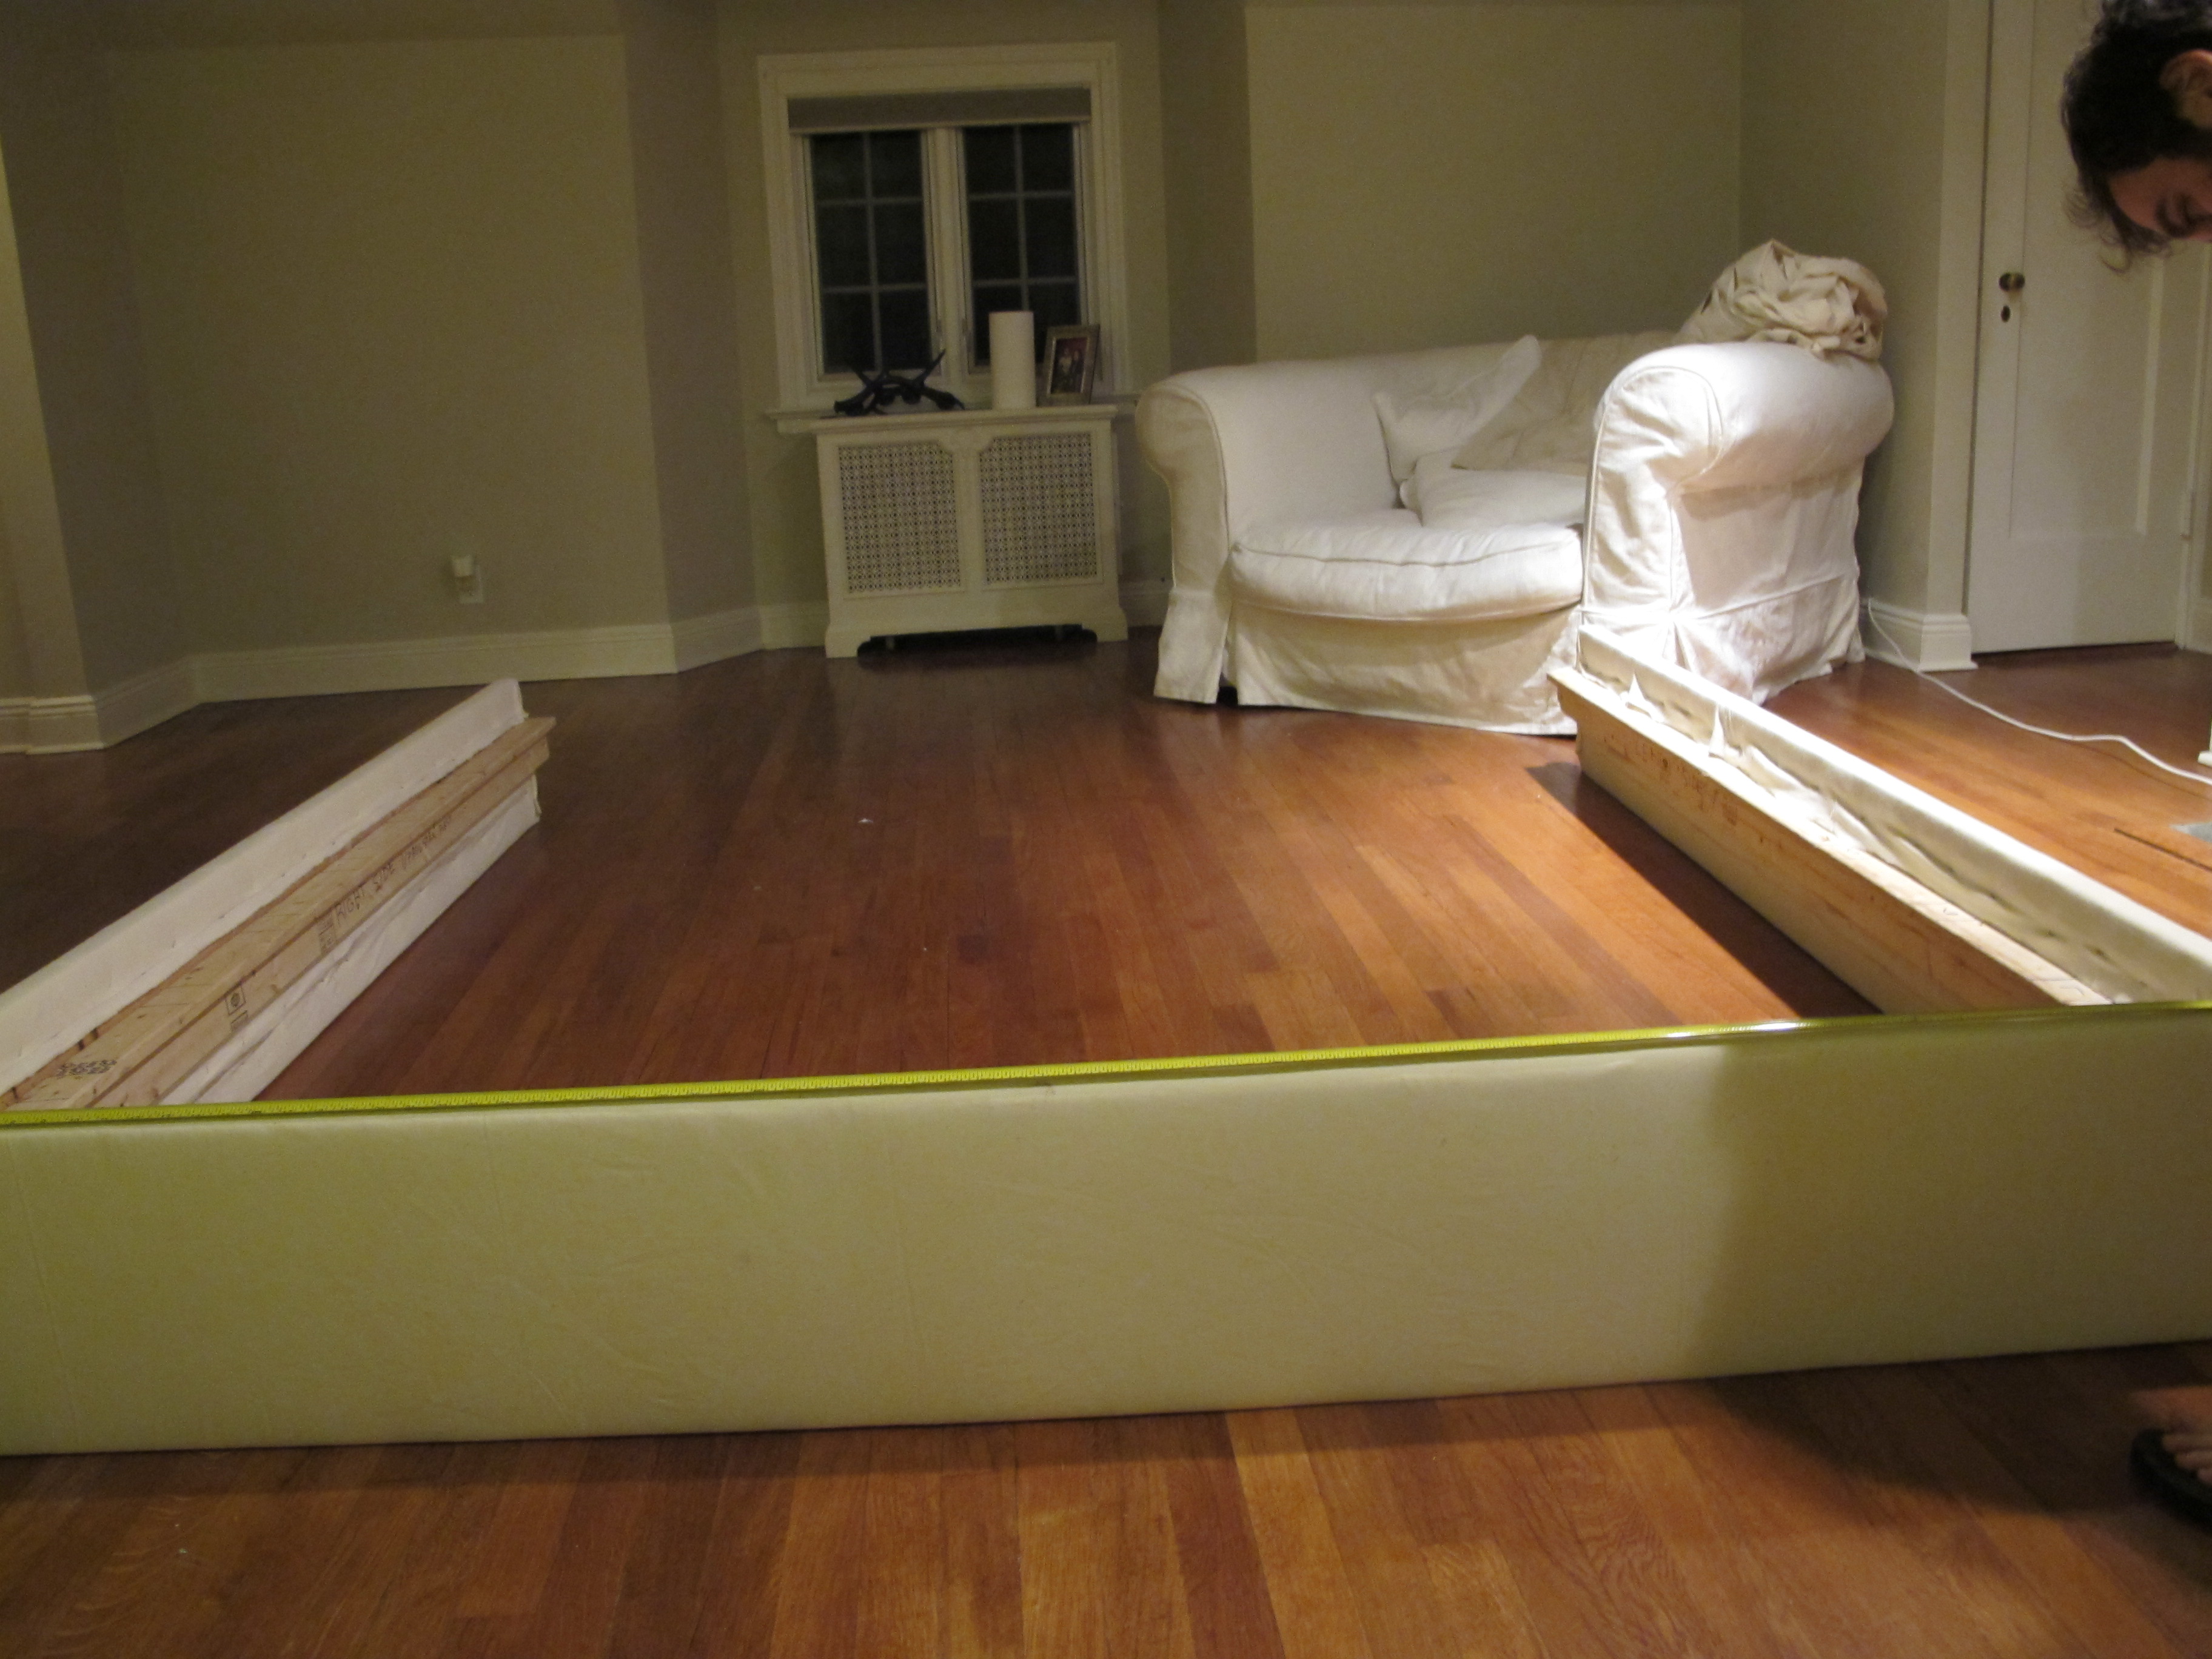
Repeat for the left side, right side and food of the bed. Take a break! This is a lot of hard work. All the fabric must be stretched tight in order for it to look its  best. It's good to do with a friend to help out. When you have completed these steps, you should wind up with this:

It's kinda looking like a bed, eh?! This is the part where is starts to get exciting! Can't wait to show you what's next!

LETS GET LEGAL: WE WERE ONE OF THE 10 BLOGGERS TRUE VALUE HAS CHOSEN TO WORK ON THE BLOG SQUAD , AND WE ARE WAY EXCITED TO TAKE ON THE CHALLENGE OF SHOWING YOU EXCITING DIY PROJECTS.  THEY HAVE COMPENSATED US FOR OUR TIME AND WRITING, AND PROVIDED MATERIALS FOR THE PROJECTS WE HAVE WORKED ON. HOWEVER, OUR OPINIONS ARE ENTIRELY OUR OWN AND WE HAVE NOT BEEN PAID TO PUBLISH POSITIVE COMMENTS. DID WE MENTION WE ARE EXCITED TO SHOW YOU OUR DIY BLOG SQUAD PROJECTS?