Related Posts Plugin for WordPress, Blogger...

                   Follow Me on Pinterest


photo cards


OpenSky

Freckled Nest - Design by Kelly Ann

Home & Garden Blogs
BLOG DIRECTORY
Online Marketing
Home Improvement Blogs - BlogCatalog Blog Directory

Entries in True Value Blog Squad (16)

Monday
Nov222010

True Value Blog Squad Challange - A Bed Fit for a King! Part 1 

So....we have been working on a new bed now for a while. When we took on the  DIY Blog Squad and the challenge to create new and exciting DIY projects, we committed to challenge ourselves - and we sure did with this one! The bed has been an exciting challenge to say the least! We started off looking to buy a bed, and couldn't find exactly what we wanted. After much research and inspecting the hundreds of beds we went to look at, Joey announced "I can build this!"......and the mission began!
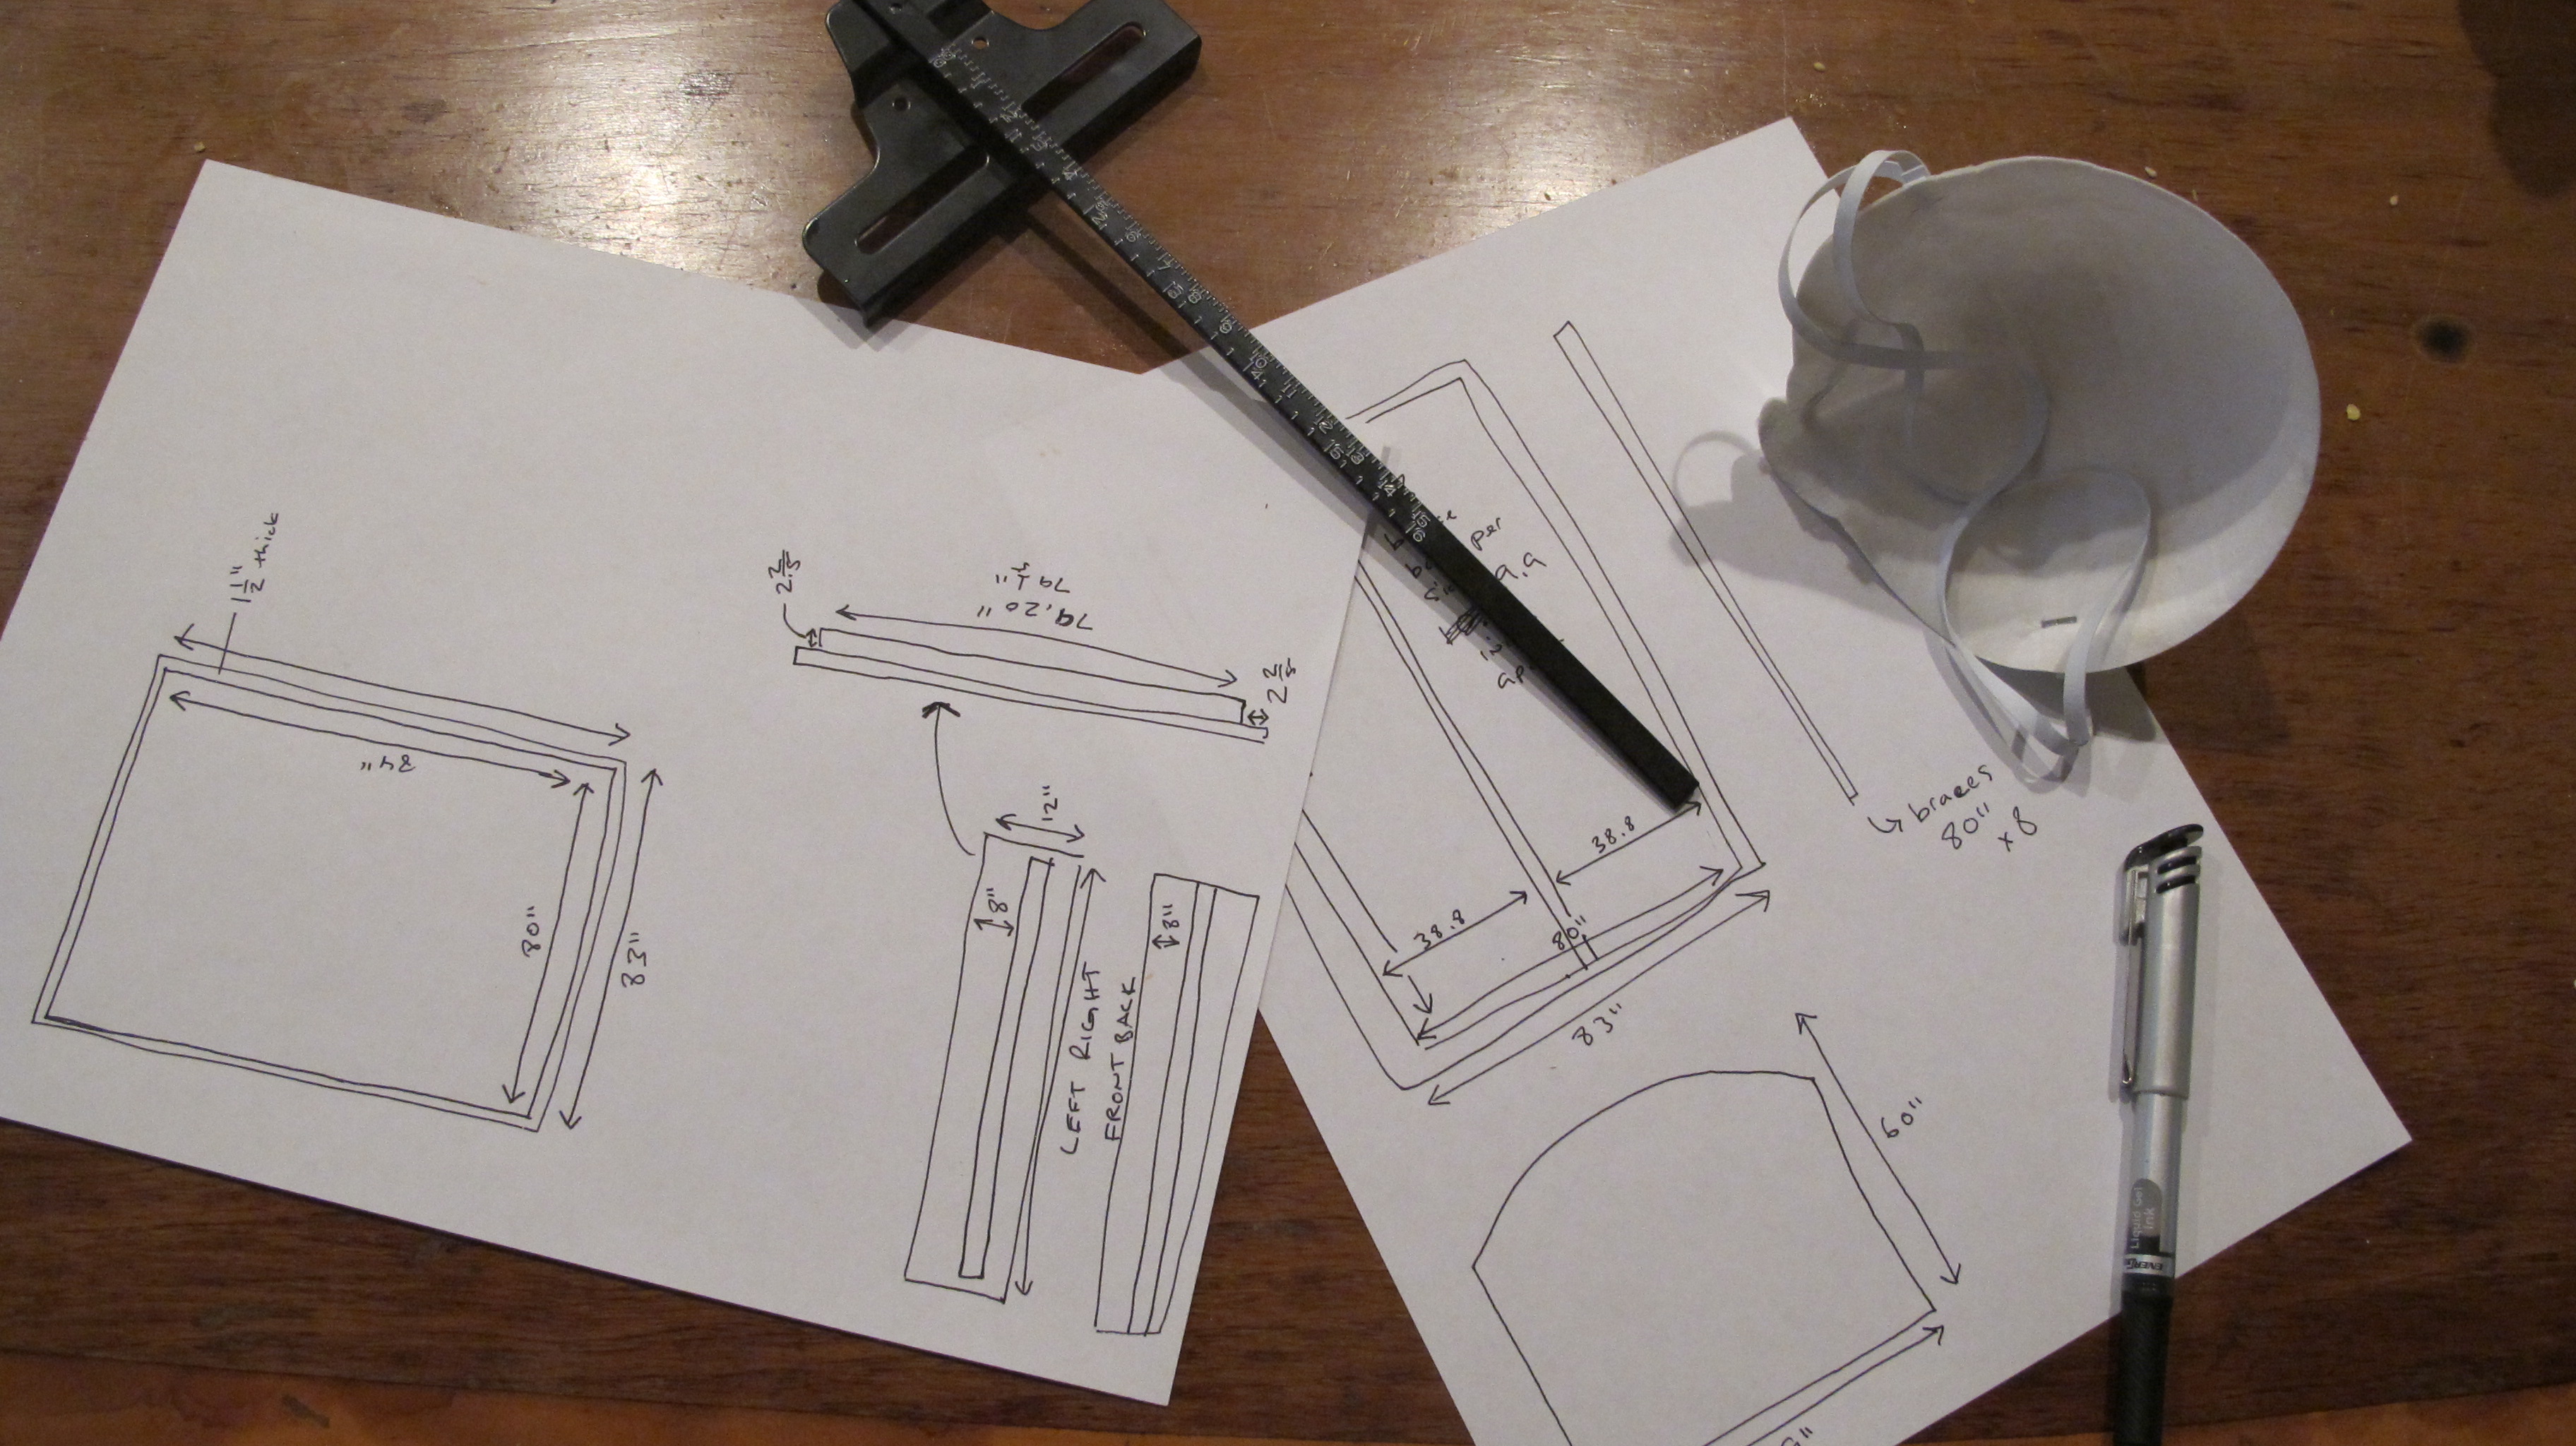
After drafting up some plans, we headed over to the True Value Lumber Yard in the Bronx and picked up some wood. It was a bit intimidating coming home with just a few pieces of wood and thinking we could whip it up into an actual bed. A bed we would sleep in that wouldn't come crashing to the floor in the middle of the night!
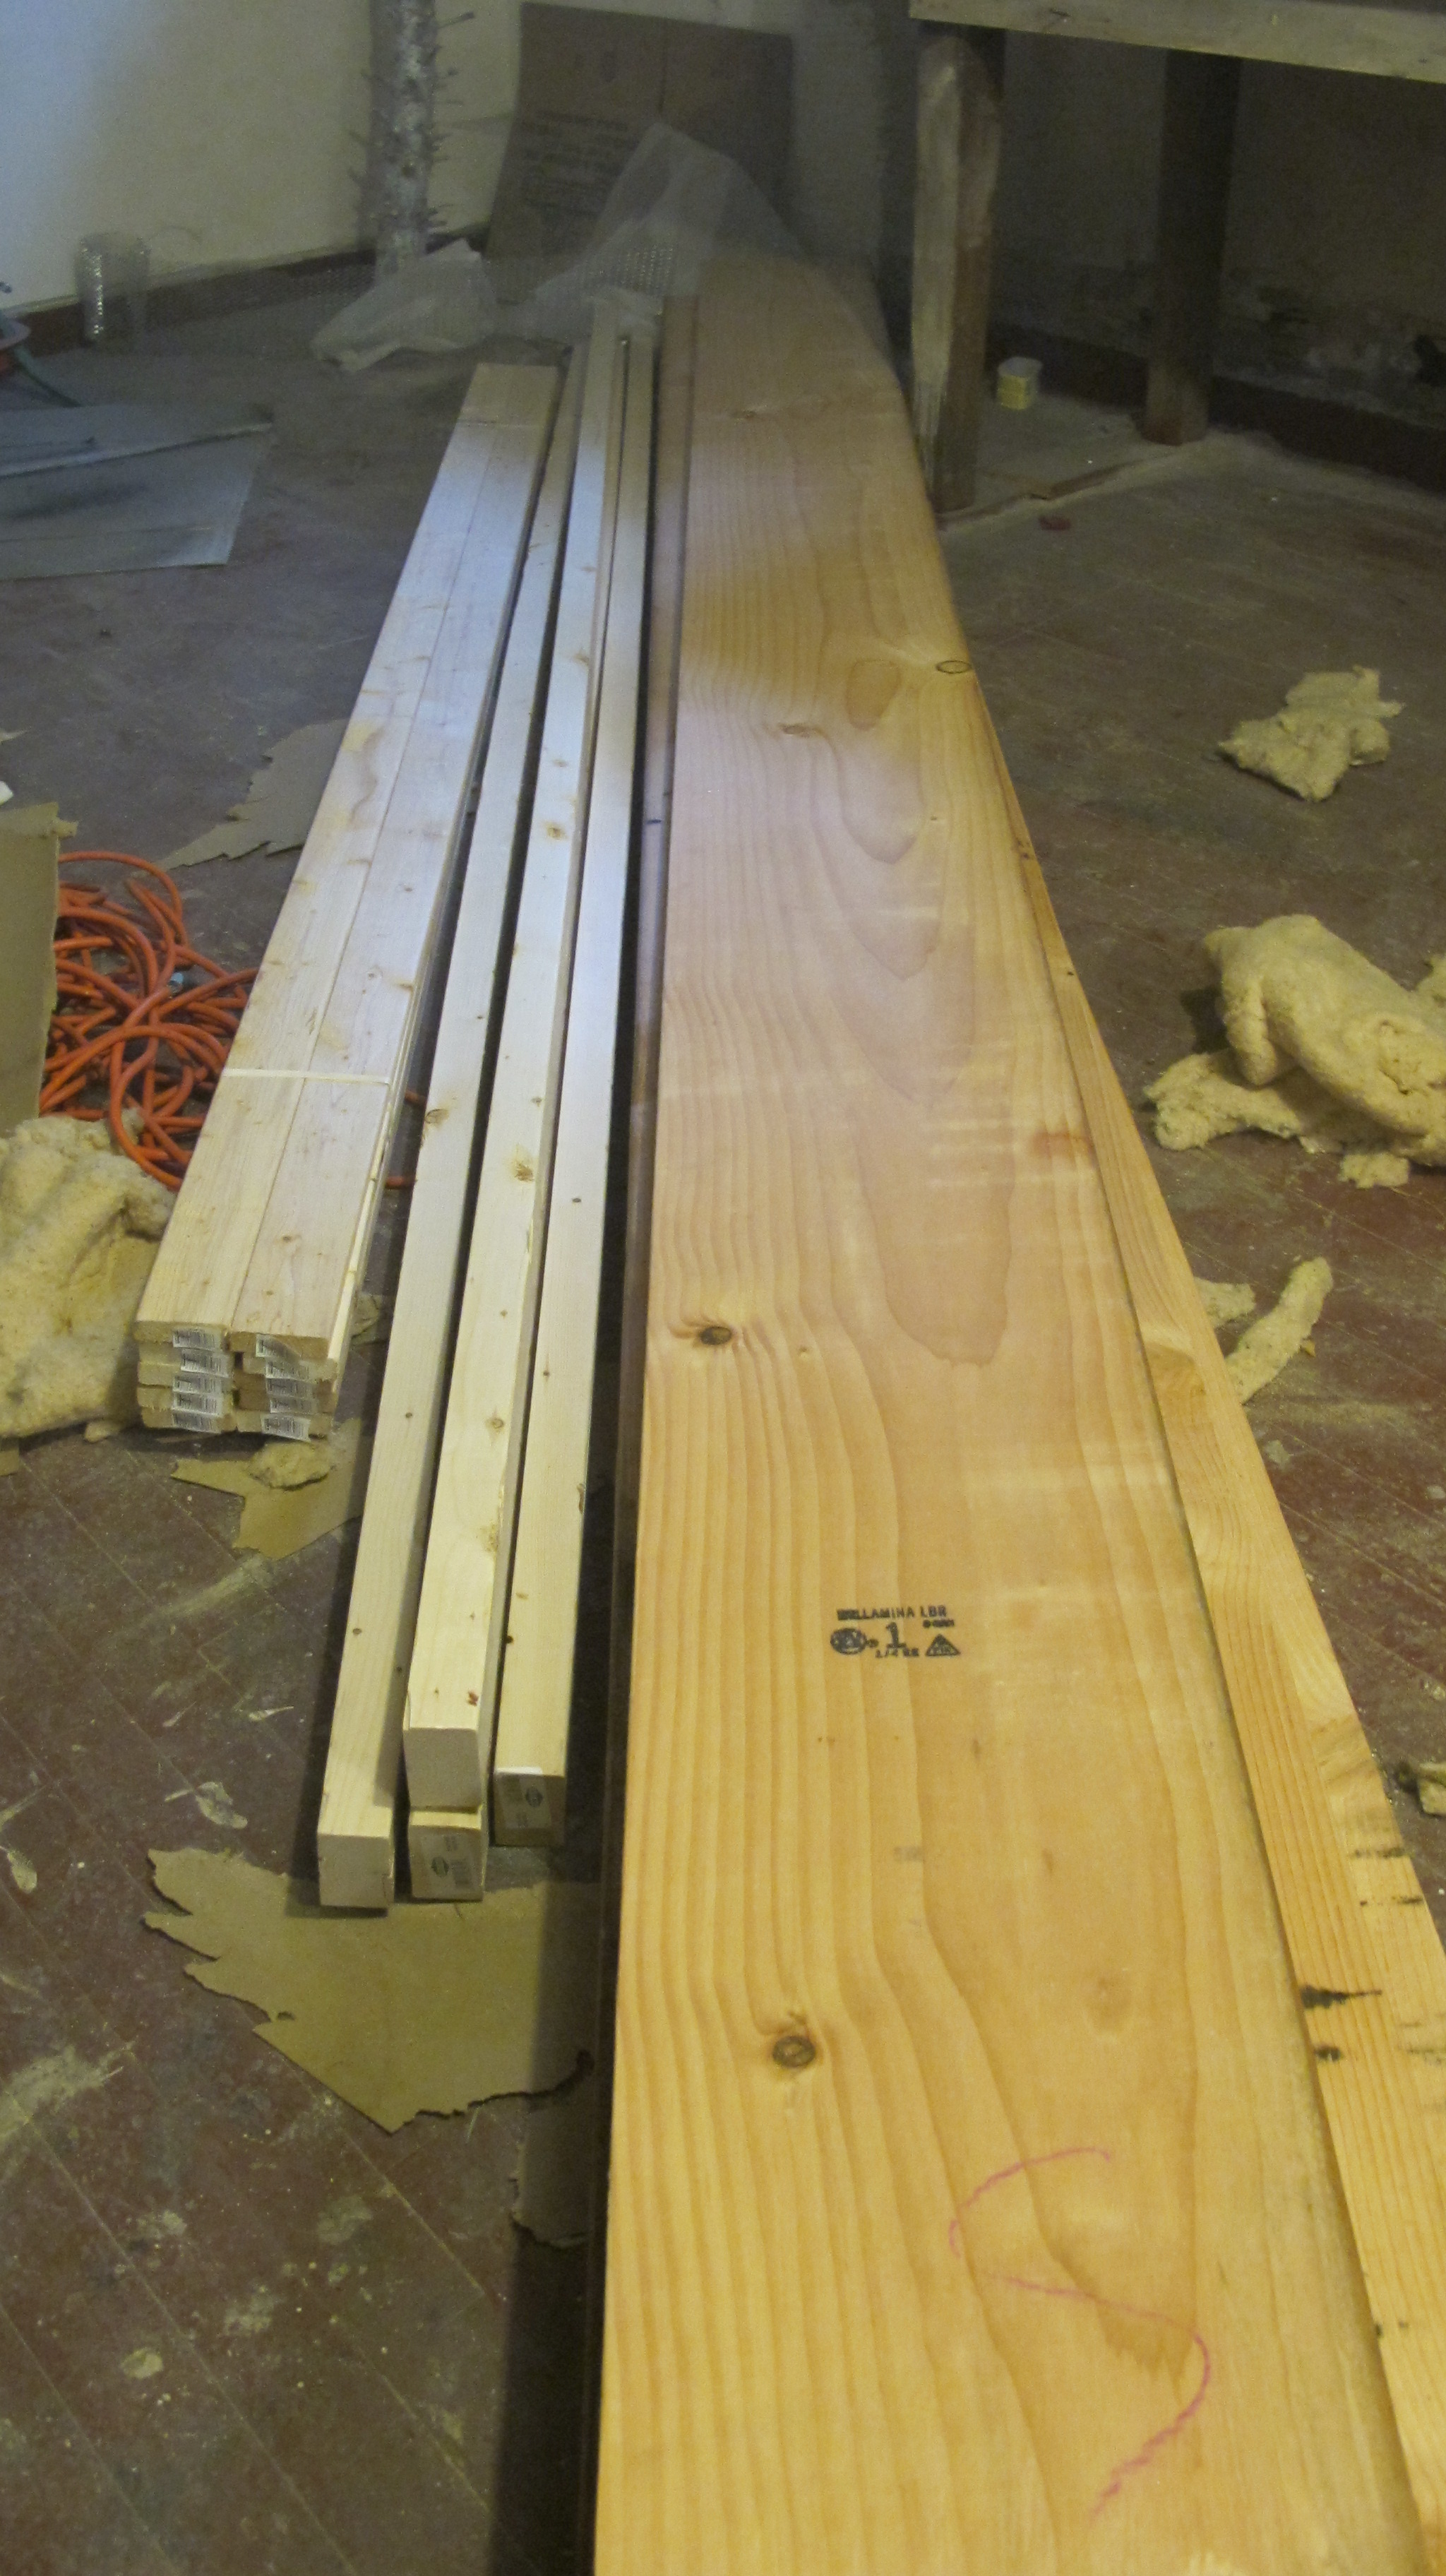
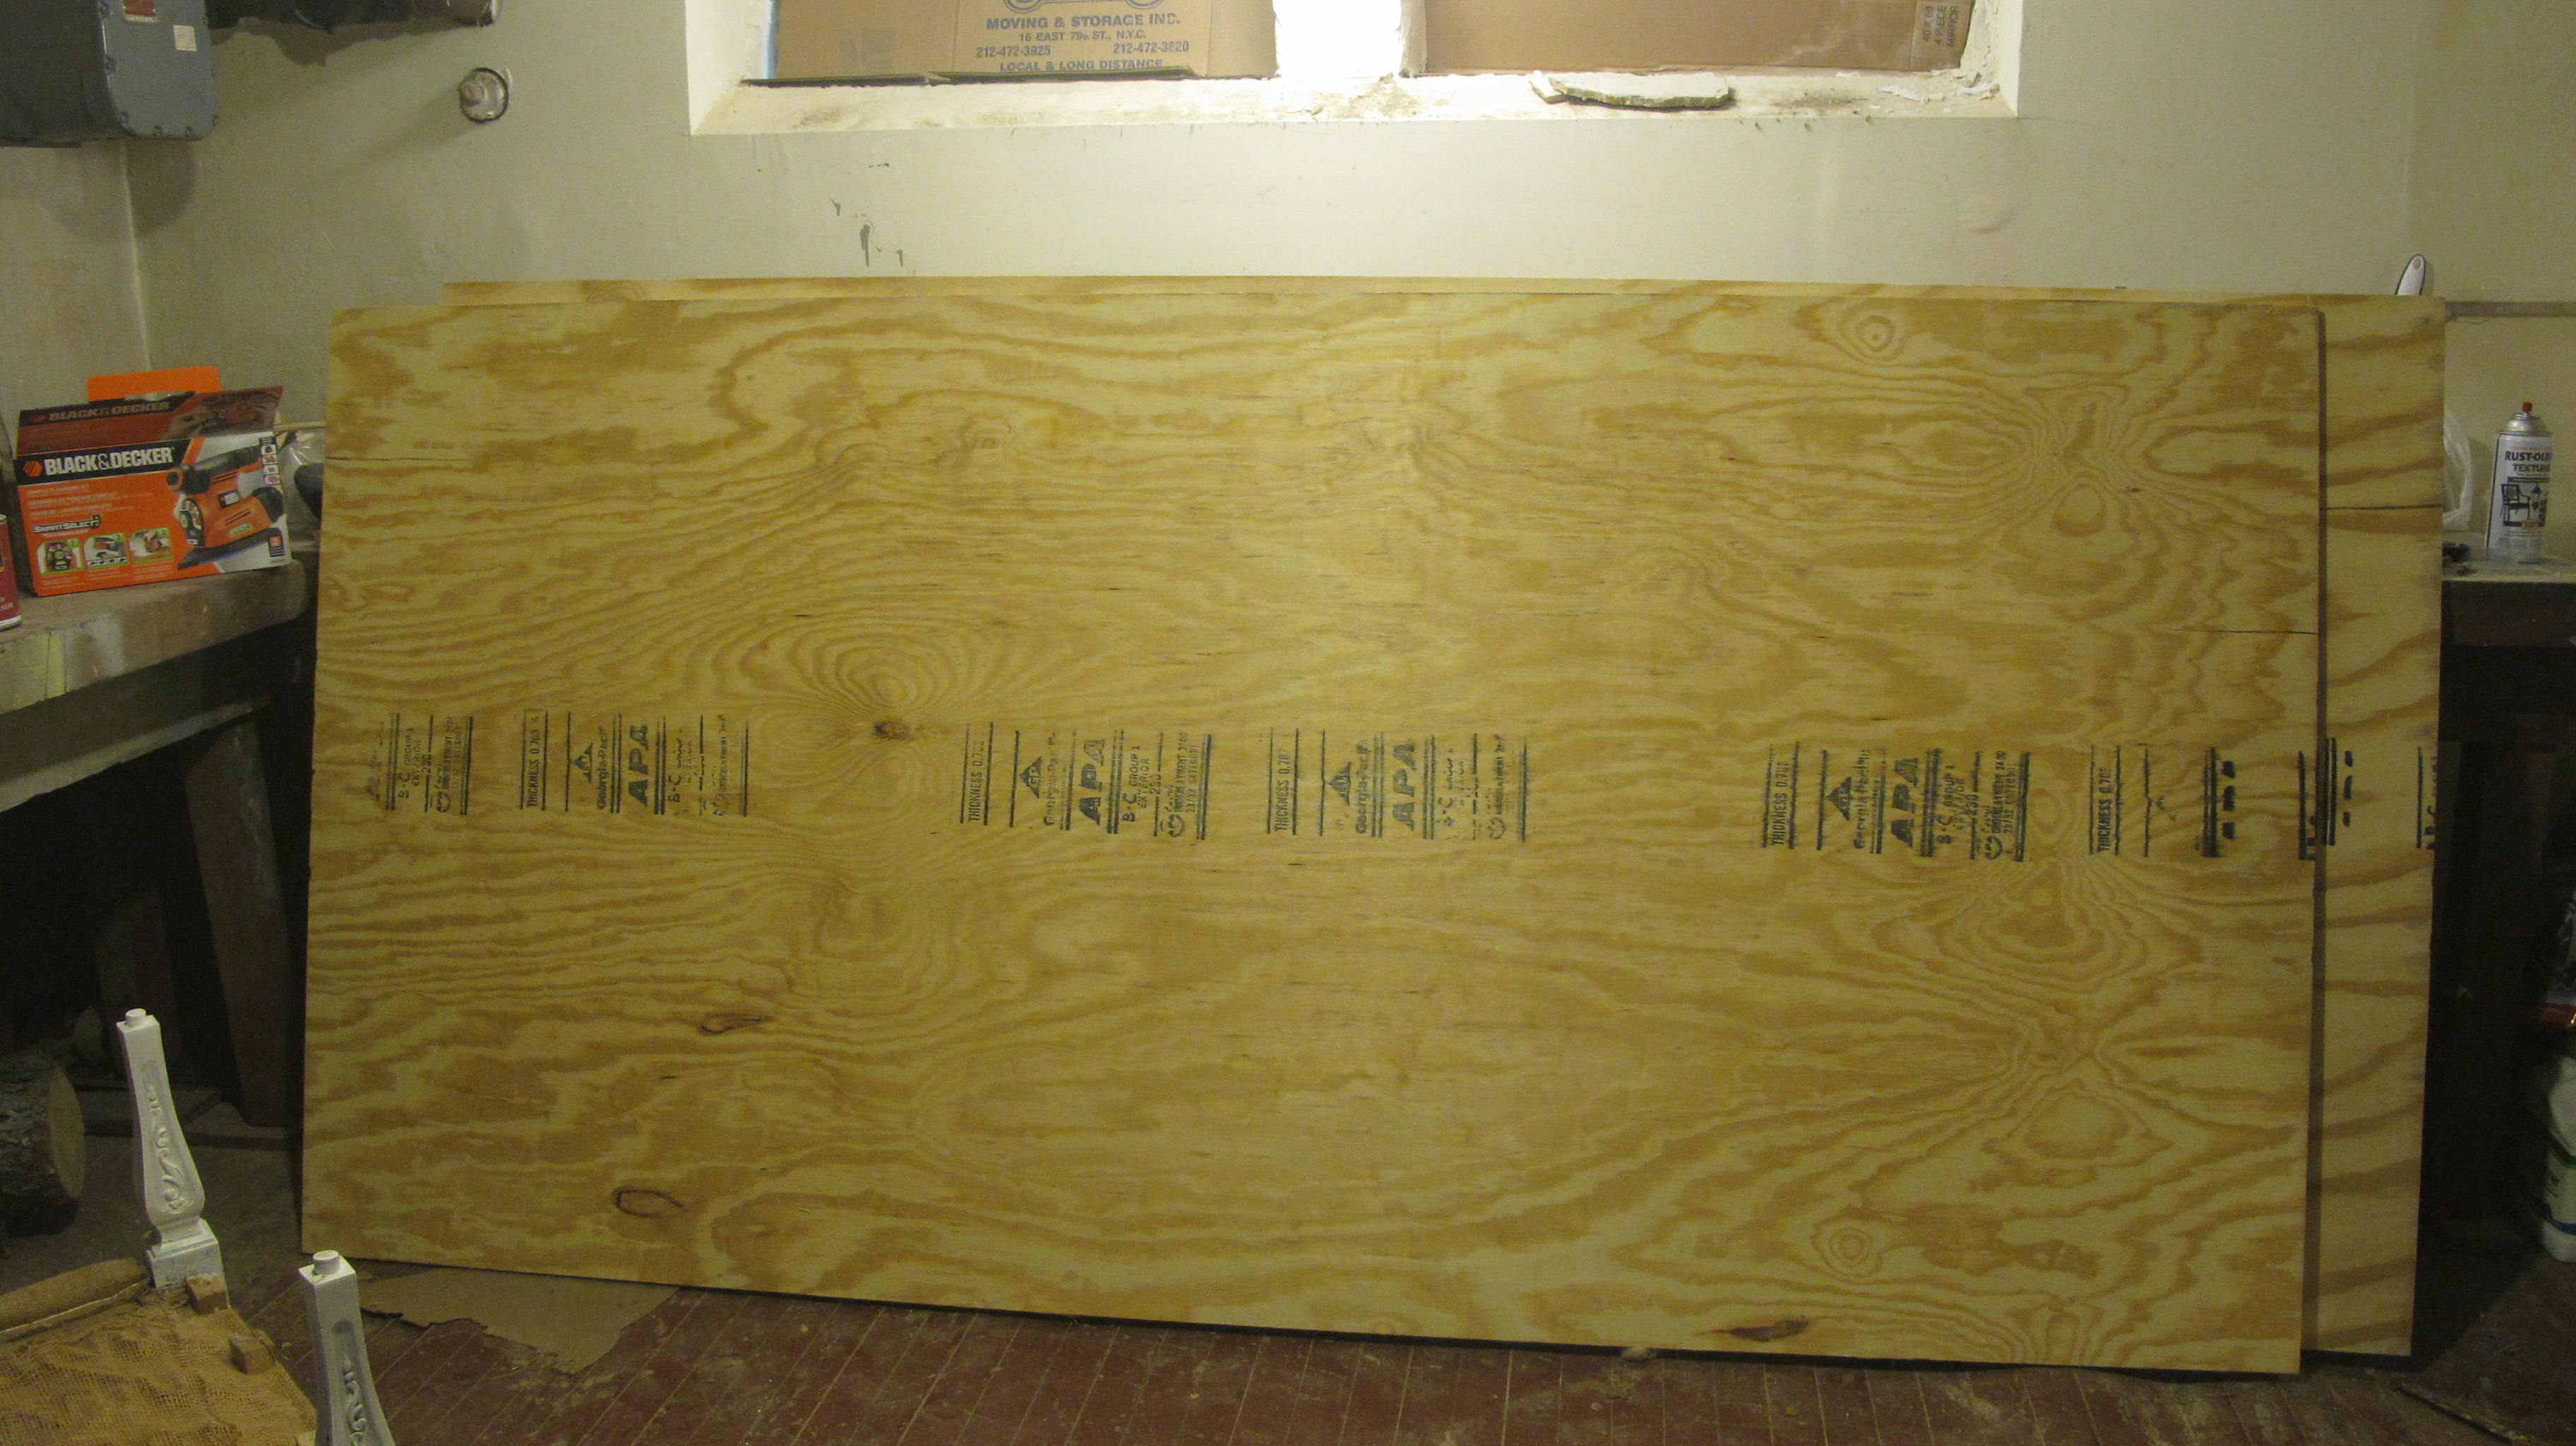
You can see from the photos how intimidating this was! But we measured a thousand times, and were convinced we can make magic!. The first step we took was creating the bedframe. The actual piece which would hold the boxspring and mattress. All of the details we will walk through are that of a king size bed.

Here is what we did, how we did it and what it cost:

80"X83" is the frame of the box spring: 2"X12" (at about 8 feet long) wood is what we purchased 1 piece for the foot of the bed and 2 piece for the sides.

For stability of the boxspring we bought 2"X4" at about 8 feet long to frame the inside of the 2"X12" then laid the 1"X4" over the 2"X"4 like this:
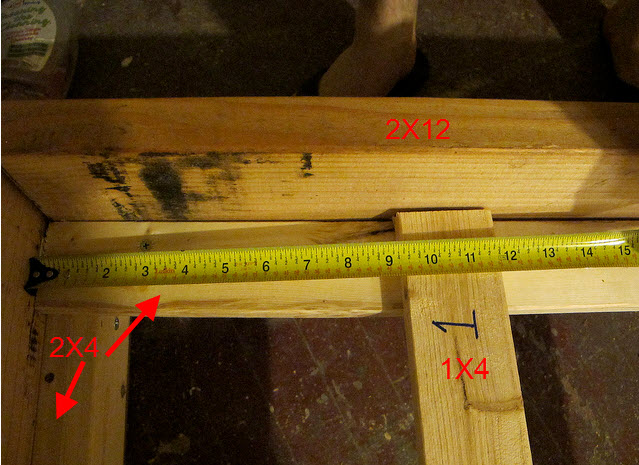
Even though this part is the part no one will see, it is super important to built this nice and sturdy! We used wood screws to attached everything with a drill. At this point make triangle supports - but do NOT attach them yet. Right now we are just laying out, measuring, and using screws to assemble to ensure perfection. Here is what you want to accomplish at this point:
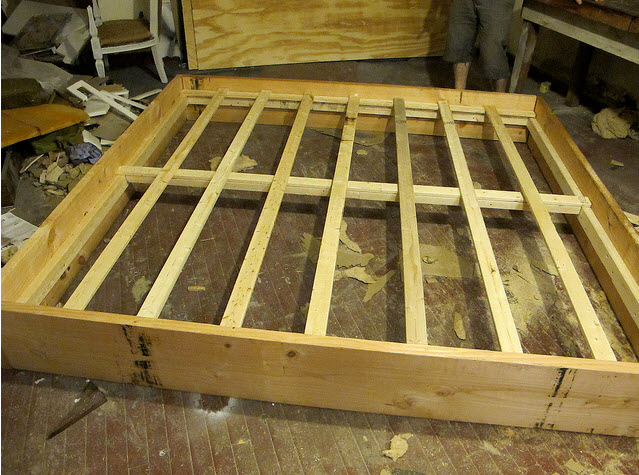
The 2"X12" wood will show when we are done, but not how you see it here. We decided to upholster the bed and headboard. At this point we are focusing on the stability of the bedframe. Is it secure?

So there you go! Step numbro uno! Now the wood looks like something! Next step is to buy the wood for the headboard. We purchased two 8ft X 4ft (3/4 inch thick) plywood. Now is a good time to pick out the fabric you are going to use to upholster the bed along with a nice thick foam and batting. Also pick up some spray glue and upholstery grade thread and needles.

So once again, your True Value Shopping list is:

2"X12" wood X 3 at about 8 ft long (you will have to cut)

2"X4" wood  X 3 at about 8 ft long (you won't need all of it, you will have to cut to size of the 2"X12")

1"X4" wood bundle of 8 8 ft long (we didn't use them all)

Wood Screws 1 Box of each:  2 1/2 in and 1 1/12 in

2 8ft X 4ft (3/4 inch thick) plywood

We also suggest: tape measurer, level, thick pencils and sharpies to mark wood

Lets get legal: We were one of the 10 bloggers True Value has chosen to work on The Blog Squad , and we are way excited to take on the challenge of showing you exciting DIY projects.  They have compensated us for our time and writing, and provided materials for the projects we have worked on. However, our opinions are entirely our own and we have not been paid to publish positive comments. Did we mention we are excited to show you our DIY Blog Squad Projects?

Wednesday
Nov172010

Fireplace Facelift: A (semi) Quicky blog Squad Project

Good morning, friends! We have a few fireplaces in our home. Well, more like four. Ok, wait, three. See, the one is the basement is for "show". Kinda weird, right? A faux basement fireplace....wonder what they were thinking when that happened. So the three real fireplace are in the living room, master bedroom, and my office. We were very excited about all the fire places when we moved in. We actively use the one in the master suite, and the one in the living room. We have plans for the living room one, kinda massive plans, but the rest will pretty much stay "as is"...almost. We liked the brick texture in the master bedroom, however the "red brick-ness" didn't quite fit into out master plans. So we decided to give her a 'lil face lift. First we thought painting it white would be good enough. Fail. After a few days I hated it.  Take a look.

So we figured out how to "rectify" the situation, and wound up with something we seriously love and absolutely fits in with what we are trying to do. Painting a brick fireplace is kind of scary. We aren't going to lie. It's a little permanent to be honest. But we are going to show you what to do, how to do it, and what it costs.

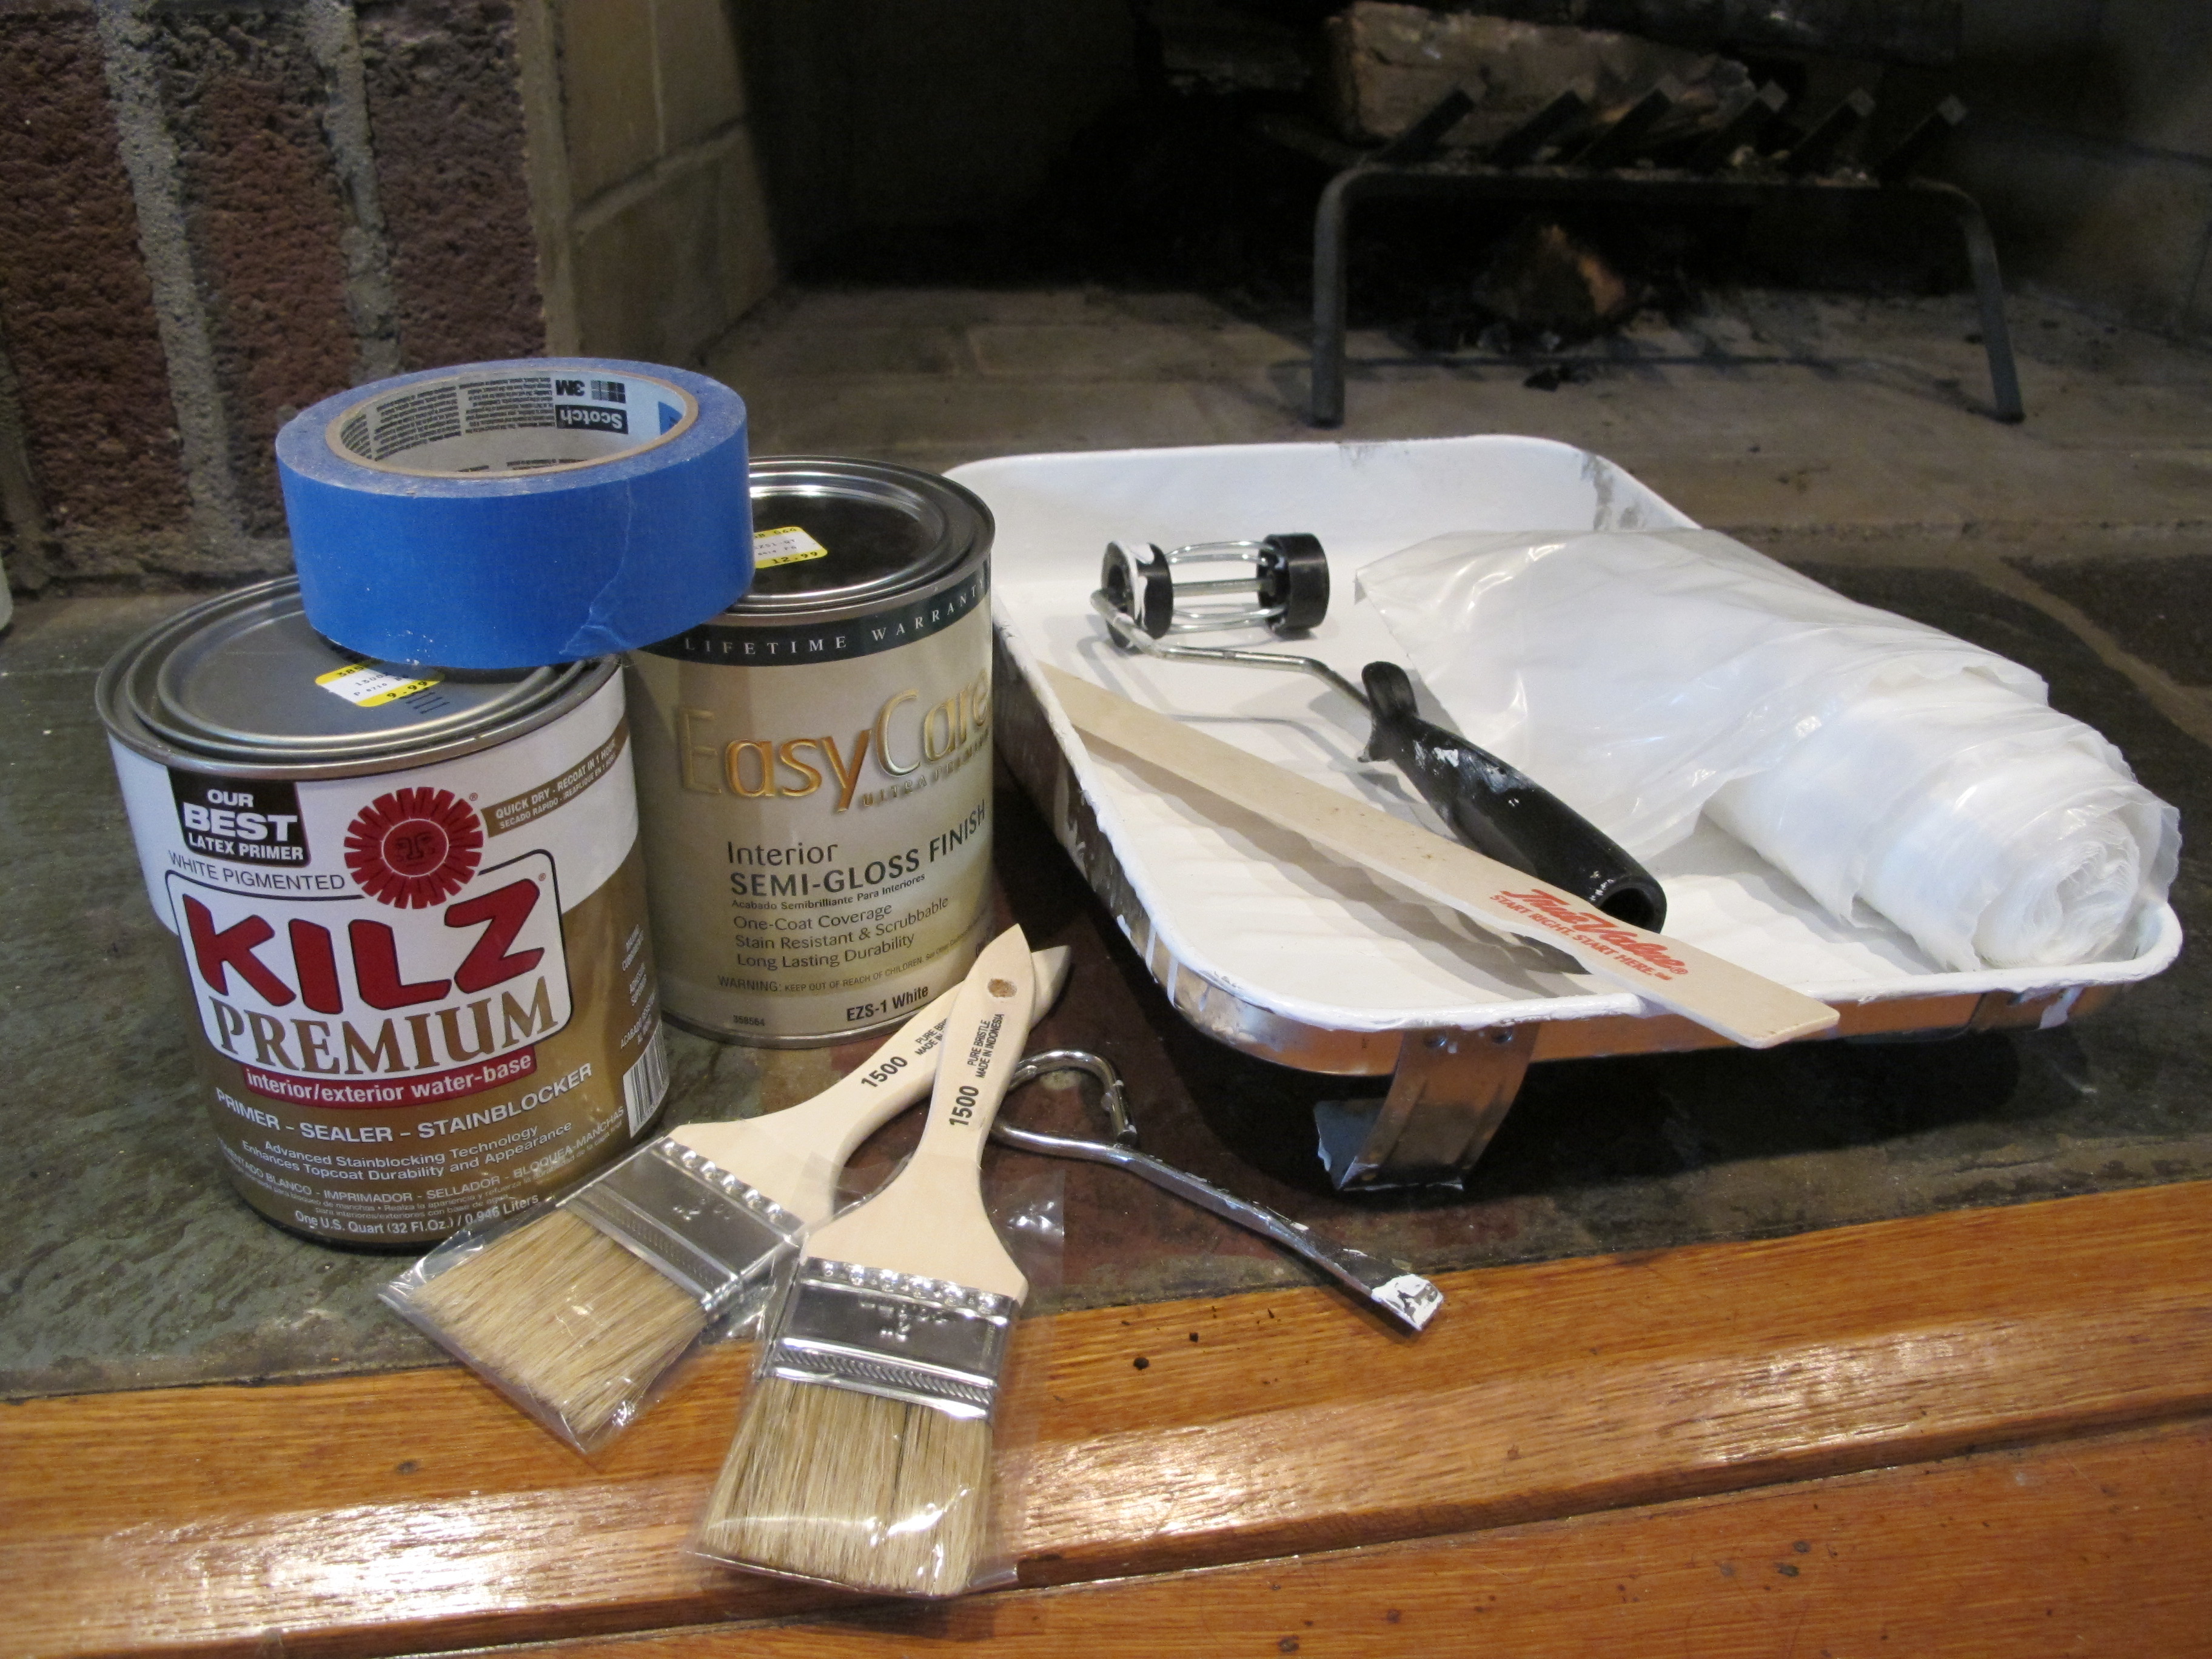
We started with the following:

1-2 paintbrushes - $2

Kilz sealer - $6

Easy Care semi Gloss in white- $8

Plastic tarp - $3

Paint pan - $2

Mini Roller - $3

Total for round: $24

We got all of our items at True Value, as well as advice on which brands would work best for this project. The fine people at True Value warned us that if we were going to paint brick, it was going to stick. They also advised us that the brands above were safe to paint the outside of a fireplace.

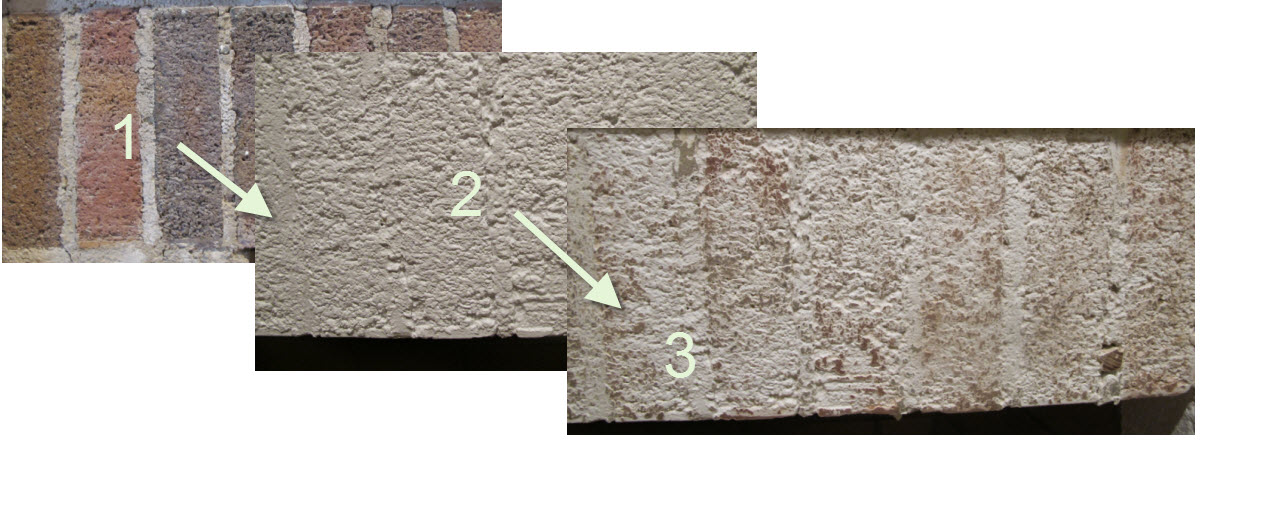
As you can see above, step 1 is pretty simple. Brush off any debris, and clean the area before priming. Paint the fireplace and let it dry for at least 24 hours. We believe in taping stuff off and suggest you do too if you like clean lines and ensuring not to paint the mantel or wall. 


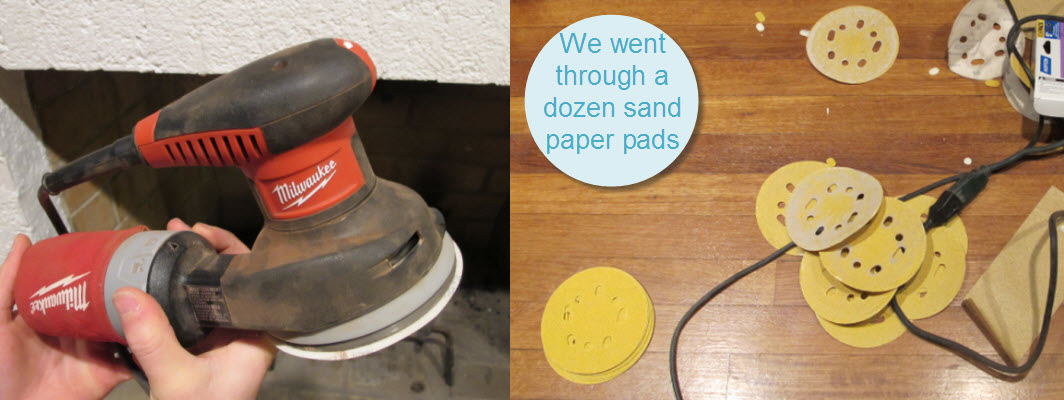
So you can see getting from step one to two is pretty easy. Getting from step two to three takes a little more work, but is so worth it. Joey figured out about half way through that spraying the painted brick with water helped the process of sanding. We tried a blow dryer before that, and it didn't help much. We used a Milwaukee hand sander, and a dozen rough 60 grain pads to "rough her up" once it was completely dry. 

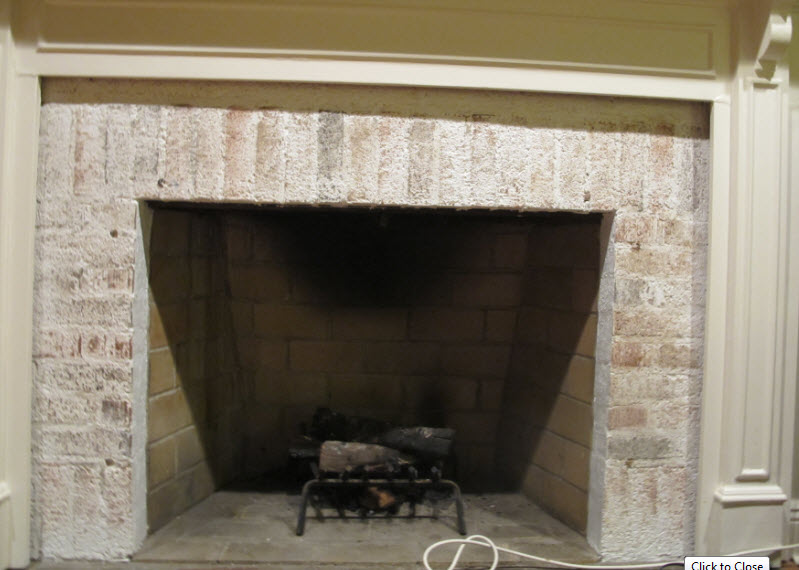
It took about a solid hour to buff through the perfectly painted white paint, and transform it into more of an aged and weathered look. But here is our shiny new fireplace we love!

We have some styling to do around the fireplace, but now we are totally happy with the results of it's new look. We encourage you to not be scared and go for it. It was really simple. The hardest part is making the decision! Once you do, stop by your True Value and ask a friendly face to walk you through the process and you'll have a cheap and quick way to update your fireplace too.

Lets get legal: We were one of the 10 bloggers True Value has chosen to work on The Blog Squad , and we are way excited to take on the challenge of showing you exciting DIY projects.  They have compensated us for our time and writing, and provided materials for the projects we have worked on. However, our opinions are entirely our own and we have not been paid to publish positive comments. Did we mention we are excited to show you our DIY Blog Squad Projects?


Wednesday
Oct272010

Treat yourself to $500 this Halloween! + 5 Winter Tips

Win one of four grand-prize $500 shopping sprees at your local True Value or one of eight weekly drawings for a $50 shopping sprees!

All entrants need to do is text SWEEPS to 30364 by October 31st for a chance to win! Once signed up, you'll receive a couple texts a month with specials/deals and sales information from True Value.

May we suggest some winter prep with your winnings? Here is a list free and cheap tricks to get you in gear for the cozy & cuddly months ahead!

MAHAH Five Ways to prep for Winter, on the cheap!

#1 A Window Insulation Kit:

A DIY project, that wont take long at all. How it works is the film adds an extra layer to keep the cold out and the warm in and vice versa. There are many brand name kits available, and the price is usually under $20 a kit (which covers 1-5 windows). Additional tools needed will most likely involve a hairdryer and a friend to help you out. With these few items you can get a transparent, shrink to fit, professional look in just a few hours.

Though a little investment is involved to get these up and rolling, it is said to expect up to $500 in saving a year in your heating bill. We learned our lesson last year ($1,500/mo heating bill anyone?!), and stocked up on these bad boys to save this year. 


#2 Check for air leaks: 

You may remember the post we made about the top 10 things to check when purchasing a home, this was on the list! If you were already a home owner, or didn't get to check, now it the time. Some caulking, tightening up screws on old windows, and repairing doors is best to do before Winter starts. Drafts can come from all sides of a window and door, so check them out! Many stores sell those under the door things, you slide in and out. This is by no means a permanent fix, but a temporary cheap solution. 

#3 Make sure your chimney is CLEAN!

True Value, and most hardware stores have creosote logs which you can burn before you start using your chimney. It's recommended to burn one log each season. It can be dangerous to not clear out your chute annually, so we highly recommend this cheap practice to keep you and your home safe!

#4 Designate an area in your entryway for your shoes:

From wood to carpet and everything in between, Winter can take a real beating on your floors. Here in New York they start throwing down salt early, and that could totally destroy our wood floors even though they are finished. Think about it; you carry in sand and little rocks all year long on the bottom of you feet, it make tiny scratches and marks, then winter comes and you bring in the salt and it goes into those cracks and make marks which are super hard to repair, and marks up carpet beyond repair. Simply place a basket, bin, or boot mat by the door you enter and exit from the most to remove your shoes everyday (not just snow days!) - and you will keep your floors in tip top shape. 


#5 Swap out your curtains:

You may have noticed we are focusing a lot on keeping the cold air out, and the warm air in. There are lots of little tips we read (like taking your electronics off their shelves and bringing them to open space, and popping heaters in every room - but who wants to destroy their decor to keep warm?), but all in all the simplest solution is the best in this case. Invest in winter curtains and swap them out when you are thinking it's time to turn on the heat. During the daylight keep them open and let the sun in, at night close them up for an extra layer of protection. Try to pick curtains that are thick, two ply, and create at least a small puddle on the floor. 


These are some quick tips we practice to help keep our heating bills under control. We hope to never have another four-figure bill, and wish the same for you as well!

Lets get legal: We were one of the 10 bloggers True Value has chosen to work on The Blog Squad , and we are way excited to take on the challenge of showing you exciting DIY projects.  They have compensated us for our time and writing, and provided materials for the projects we have worked on. However, our opinions are entirely our own and we have not been paid to publish positive comments. Did we mention we are excited to show you our DIY Blog Squad Projects?