Related Posts Plugin for WordPress, Blogger...

                   Follow Me on Pinterest


photo cards


OpenSky

Freckled Nest - Design by Kelly Ann

Home & Garden Blogs
BLOG DIRECTORY
Online Marketing
Home Improvement Blogs - BlogCatalog Blog Directory

Entries in bedroom (16)

Wednesday
Nov172010

Fireplace Facelift: A (semi) Quicky blog Squad Project

Good morning, friends! We have a few fireplaces in our home. Well, more like four. Ok, wait, three. See, the one is the basement is for "show". Kinda weird, right? A faux basement fireplace....wonder what they were thinking when that happened. So the three real fireplace are in the living room, master bedroom, and my office. We were very excited about all the fire places when we moved in. We actively use the one in the master suite, and the one in the living room. We have plans for the living room one, kinda massive plans, but the rest will pretty much stay "as is"...almost. We liked the brick texture in the master bedroom, however the "red brick-ness" didn't quite fit into out master plans. So we decided to give her a 'lil face lift. First we thought painting it white would be good enough. Fail. After a few days I hated it.  Take a look.

So we figured out how to "rectify" the situation, and wound up with something we seriously love and absolutely fits in with what we are trying to do. Painting a brick fireplace is kind of scary. We aren't going to lie. It's a little permanent to be honest. But we are going to show you what to do, how to do it, and what it costs.

We started with the following:
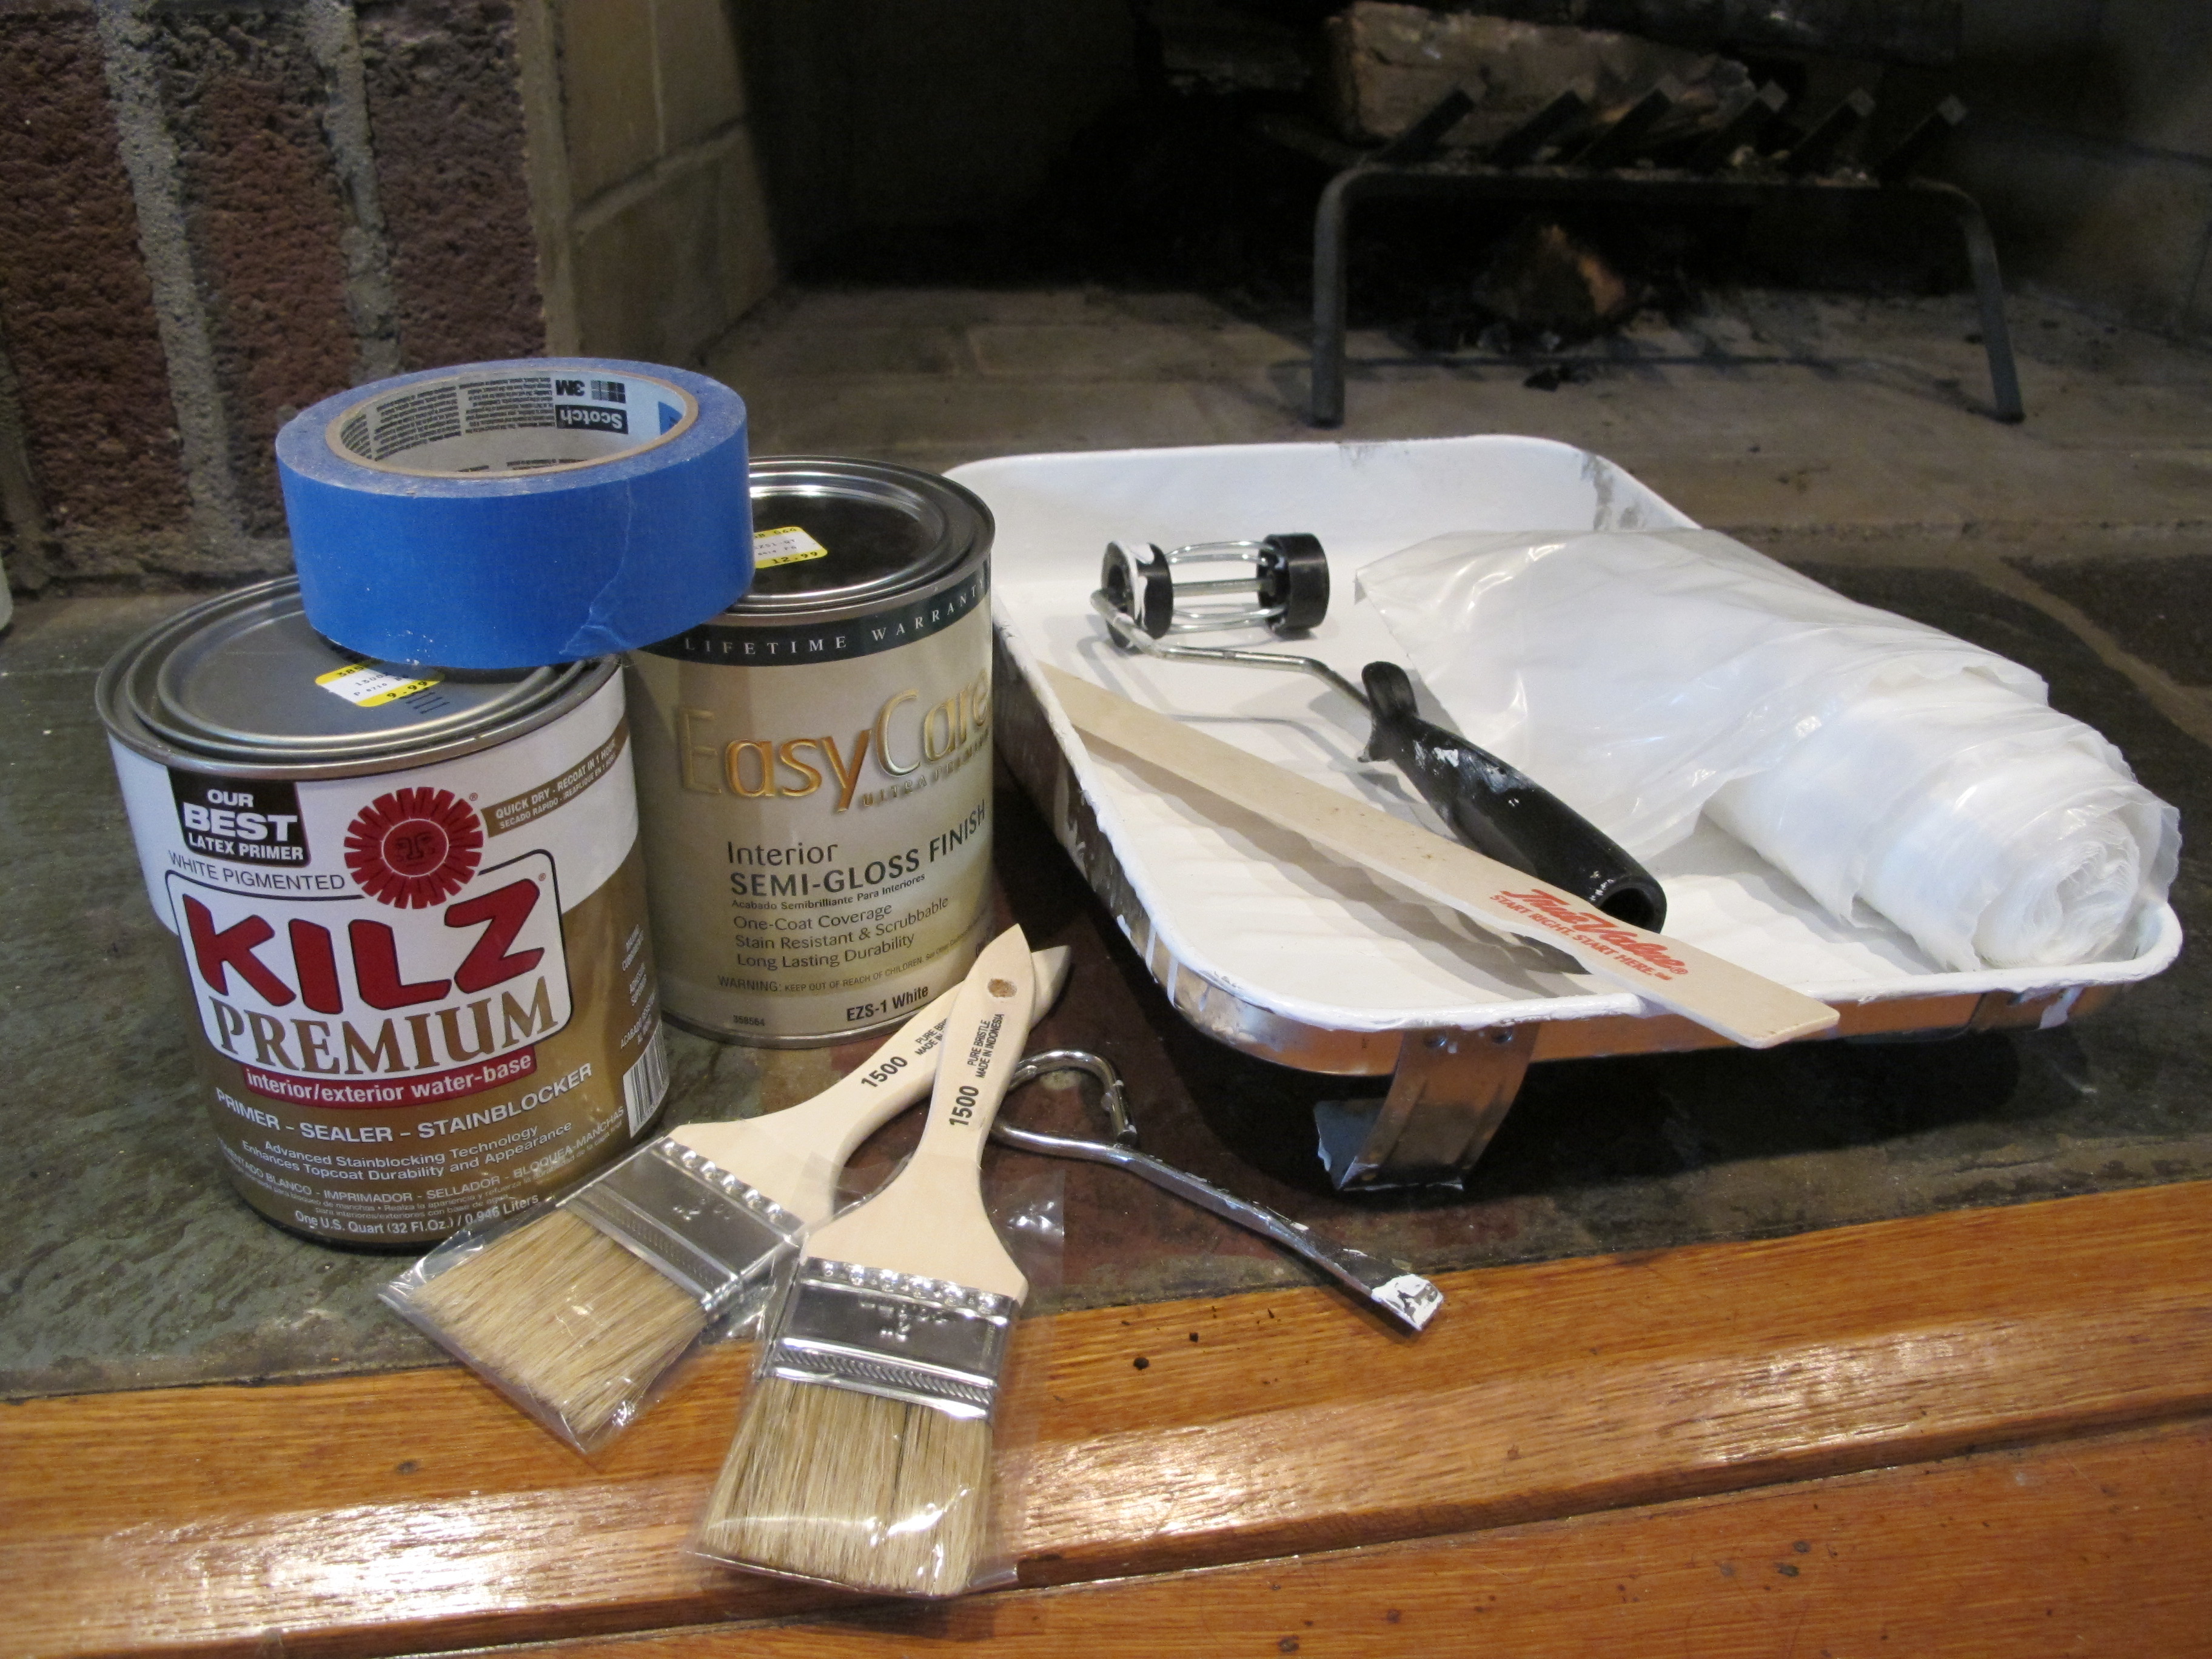
1-2 paintbrushes - $2

Kilz sealer - $6

Easy Care semi Gloss in white- $8

Plastic tarp - $3

Paint pan - $2

Mini Roller - $3

Total for round: $24

We got all of our items at True Value, as well as advice on which brands would work best for this project. The fine people at True Value warned us that if we were going to paint brick, it was going to stick. They also advised us that the brands above were safe to paint the outside of a fireplace.

As you can see above, step 1 is pretty simple. Brush off any debris, and clean the area before priming. Paint the fireplace and let it dry for at least 24 hours. We believe in taping stuff off and suggest you do too if you like clean lines and ensuring not to paint the mantel or wall. 
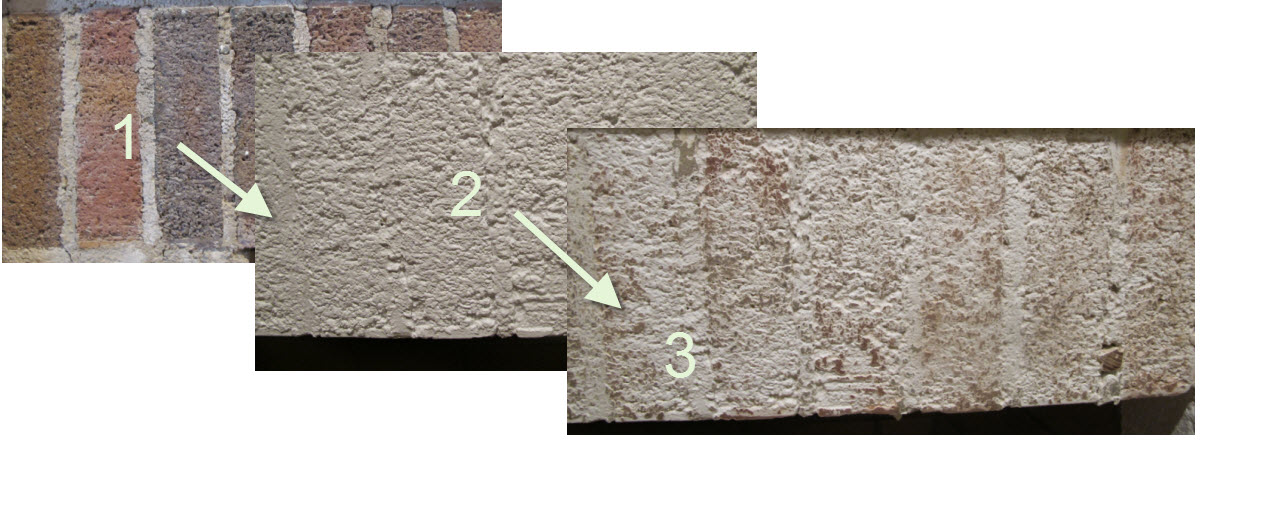
 

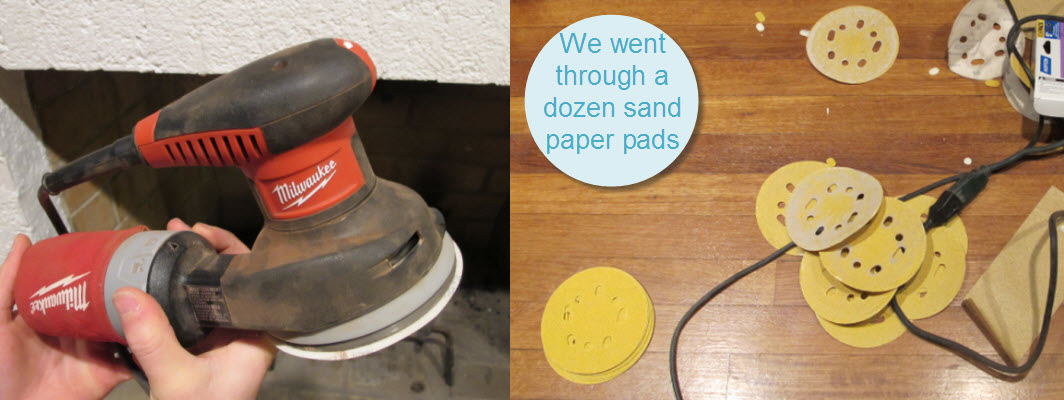
So you can see getting from step one to two is pretty easy. Getting from step two to three takes a little more work, but is so worth it. Joey figured out about half way through that spraying the painted brick with water helped the process of sanding. We tried a blow dryer before that, and it didn't help much. We used a Milwaukee hand sander, and a dozen rough 60 grain pads to "rough her up" once it was completely dry. 
It took about a solid hour to buff through the perfectly painted white paint, and transform it into more of an aged and weathered look. But here is our shiny new fireplace we love!
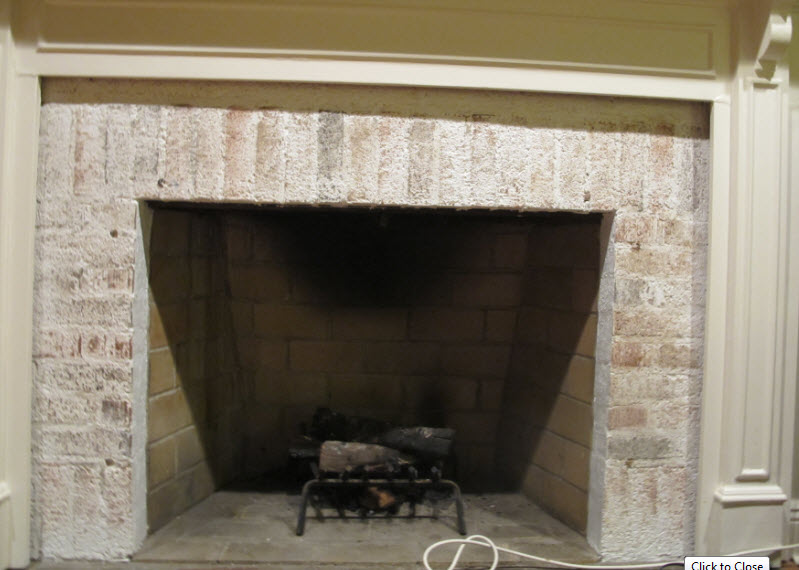
We have some styling to do around the fireplace, but now we are totally happy with the results of it's new look. We encourage you to not be scared and go for it. It was really simple. The hardest part is making the decision! Once you do, stop by your True Value and ask a friendly face to walk you through the process and you'll have a cheap and quick way to update your fireplace too.

Lets get legal: We were one of the 10 bloggers True Value has chosen to work on The Blog Squad , and we are way excited to take on the challenge of showing you exciting DIY projects.  They have compensated us for our time and writing, and provided materials for the projects we have worked on. However, our opinions are entirely our own and we have not been paid to publish positive comments. Did we mention we are excited to show you our DIY Blog Squad Projects?


Tuesday
Oct052010

A shopping we will go

One of the best unexpected things ever is when we come across a piece of furniture we have to have, and can afford. Such is the case this past weekend. While running around to Moon River Chattel in Brooklyn, then off to Build it Green in Queens, we stopped at ABC in the Bronx and fell in love. Two huge club chairs called our name with their tufted bottoms and oversized stature. They were big, mean, and soft at the same time. They demanded "sit on me and be cozy". They were made for our living room. They were also $3,500 a pop plus $1,500 for the ottoman. That's $8,500 for a non-expected purchase. That's a down payment on a car. Clearly we did not spend $8,500. The wonderful thing about the ABC Home in the Bronx is that it's the warehouse, strategicly loaded with goods the massive city store can no longer house due to overstock, no longer carrying that specific brand, custom orders never picked up, etc. We got these puppies at $900 each and $350 for the ottoman ($1,250!). Yes, you read that right. Now you ask, what do these "puppies" look like. Sadly I couldn't find a photo, but if you use your imagination and look below...

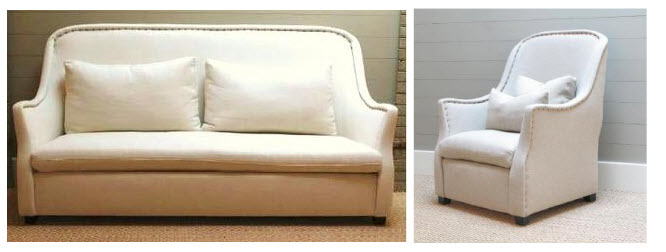
...you can get a good idea. They are the grey to the left, same size and shape, but they have the arms to the right. They are from an amazing organic furniture company, Verellen. I was so in love with these pieces, I had to learn more about these guys and what other beauties they produce. Boy did I i have to use drool control today. Take a peek.

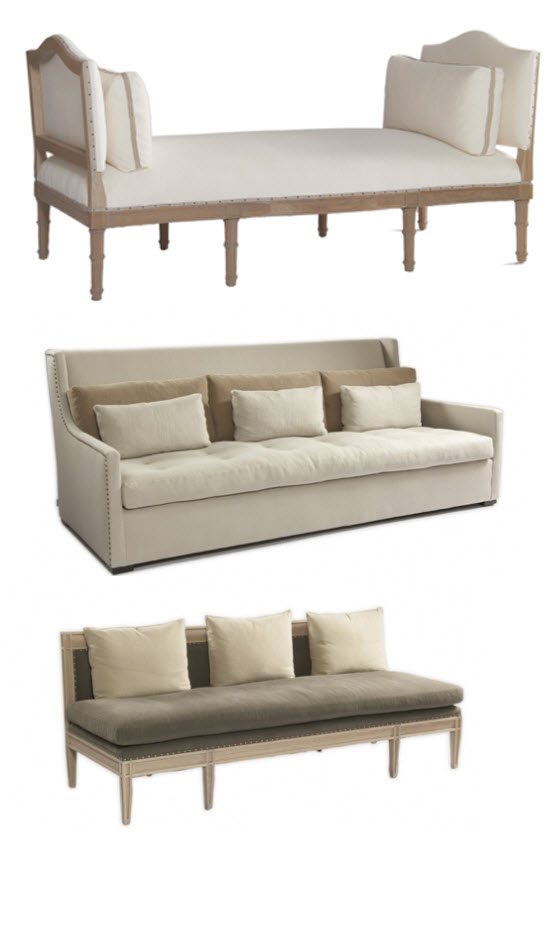
Pretty diverse, right? They really know how to work both modern and classic pieces. The craftsmanship is pretty amazing as well as the style. My wheels are turning, and perhaps furnishing the downstairs may not be as big of a challenge as I first thought. It's always exciting to find a "new" brand both Joey and I agree on 100%.

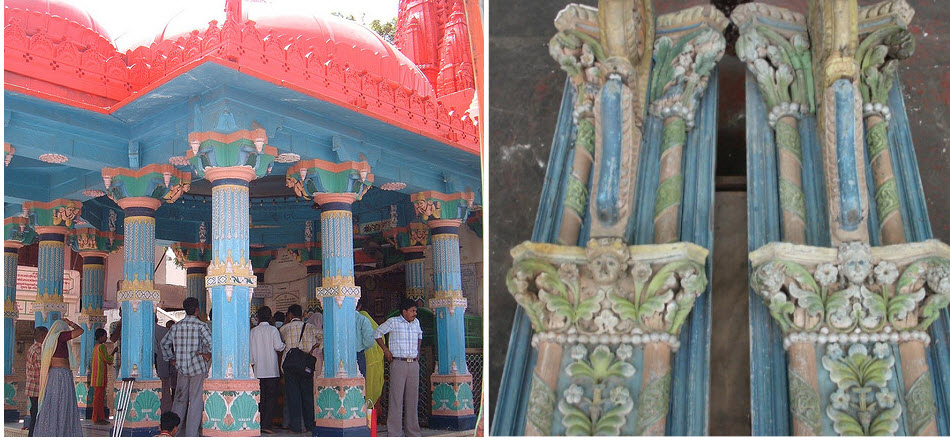
In addition to our super find in the seating arena, we also bought a not-so-practical item, which made me physically squeal when I noticed it across the room. Imagine, if you will, 1840 solid wood pillars imported from India. Cream and blue paint pealing off it's ornate details. Now imagine this in a bedroom, framing a massive king sized bed with lux curtains draped behind it. That my friends, is the project we have ahead us us (yes, another one!). We bought this incredible piece and of course there are no photos for me to find online which are exactly like it, but I posted some below to give you an idea.


We also got some awesome reclaimed wood at Build it Green in Queens, which Joey will work his magic on and turn into an amazingly and huge table for the foyer. I think our theme in the house is "super size" it. Less furniture, just really big. Have any of you tried this method while decorating your home? If you have, we would love to know. Please tell us about what you got and how you used it to fill dead space!

Wednesday
Aug252010

Three Simple Design Solutions

We hope your week has been treating you well lovely readers! Here are some simple design solutions we found, and were so inspired by. Take a peek and let us know if you have tried any of these ideas out. We would love to see!

Stair Runners: Add pop, texture, and function! Look at these amazing ideas found on Apartment Therapy.

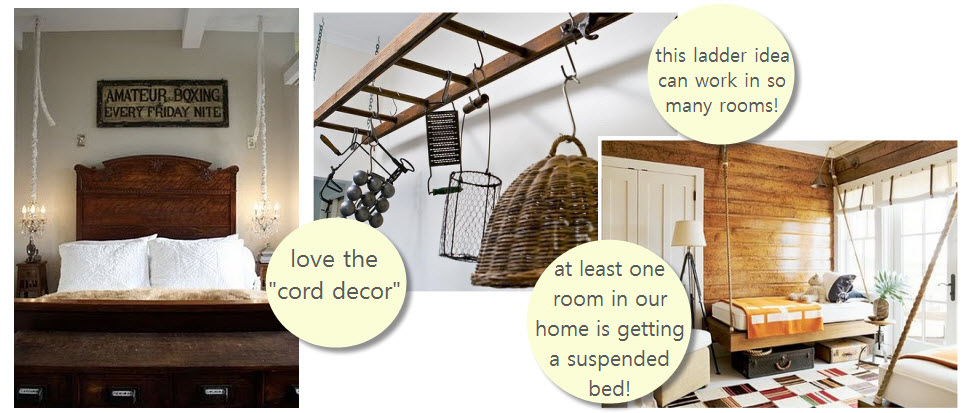
We love guests! We like to have slumber parties, weekend visitors and will take any design "excuse" to add more people to the party. We especially love the idea of letting them cozy up in a bed, which - why not, hangs from the ceiling! Hanging both large and small items from the ceiling adds depth and interest, just like our souls. I kid, I kid. :)

Photo one and three found on white and wander. Photo three on apartment therapy.

Perfectly curated chaos of your beloved items is a fun way to show off who you are. I love using mantels, windows, and large tables, as well as the obvious. The best part of sprucing up your flat surfaces with your collections - you can change them on a whim! Even simple things like spoons (above), or starfish, rocks or antique light bulbs look more deliberate when you display them in a collection.

We have been discovering new solutions ever day! We would love to know what tips and tricks you have for approaching a room before you design it. Do tell!